
Many Japanese home meals are centered on eggs. We love our ramen eggs (eggs marinated in soy sauce mixture), tamagoyaki (omelette grilled in a special pan), onsen tamago (poached eggs in hot spring temperature), egg tofu, and more.
Here’s another amazing thing to do with eggs: use as a brilliant garnish to bring life and vibrancy to a dish. Like these golden ribbons of egg crepe called Kinshi Tamago (錦糸卵)!
In this post, you will learn two Japanese preparations of eggs – Kinshi Tamago (錦糸卵) and Usuyaki Tamago (薄焼き卵).
What is Kinshi Tamago
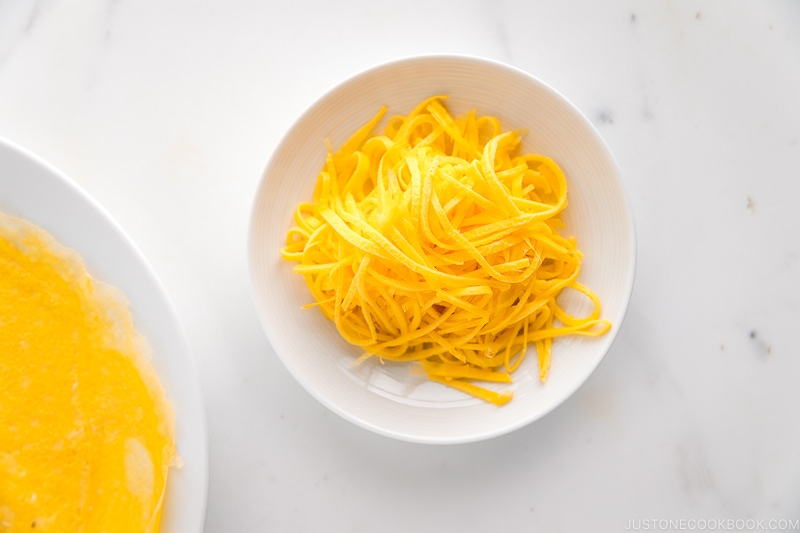
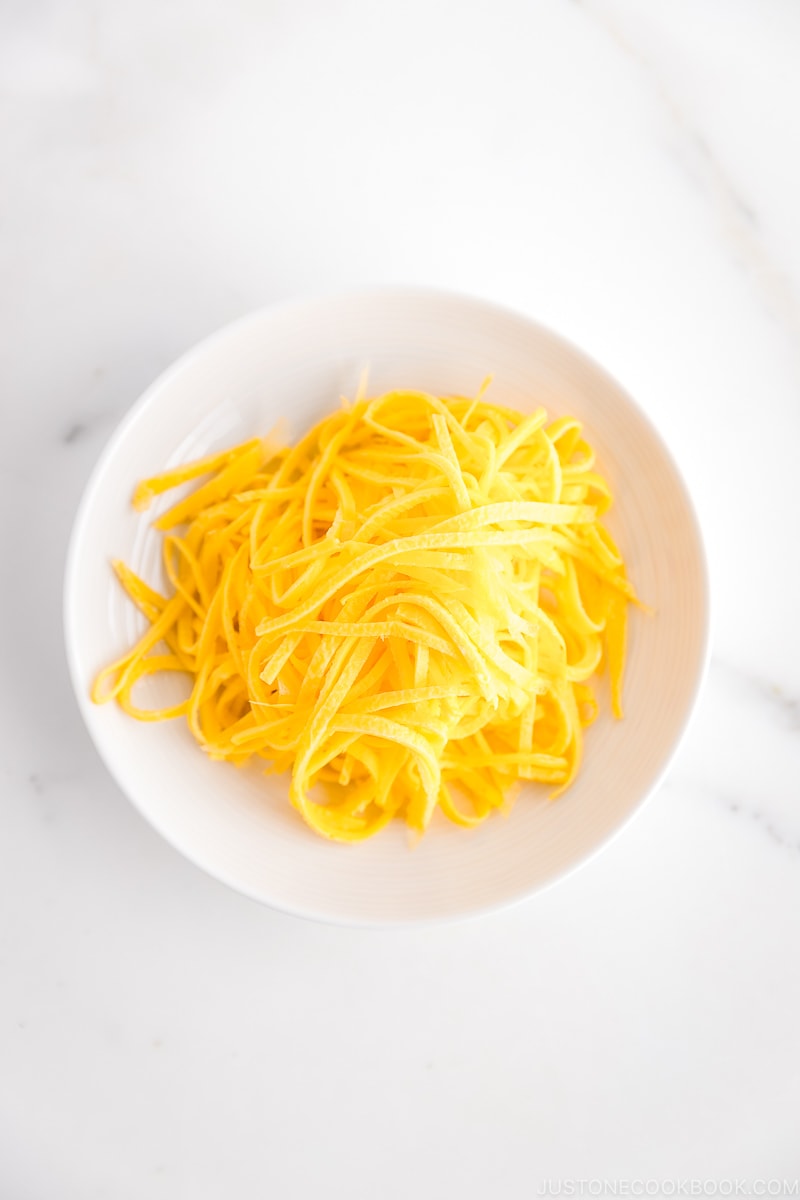
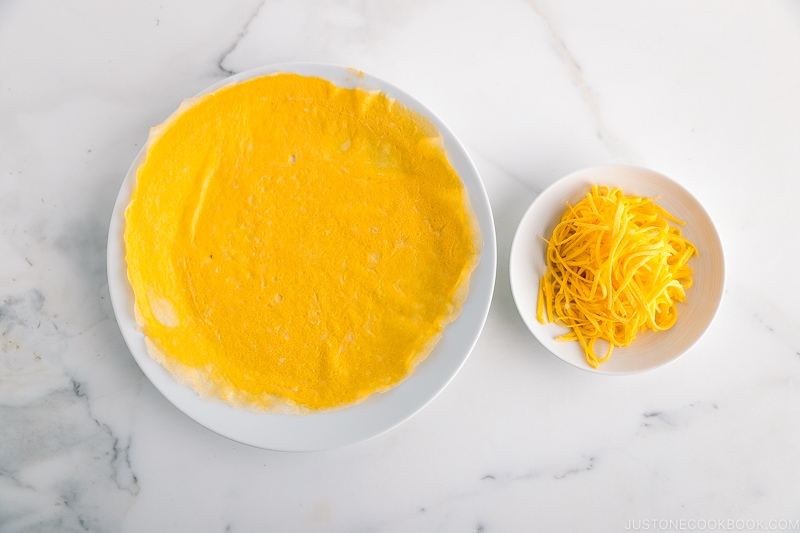
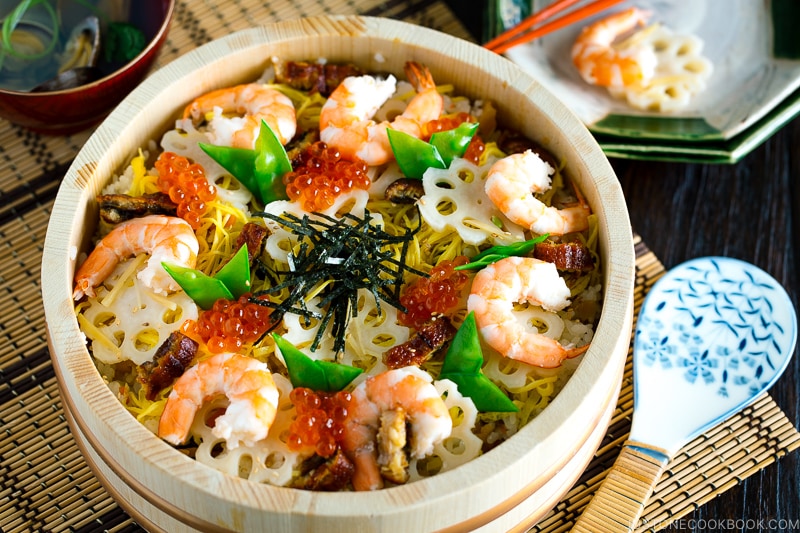
Eggs are called Tamago in Japanese, and Kinshi Tamago (錦糸卵) refers to shredded egg crepe garnish that you may have seen in dishes such as Chirashi Sushi and Hiyashi Chuka.
When added to a dish or a bento box, the bright yellow of these egg ribbons pops and catches your attention. It adds a layer of color and texture, and as a result enhancing the overall presentation of your meal. It’s slightly sweet so children often love Kinshi Tamgo in their rice or noodle dishes. Moms (and dads) love it because the eggs add extra protein.
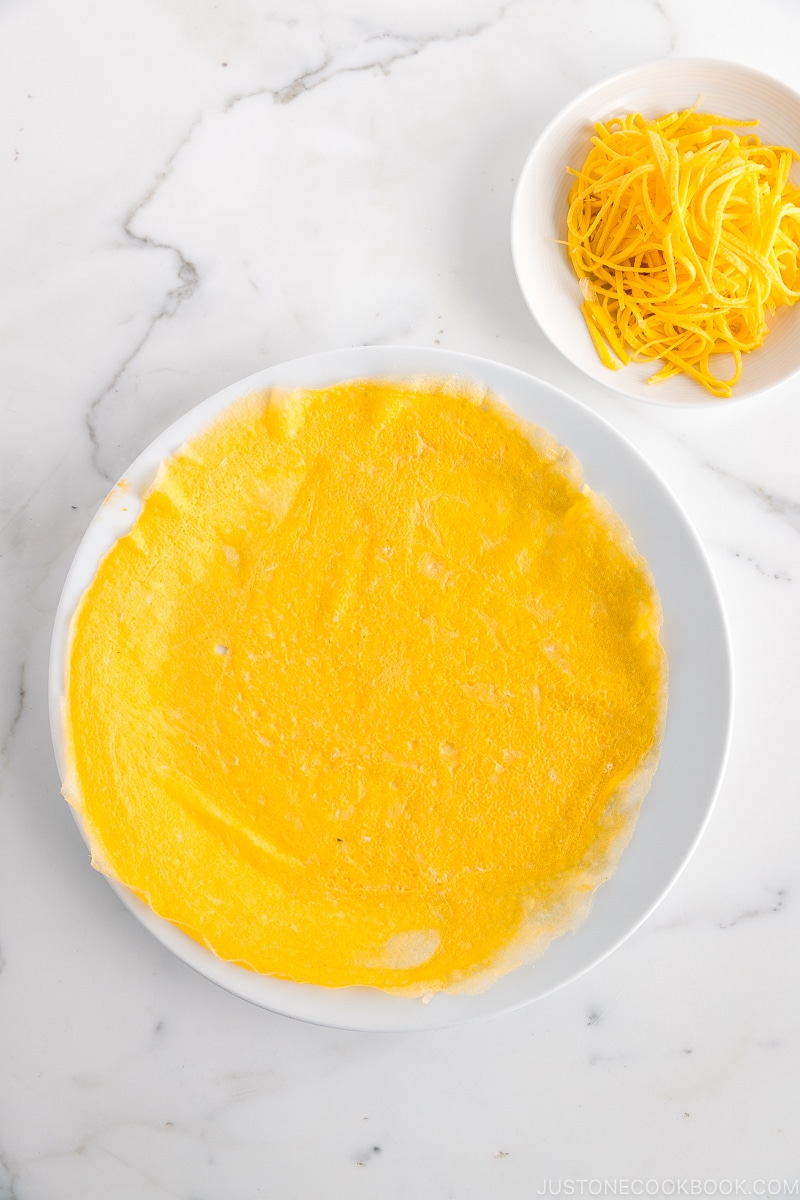
To make Kinshi Tamago, you will first need to make Usuyaki Tamago.
What is Usuyaki Tamago
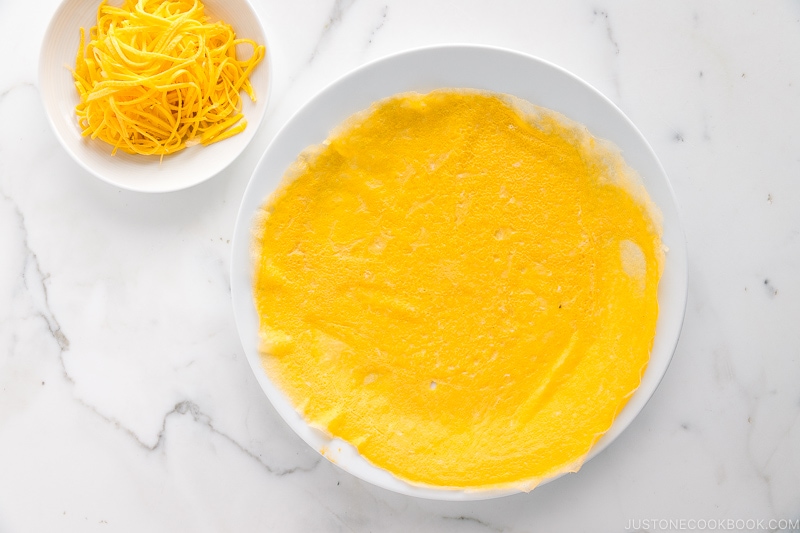
Usuyaki Tamago (薄焼き卵) is basically a paper-thin omelette or egg crepe before it’s shredded into thin strips of Kinshi Tamago.
We also use Usuyaki Tamago to wrap sushi rice for Temari Sushi.

Ingredients for Kinshi Tamgo
- Eggs
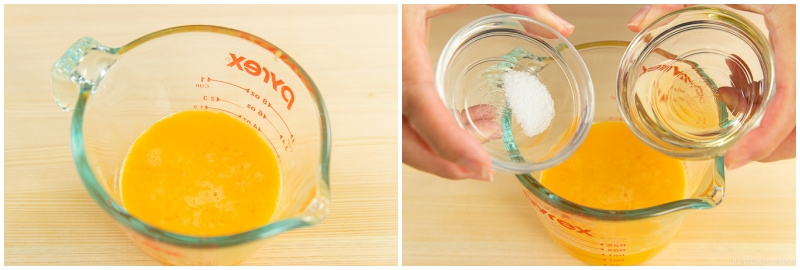
- Mirin
- Salt
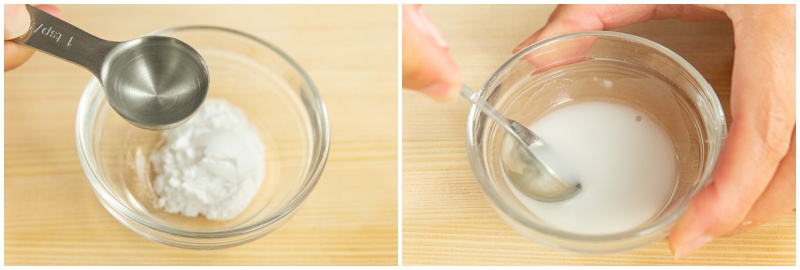
- Potato starch (cornstarch) + water
Kinshi Tamago has a gentle sweetness to it. You can either use mirin or sugar to sweeten the egg. I used mirin for its mild sweetness and the liquid yields a slightly thinner texture.
How to Make Kinshi Tamago
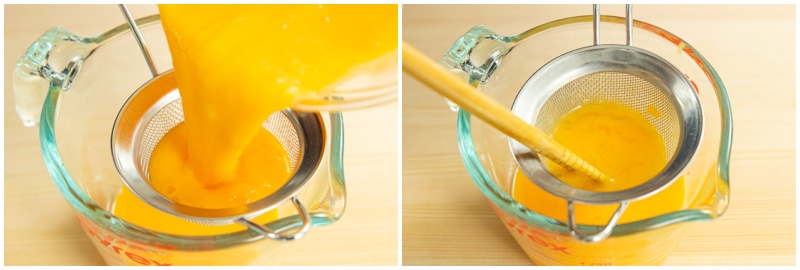
- Beat the eggs and strain the mixture through a fine-mesh sieve.
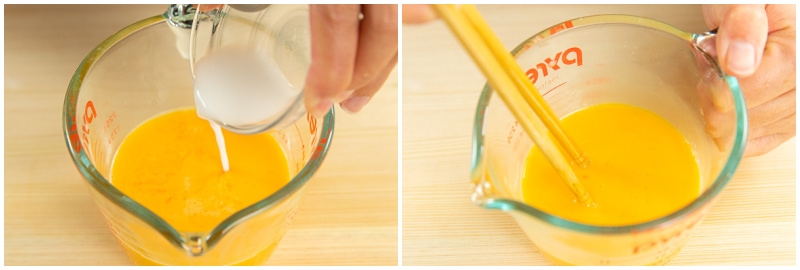
- Add the sesaoning and the slurry mixture.
- Make egg crepes (See the instructions below for tips).
- Let cool then cut into thin julienned strips.
- Ready to garnish your dish!
Tips to Make Kinshi Tamago
- With chopsticks, beat the eggs vigorously until the egg whites are broken up.
- Strain the egg mixture through a fine-mesh sieve to get a smooth texture.
- Add potato starch (or cornstarch) to the egg mixture to prevent the egg crepe from breaking easily. Instead of adding it directly to the egg mixture, make a slurry mixture with water first. The liquid form of potato starch is much easier to combine with the egg mixture. Potato starch gives enough elasticity to make a thin crepe.
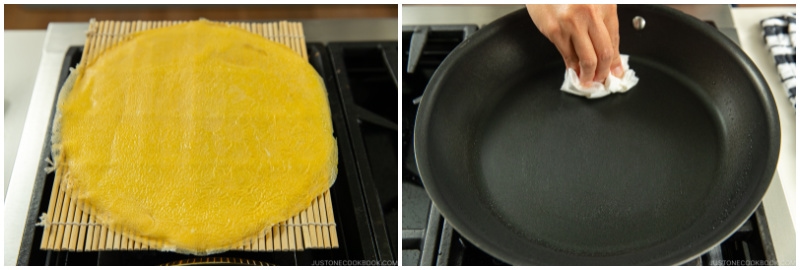
- Cool the frying pan with a wet towel before adding the egg mixture. When you heat a frying pan, it gets hot spots which brown the egg. To make a nice bright yellow egg crepe, you want to avoid hot spots. The wet towel will bring the hot pan to even temperature. Wash the towel between batches to keep it cool.
- Swirl the pan to spread the egg mixture quickly and cover the pan with a lid. The lid will keep enough heat to cook the surface of the thin egg mixture.
- The shredded egg crepe can be kept frozen for 4 weeks, so you can make ahead, portion it out into small batches, and defrost to use it anytime you need to bring some colors to the otherwise dull-looking or brownish dishes!
Recipes To Use Kinshi Tamago

Practice Makes Perfect
It’s not hard to make the perfect Usuyaki Tamago but if it’s your first time trying, you probably need to practice a few times. The thinness of the crepe is key and you will get the hang of it once you learn the ideal ratio of egg mixture for your frying pan. Have fun making these gorgeous egg crepe and ribbons!

Kinshi Tamago (Shredded Egg Crepe/Omelette)
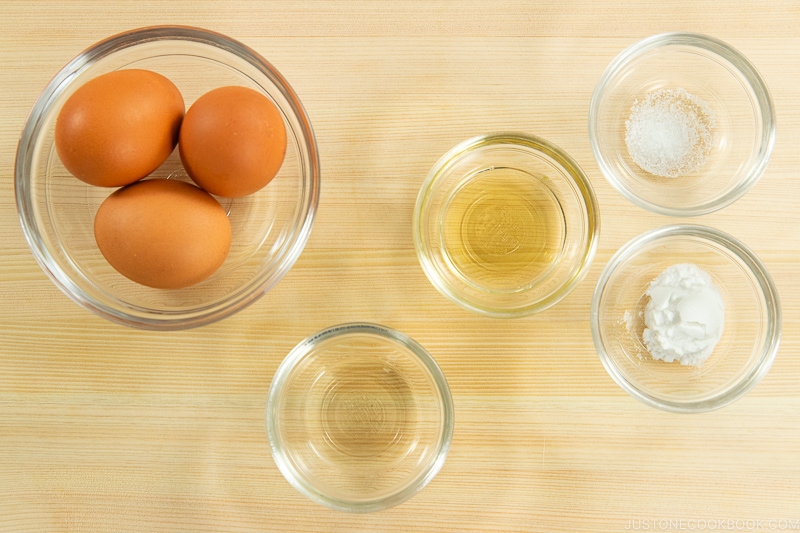
Ingredients
- 3 large eggs (50 g w/o shell)
- 1 Tbsp mirin (or substitute 1 Tbsp water + 1 tsp sugar)
- ¼ tsp Diamond Crystal kosher salt
- 1 tsp potato starch or cornstarch (to prevent the eggs from breaking easily)
- 1 tsp water (for the potato starch)
- 2 tsp neutral oil (for cooking the egg crepe)
Instructions
- Gather all the ingredients.
To Make the Egg Mixture
- In a bowl, crack 3 large eggs (50 g w/o shell) and beat them with chopsticks or a fork.
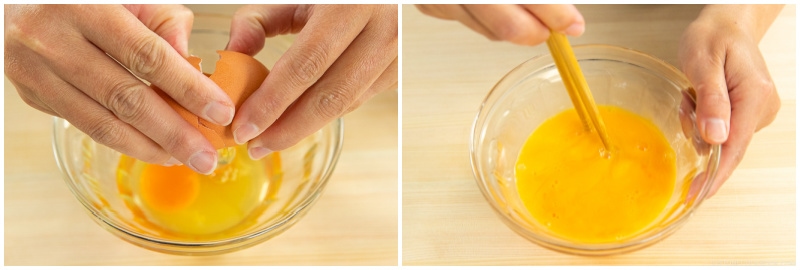
- Strain the egg mixture through a sieve at least once to get a silky smooth texture.
- Add 1 Tbsp mirin and ¼ tsp Diamond Crystal kosher salt to the egg mixture and mix well together.
- Mix 1 tsp potato starch or cornstarch and 1 tsp water together until there are no lumps.
- Add the potato starch mixture into the egg mixture and mix together.
To Cook the Egg Crepe (Usuyaki Tamago)
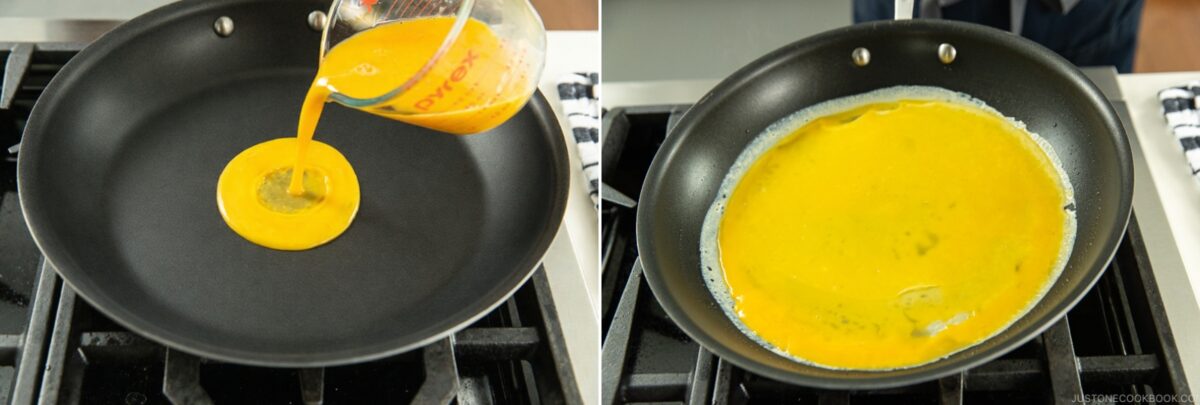
- Heat a nonstick pan on medium heat. When it's hot, lightly grease it using a paper towel or silicone brush dip in 2 tsp neutral oil. Apply a thin, even layer, then wipe off any excess oil.Nami's Tip: Keep a damp towel on the countertop. If the pan gets too hot, briefly remove it from the heat or place it on the damp towel for a few seconds. This cools the pan quickly and helps prevent the egg from browning.

- Reduce the heat to medium-low. Pour in just enough egg mixture to thinly coat the surface of the pan, then quickly swirl to spread it into a thin, even layer.Nami's Tip: You’ll get a feel for the right amount of egg mixture after making a few crepes. Practice makes perfect thickness!
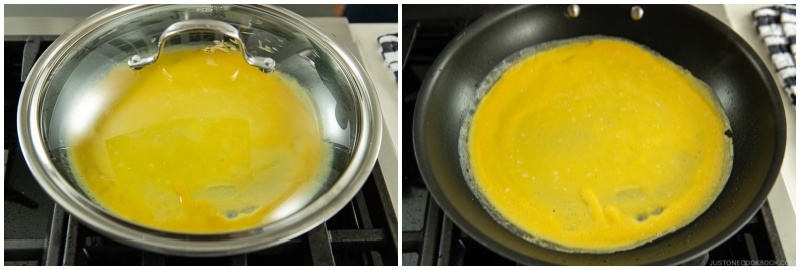
- Cook, covered, for about 1 minute. When the surface is no longer wet, it's done. The egg crepe should be paper thin, so it cooks very quickly.Nami's Tip: If the pan gets too hot, briefly place it on a damp towel to cool it down and prevent the egg from browning.
- The edges will dry first, so use a chopstick or spatula to gently lift the egg. It should release easily. If the center is still undercooked, cover and cook a little longer.Nami's Tip: If this is your first time and the crepe turns out thick, you can carefully flip it and cook the other side on low heat for a bit longer.
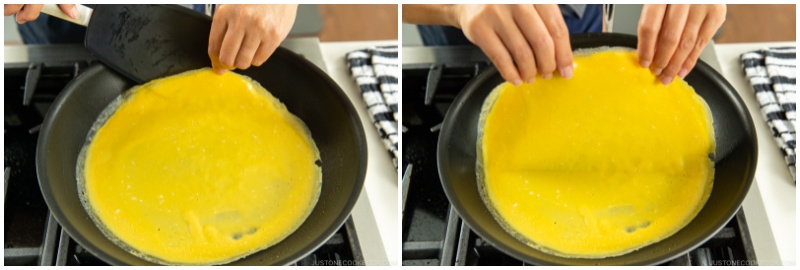
- Transfer the cooked egg crepe to a bamboo sushi mat, wire rack, or paper towel and let it cool completely. Repeat until you’ve used up all the egg mixture.Nami's Tip: Lightly oil the pan before each new batch. If you notice any browned or burnt spots, wipe them off before cooking the next crepe.
To Make the Shredded Egg Crepe (Kinshi Tamago)
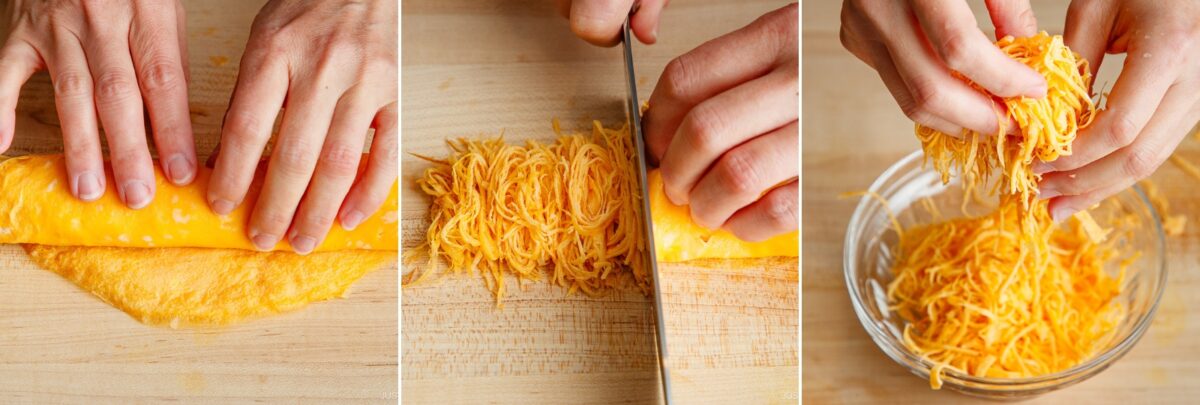
- Once the egg crepes are completely cool, fold or cut them in half and slice into thin julienne strips. Gently fluff the strands with your fingers—they’re ready to use.
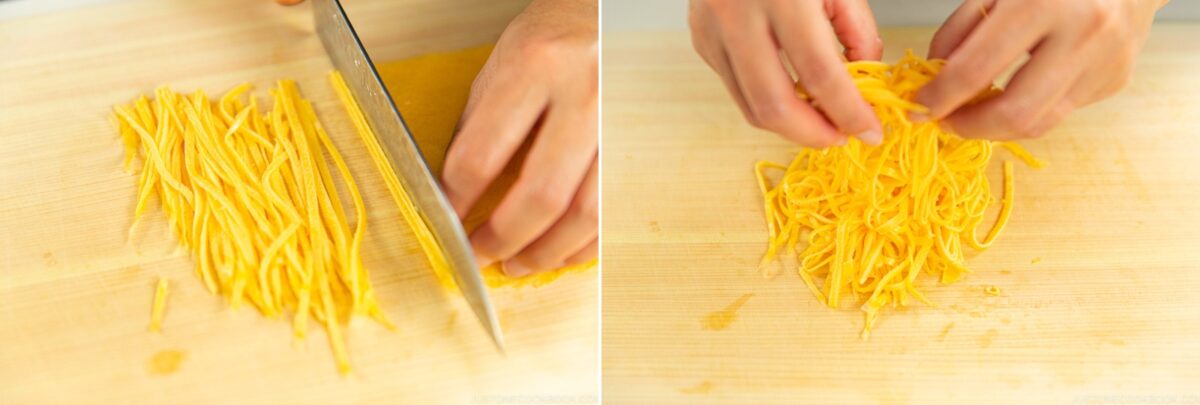
- Alternatively, roll up the crepes, slice them into thin julienne strips, and gently fluff the strands. They’re now ready to use.
To Store
- You can roll them up and freeze for up to 1 month. When ready to use, thaw at room temperature or microwave gently until just defrosted. Slice just before using to make shredded egg crepe.
Nutrition
Did you make this recipe?
Tag @justonecookbook on Instagram so we can see your delicious creation!
Editor’s Note: This post was originally published on March 1, 2012. The images and blog content have been updated in July 2021.