
Recipe Highlights
This is my convenient shortcut version of Chirashi Sushi, made with store-bought chirashi sushi mix. When I want something celebratory but easy, I turn to this Quick & Easy Chirashi Sushi recipe. With just a packet of chirashi sushi mix and freshly cooked rice, you can assemble a beautiful scattered sushi platter in about 20 minutes. I love serving this for Hinamatsuri, potlucks, or family dinners when I want the table to look bright and festive.
- Saves time with store-bought chirashi sushi mix
- Beautiful, colorful presentation
- Perfect for parties or casual gatherings
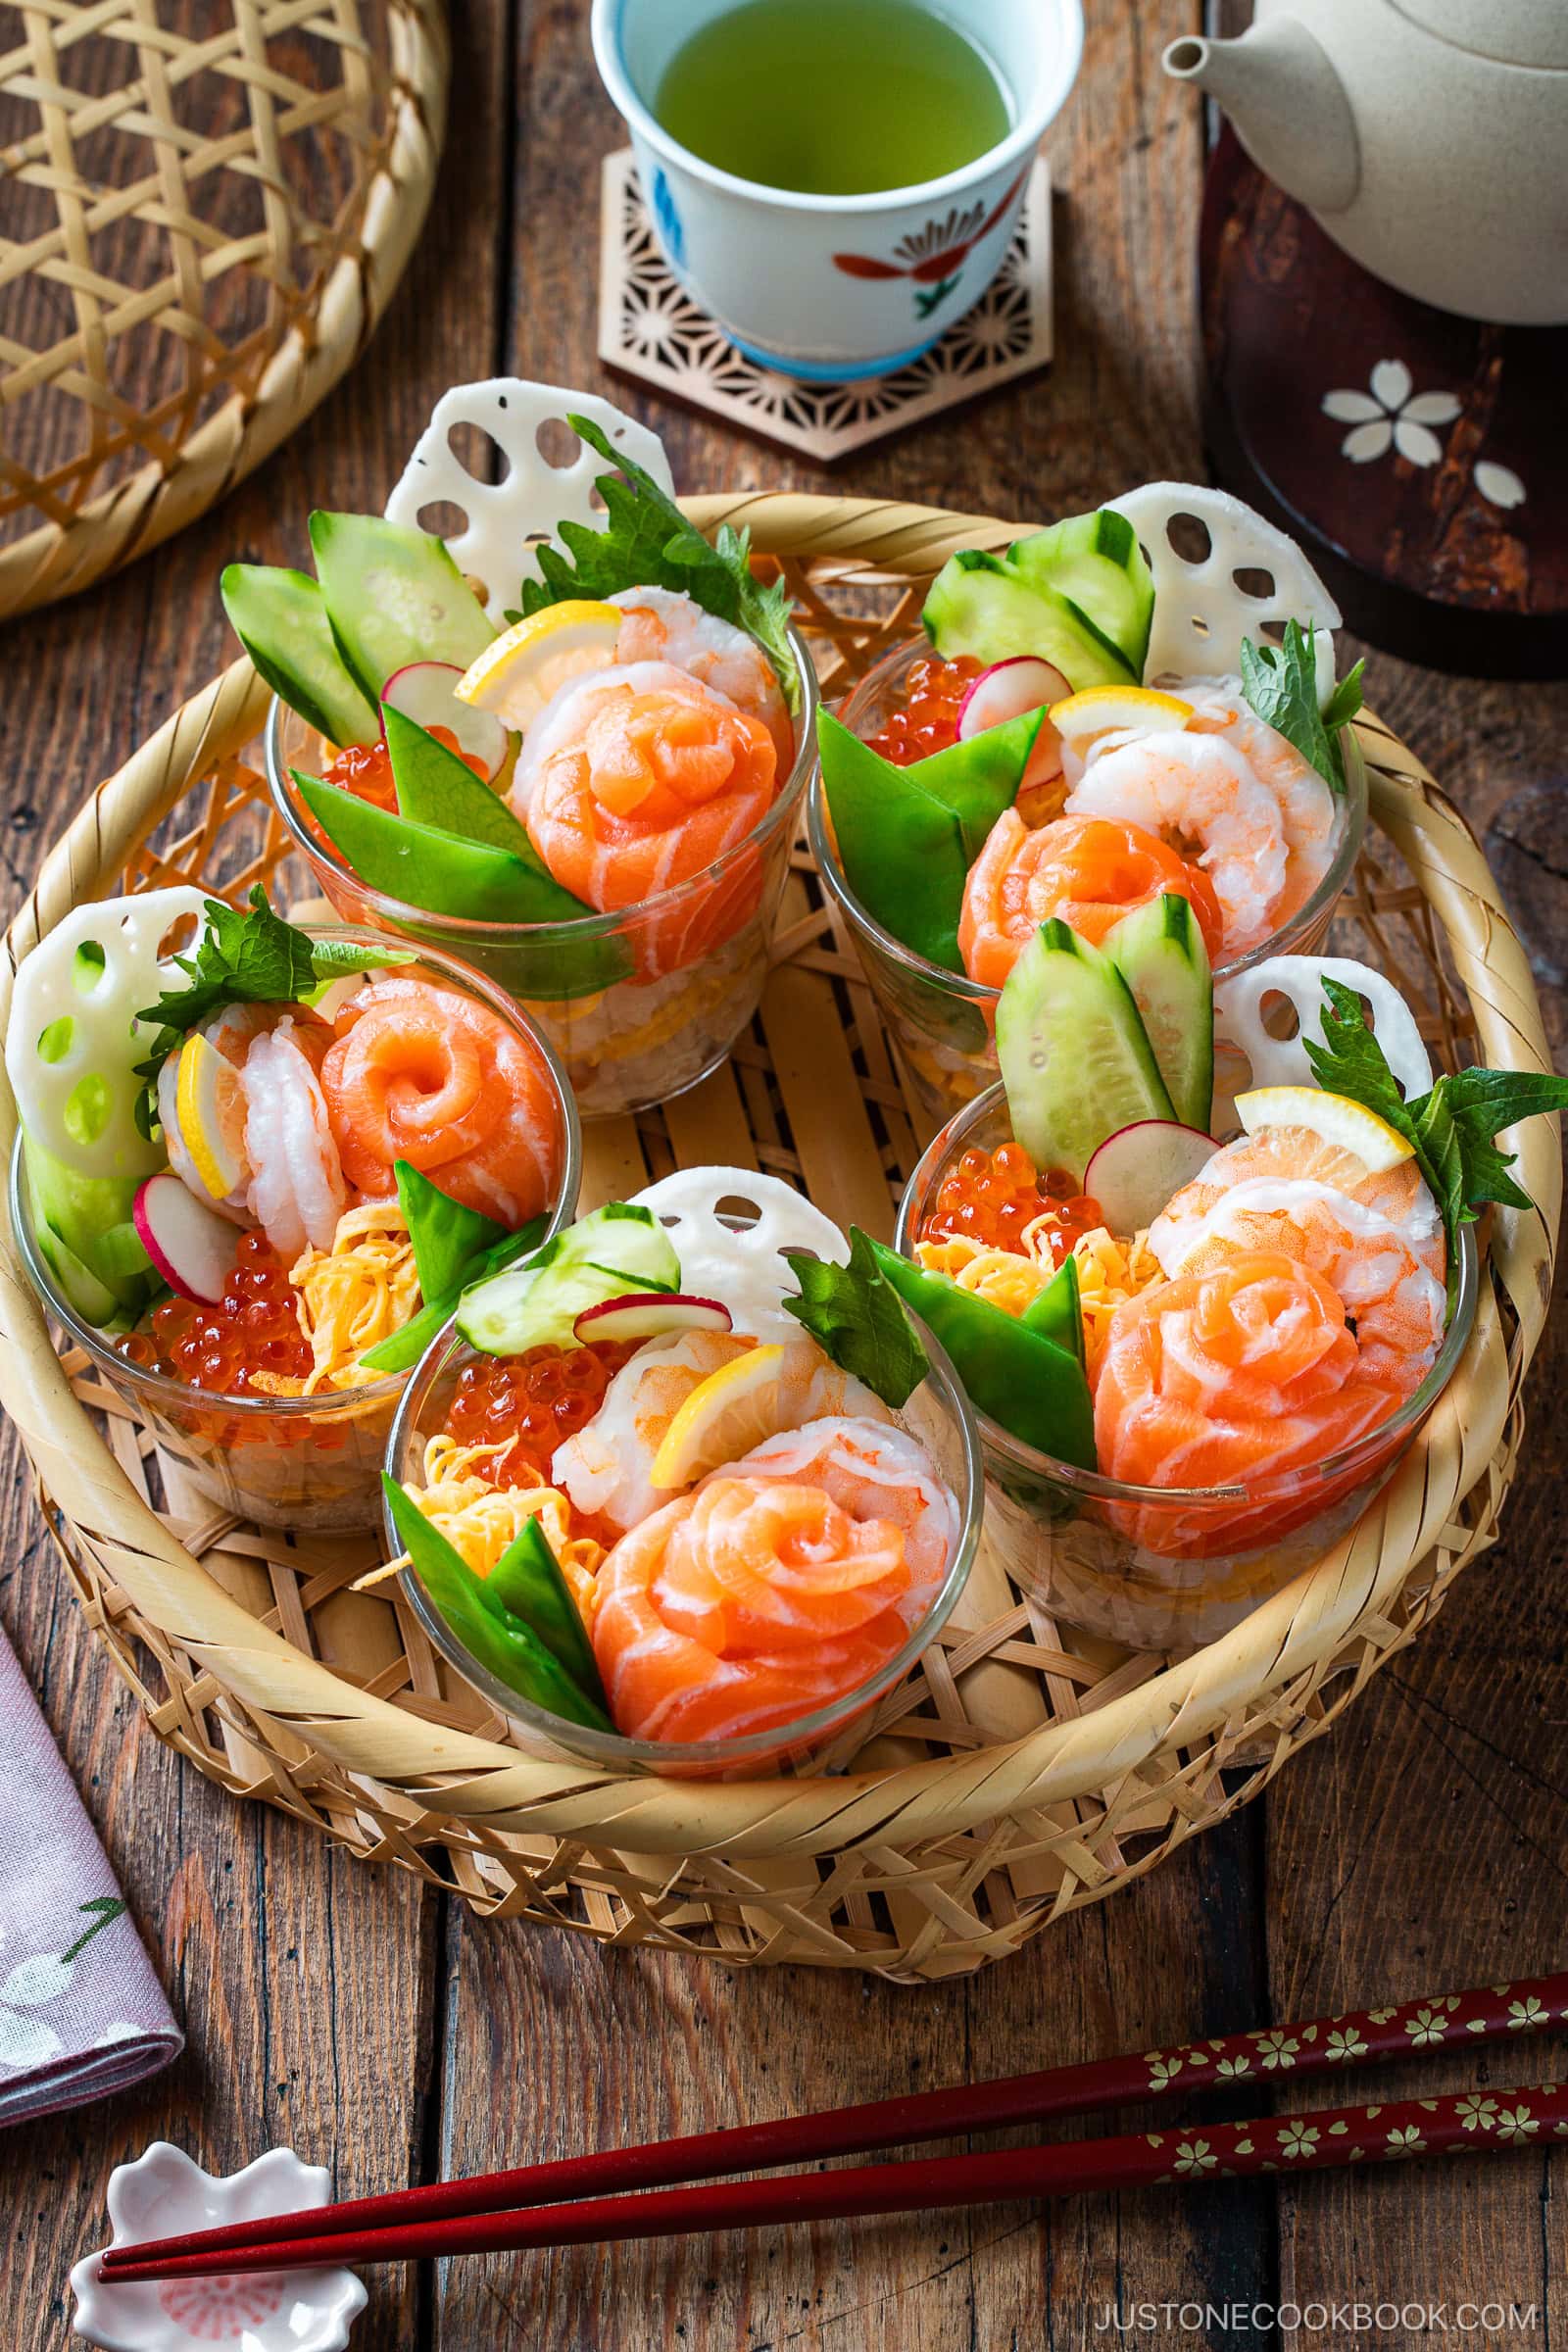
- Easy to serve as individual sushi cups for a fun presentation
If you love Japanese salads, try my Sushi Rolls (maki sushi), Temaki Sushi (hand rolls), and Vegetarian Sushi Rolls recipes next!
What is Chirashi Sushi?
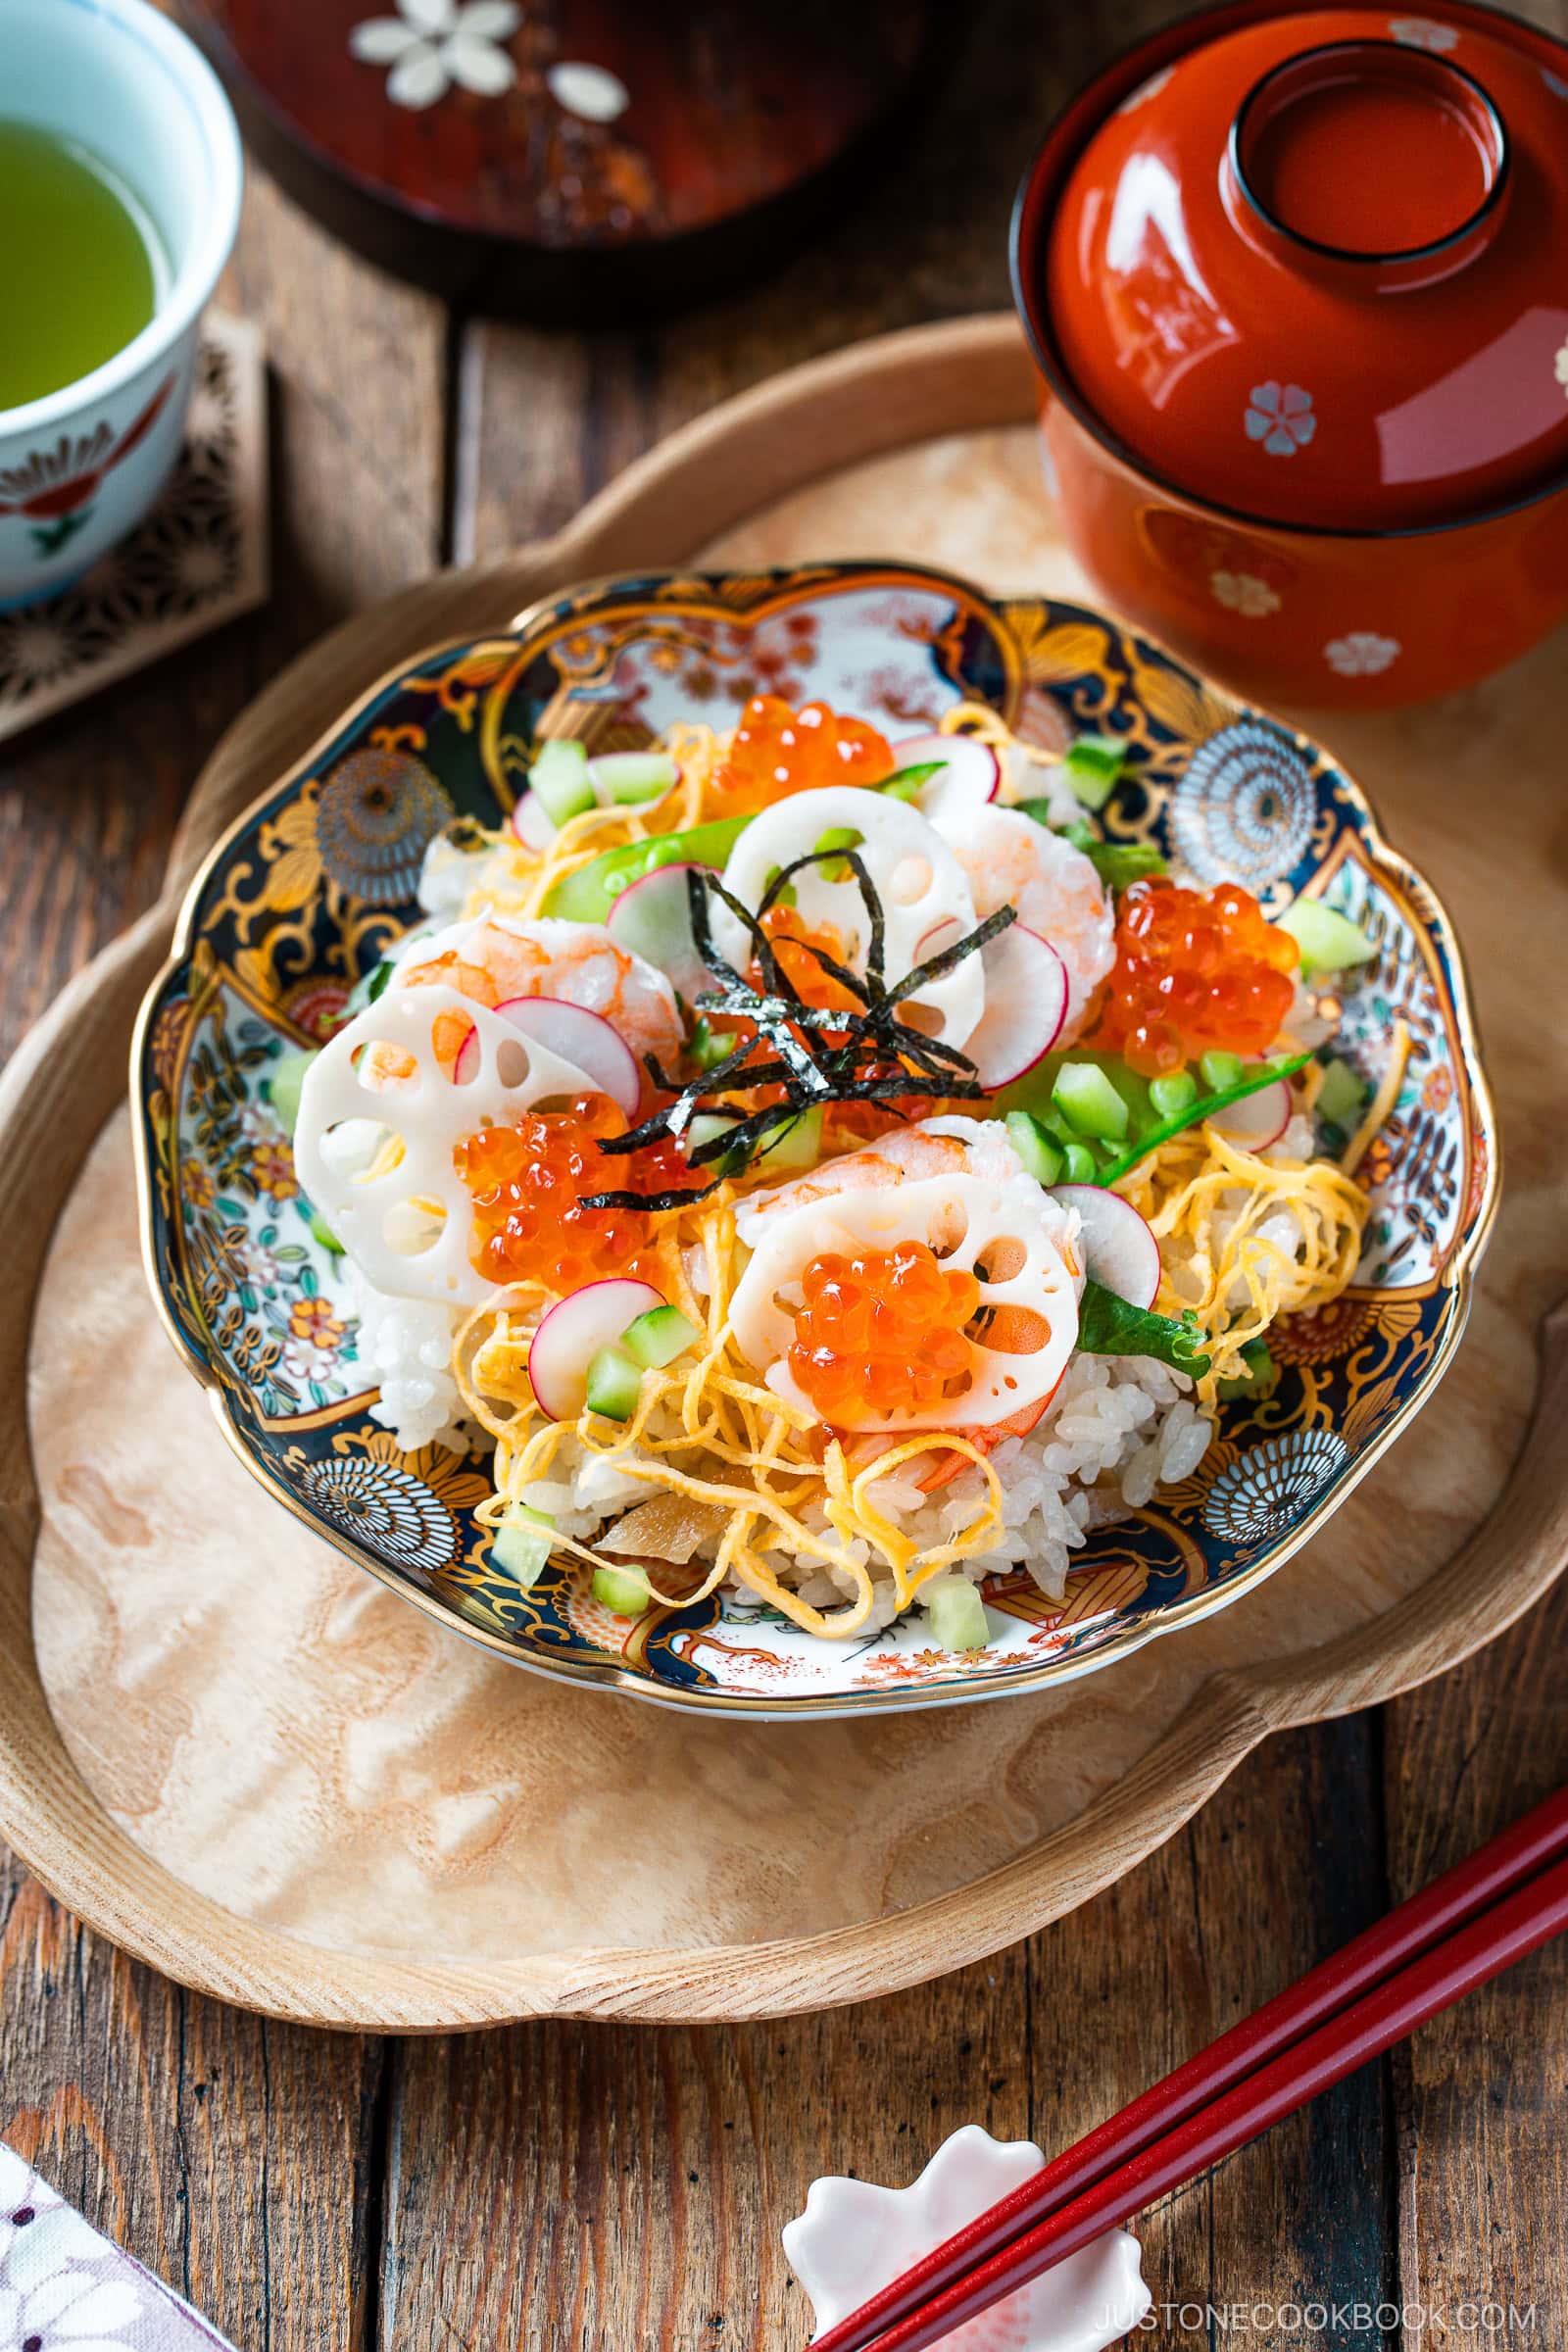
Chirashi sushi (ちらし寿司) means “scattered sushi” and features seasoned sushi rice on a platter and scatter colorful ingredients on top—or sometimes mix them into the rice.
In Japan, we often serve chirashizushi or chirashi zushi for celebrations such as Hinamatsuri (Girls’ Day) on March 3. Unlike a sashimi bowl (kaisen don) with plain steamed rice, chirashi uses vinegared sushi rice for its signature flavor.
I use a store-bought mix in this quick and easy version and make sushi cups for parties and potlucks.
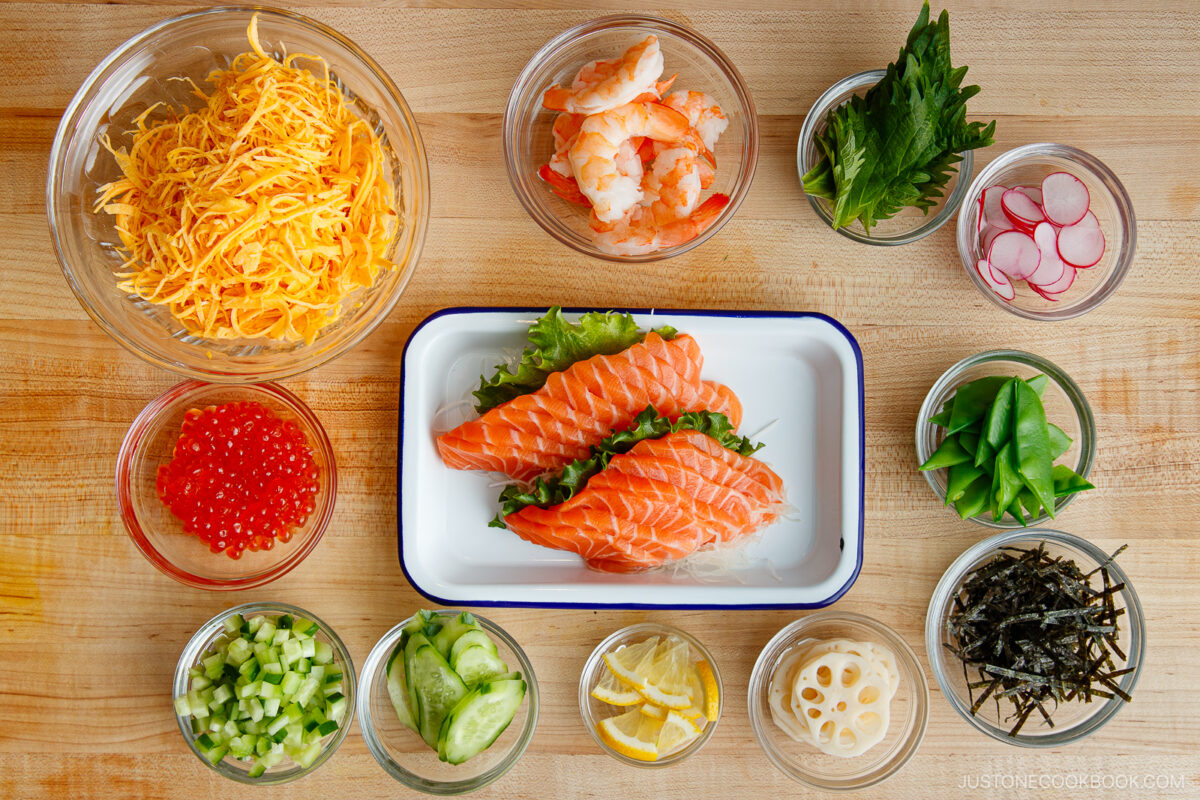
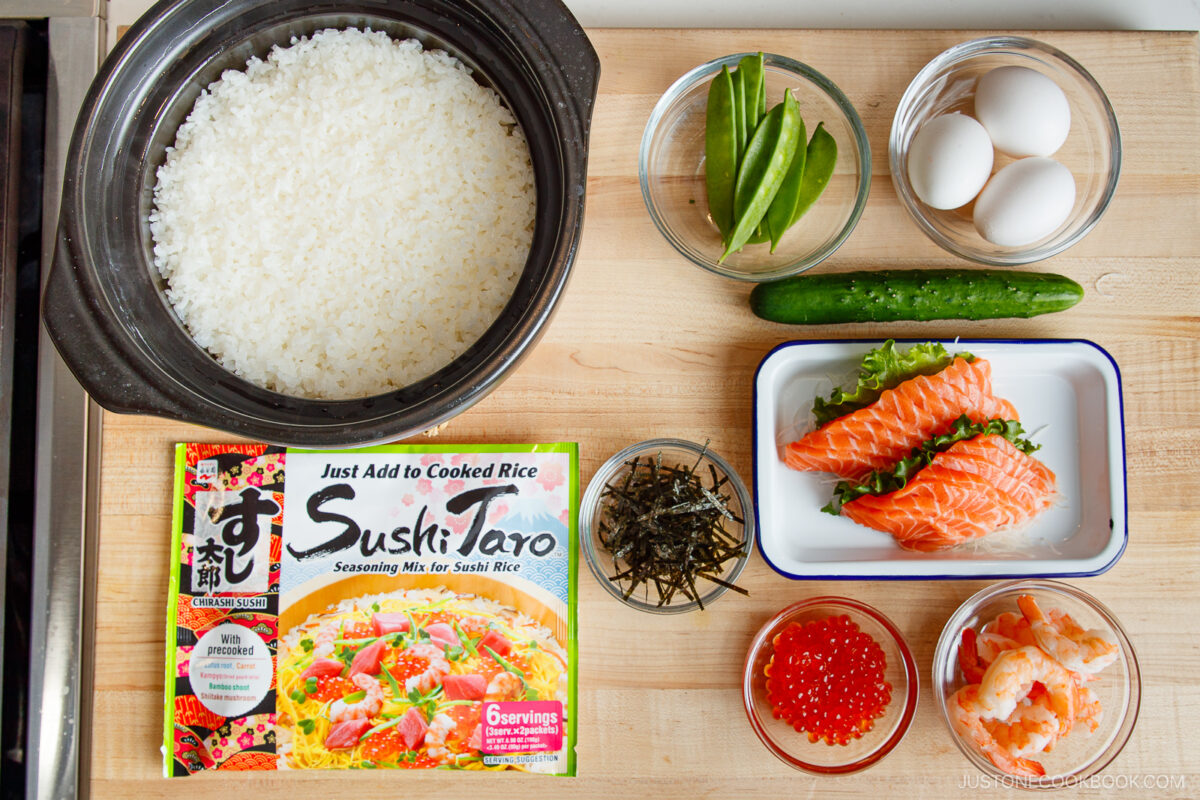
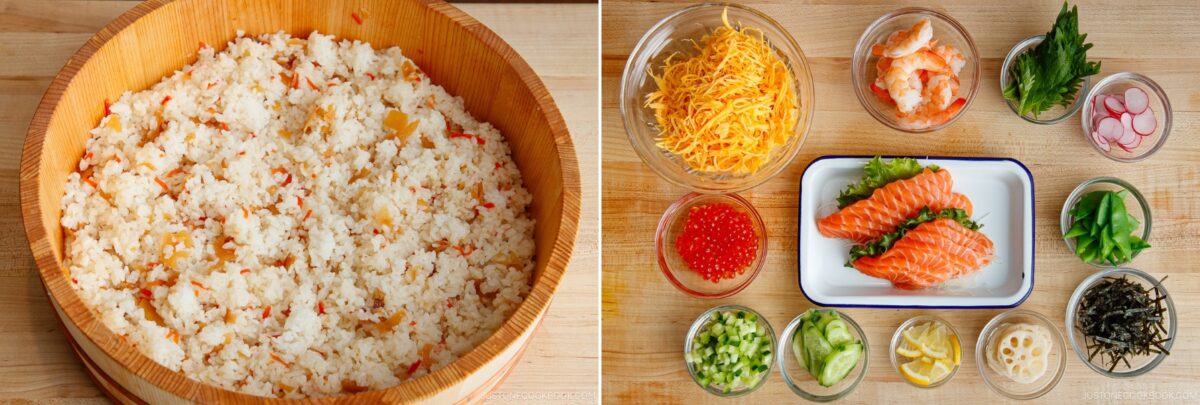
Ingredients for Quick & Easy Chirashi Sushi
- Japanese short-grain white rice + water
- chirashi sushi mix – you can buy a prepared mix like Sushi Taro on Amazon or at Japanese and Asian grocery stores. In my Chirashi Sushi recipe, I make a homemade version using lotus root, carrots, dried gourd strips (kanpyo), bamboo shoots, and shiitake mushrooms for a more traditional flavor.
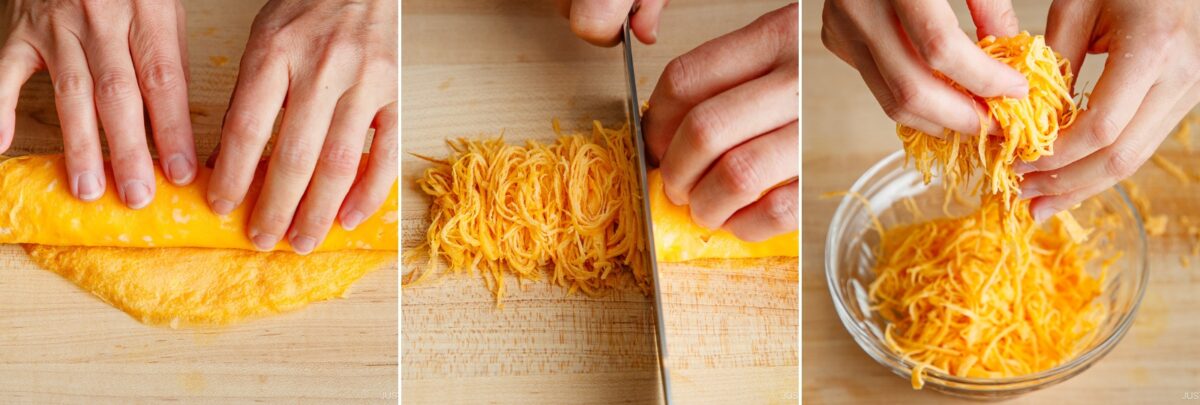
- eggs – for Shredded Egg Crepe (kinshi tamago)
- shrimp – boiled
- snow peas
- Japanese or Persian cucumber
- shredded nori seaweed
- ikura (salmon roe) – optional
- sashimi-grade salmon – optional
Find the printable recipe with measurements below.
Jump to RecipeHow to Make Quick & Easy Chirashi Sushi
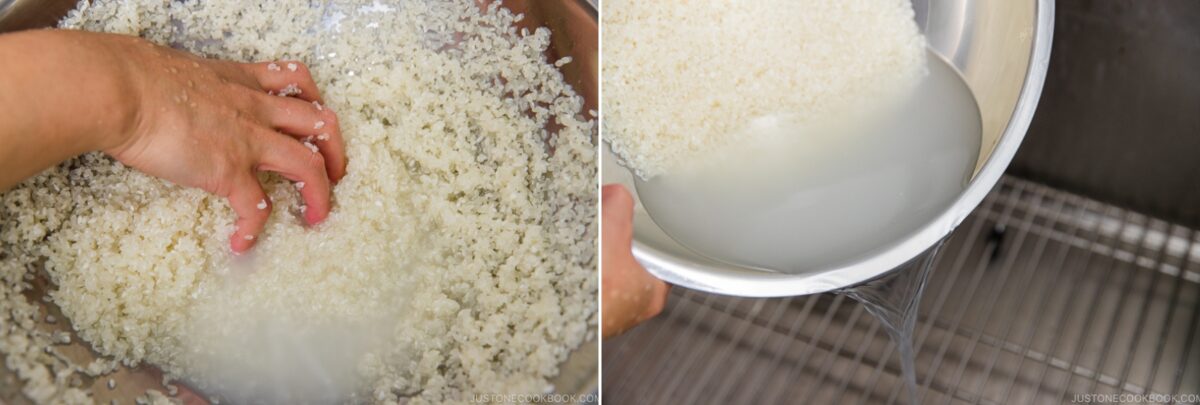
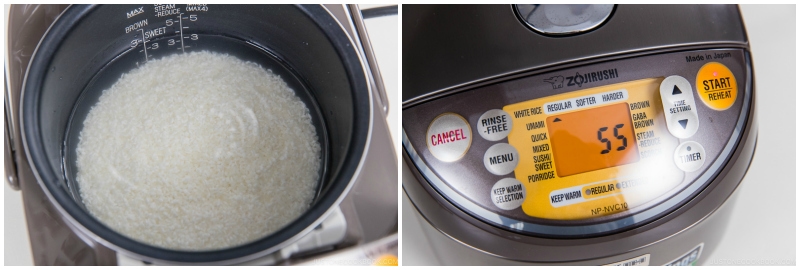
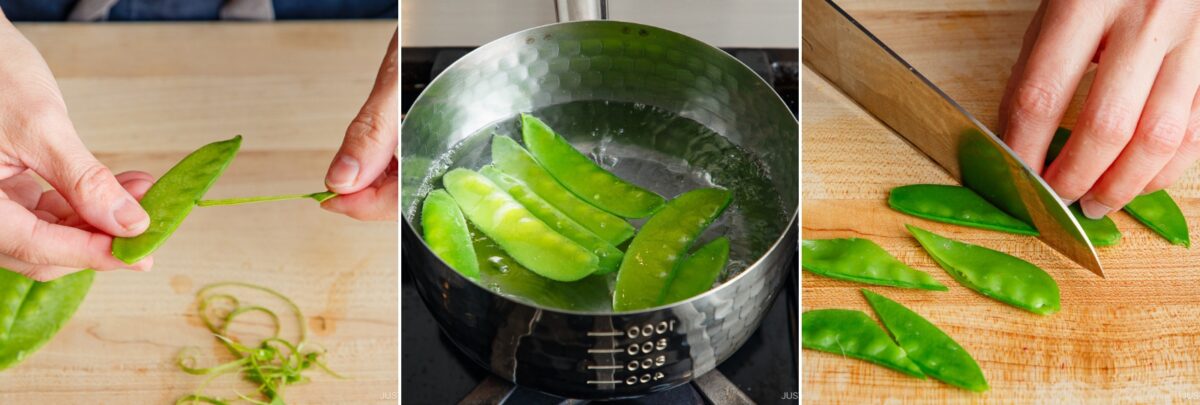
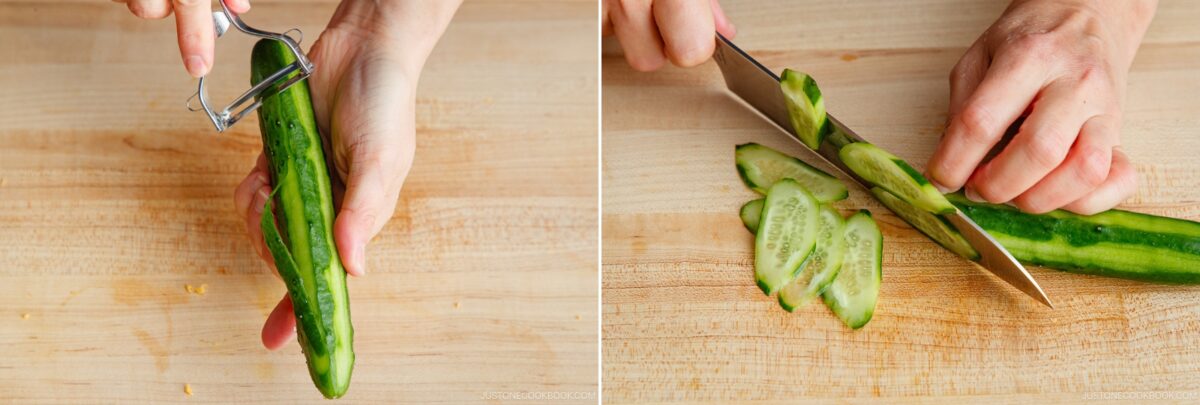
- Cook rice and prepare the toppings. Rinse and wash the rice three times and drain well. Transfer to a rice cooker, add water, soak for 20 minutes, then cook. For full details, follow my guide on How to Cook Rice. Meanwhile, prepare the toppings. Make the egg crepe. Remove strings from snow peas, blanch in salted water, and slice diagonally. Peel and slice the cucumber.
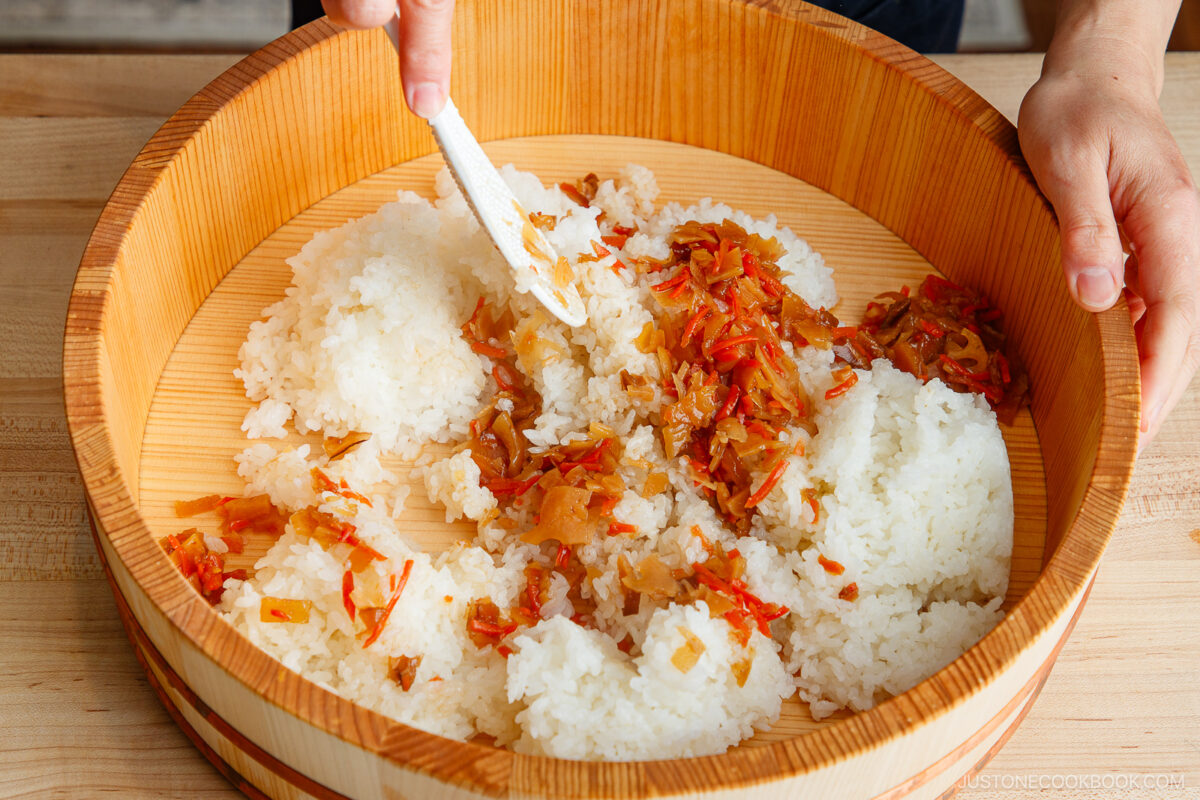
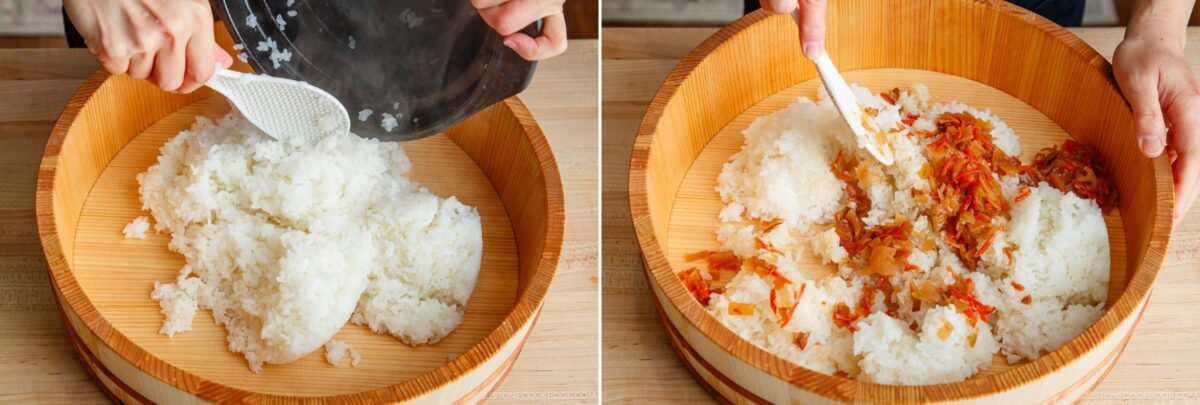
- Combine the hot rice with Chirashi Mix. Transfer the hot rice to a sushi oke or baking sheet. Add the full packet of chirashi sushi mix while the rice is still hot. Use a rice paddle and a slicing motion. Do not stir. Fan the rice as you fold to cool it to about body temperature.
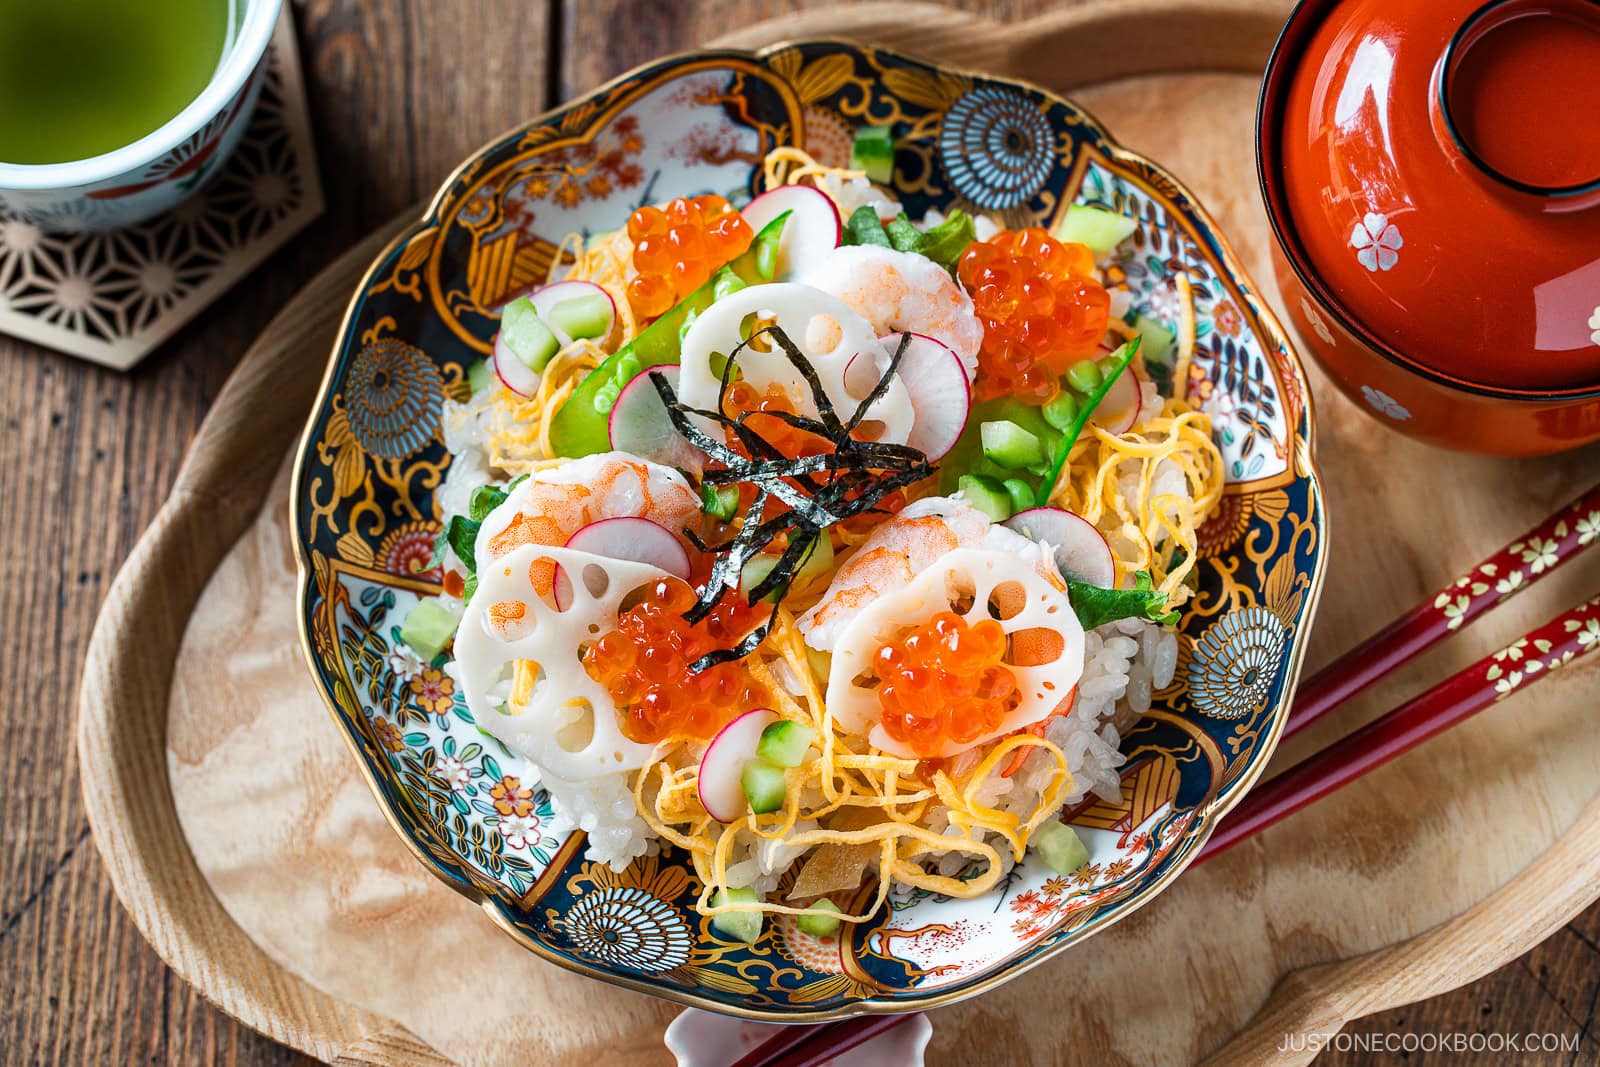
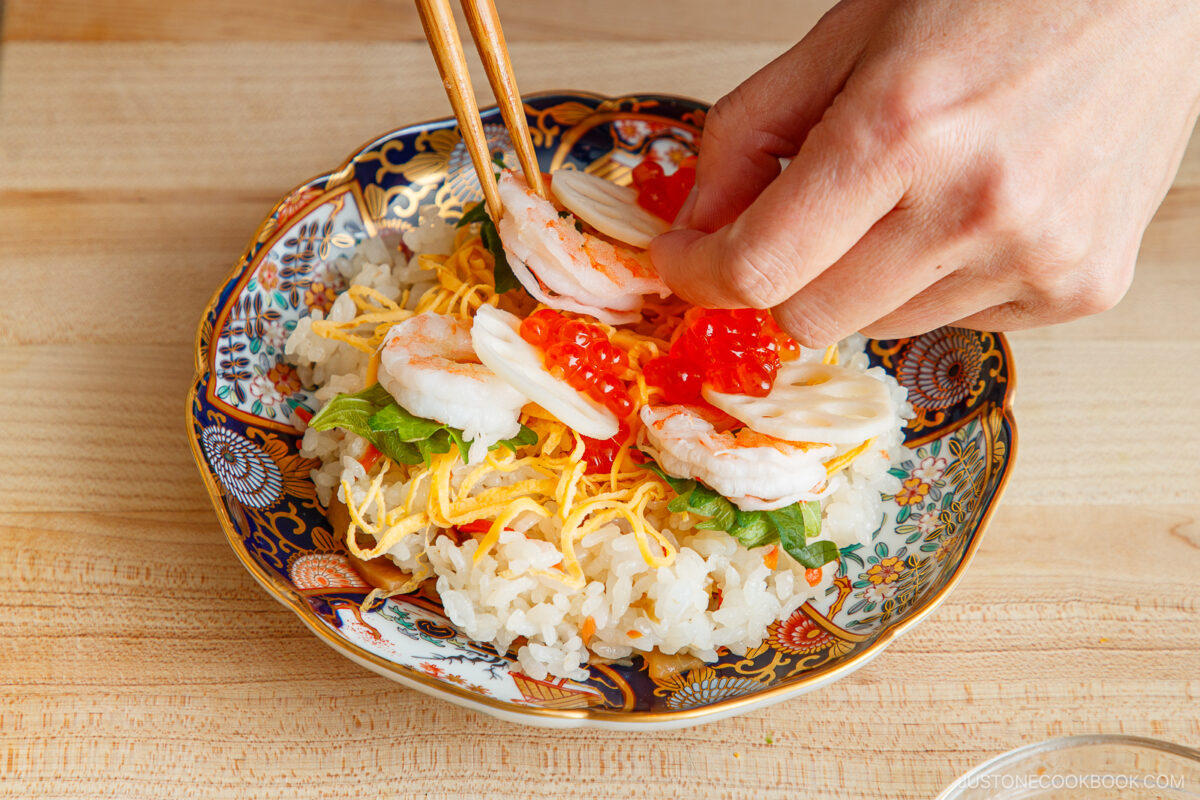
- Make individual plates. Spoon into plates and bowls. Add shredded egg, shrimp, sashimi, snow peas, nori, and other toppings. Enjoy right away for the best texture.
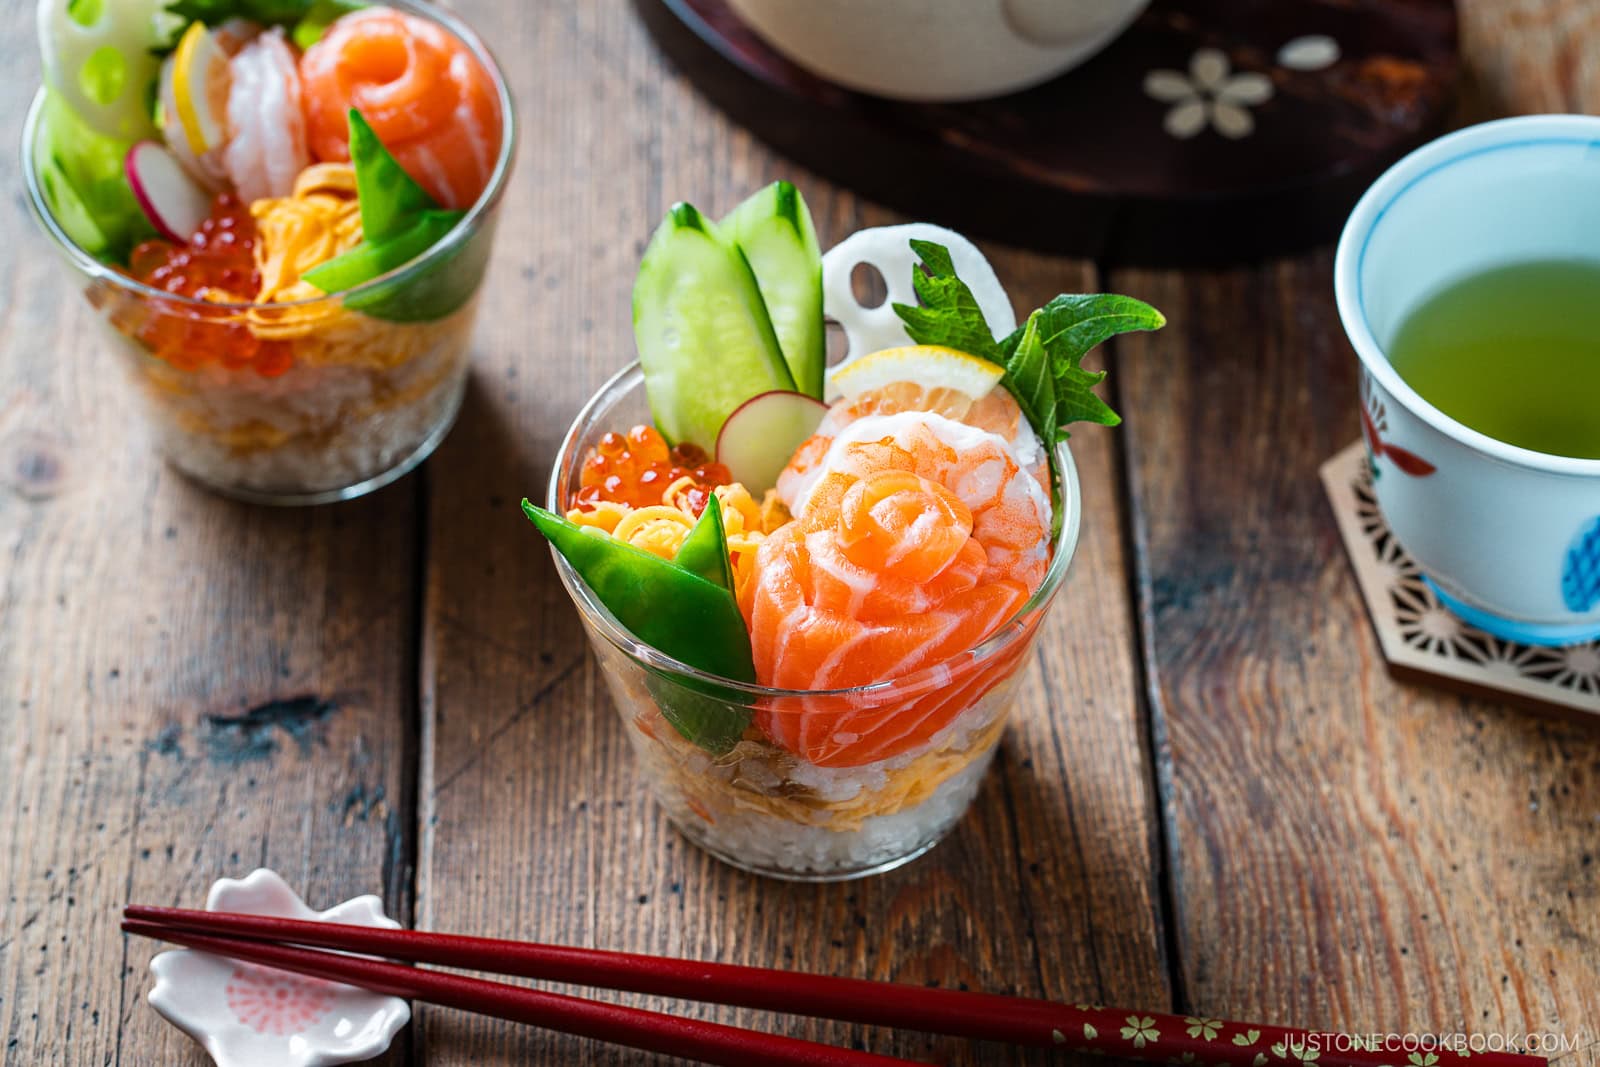
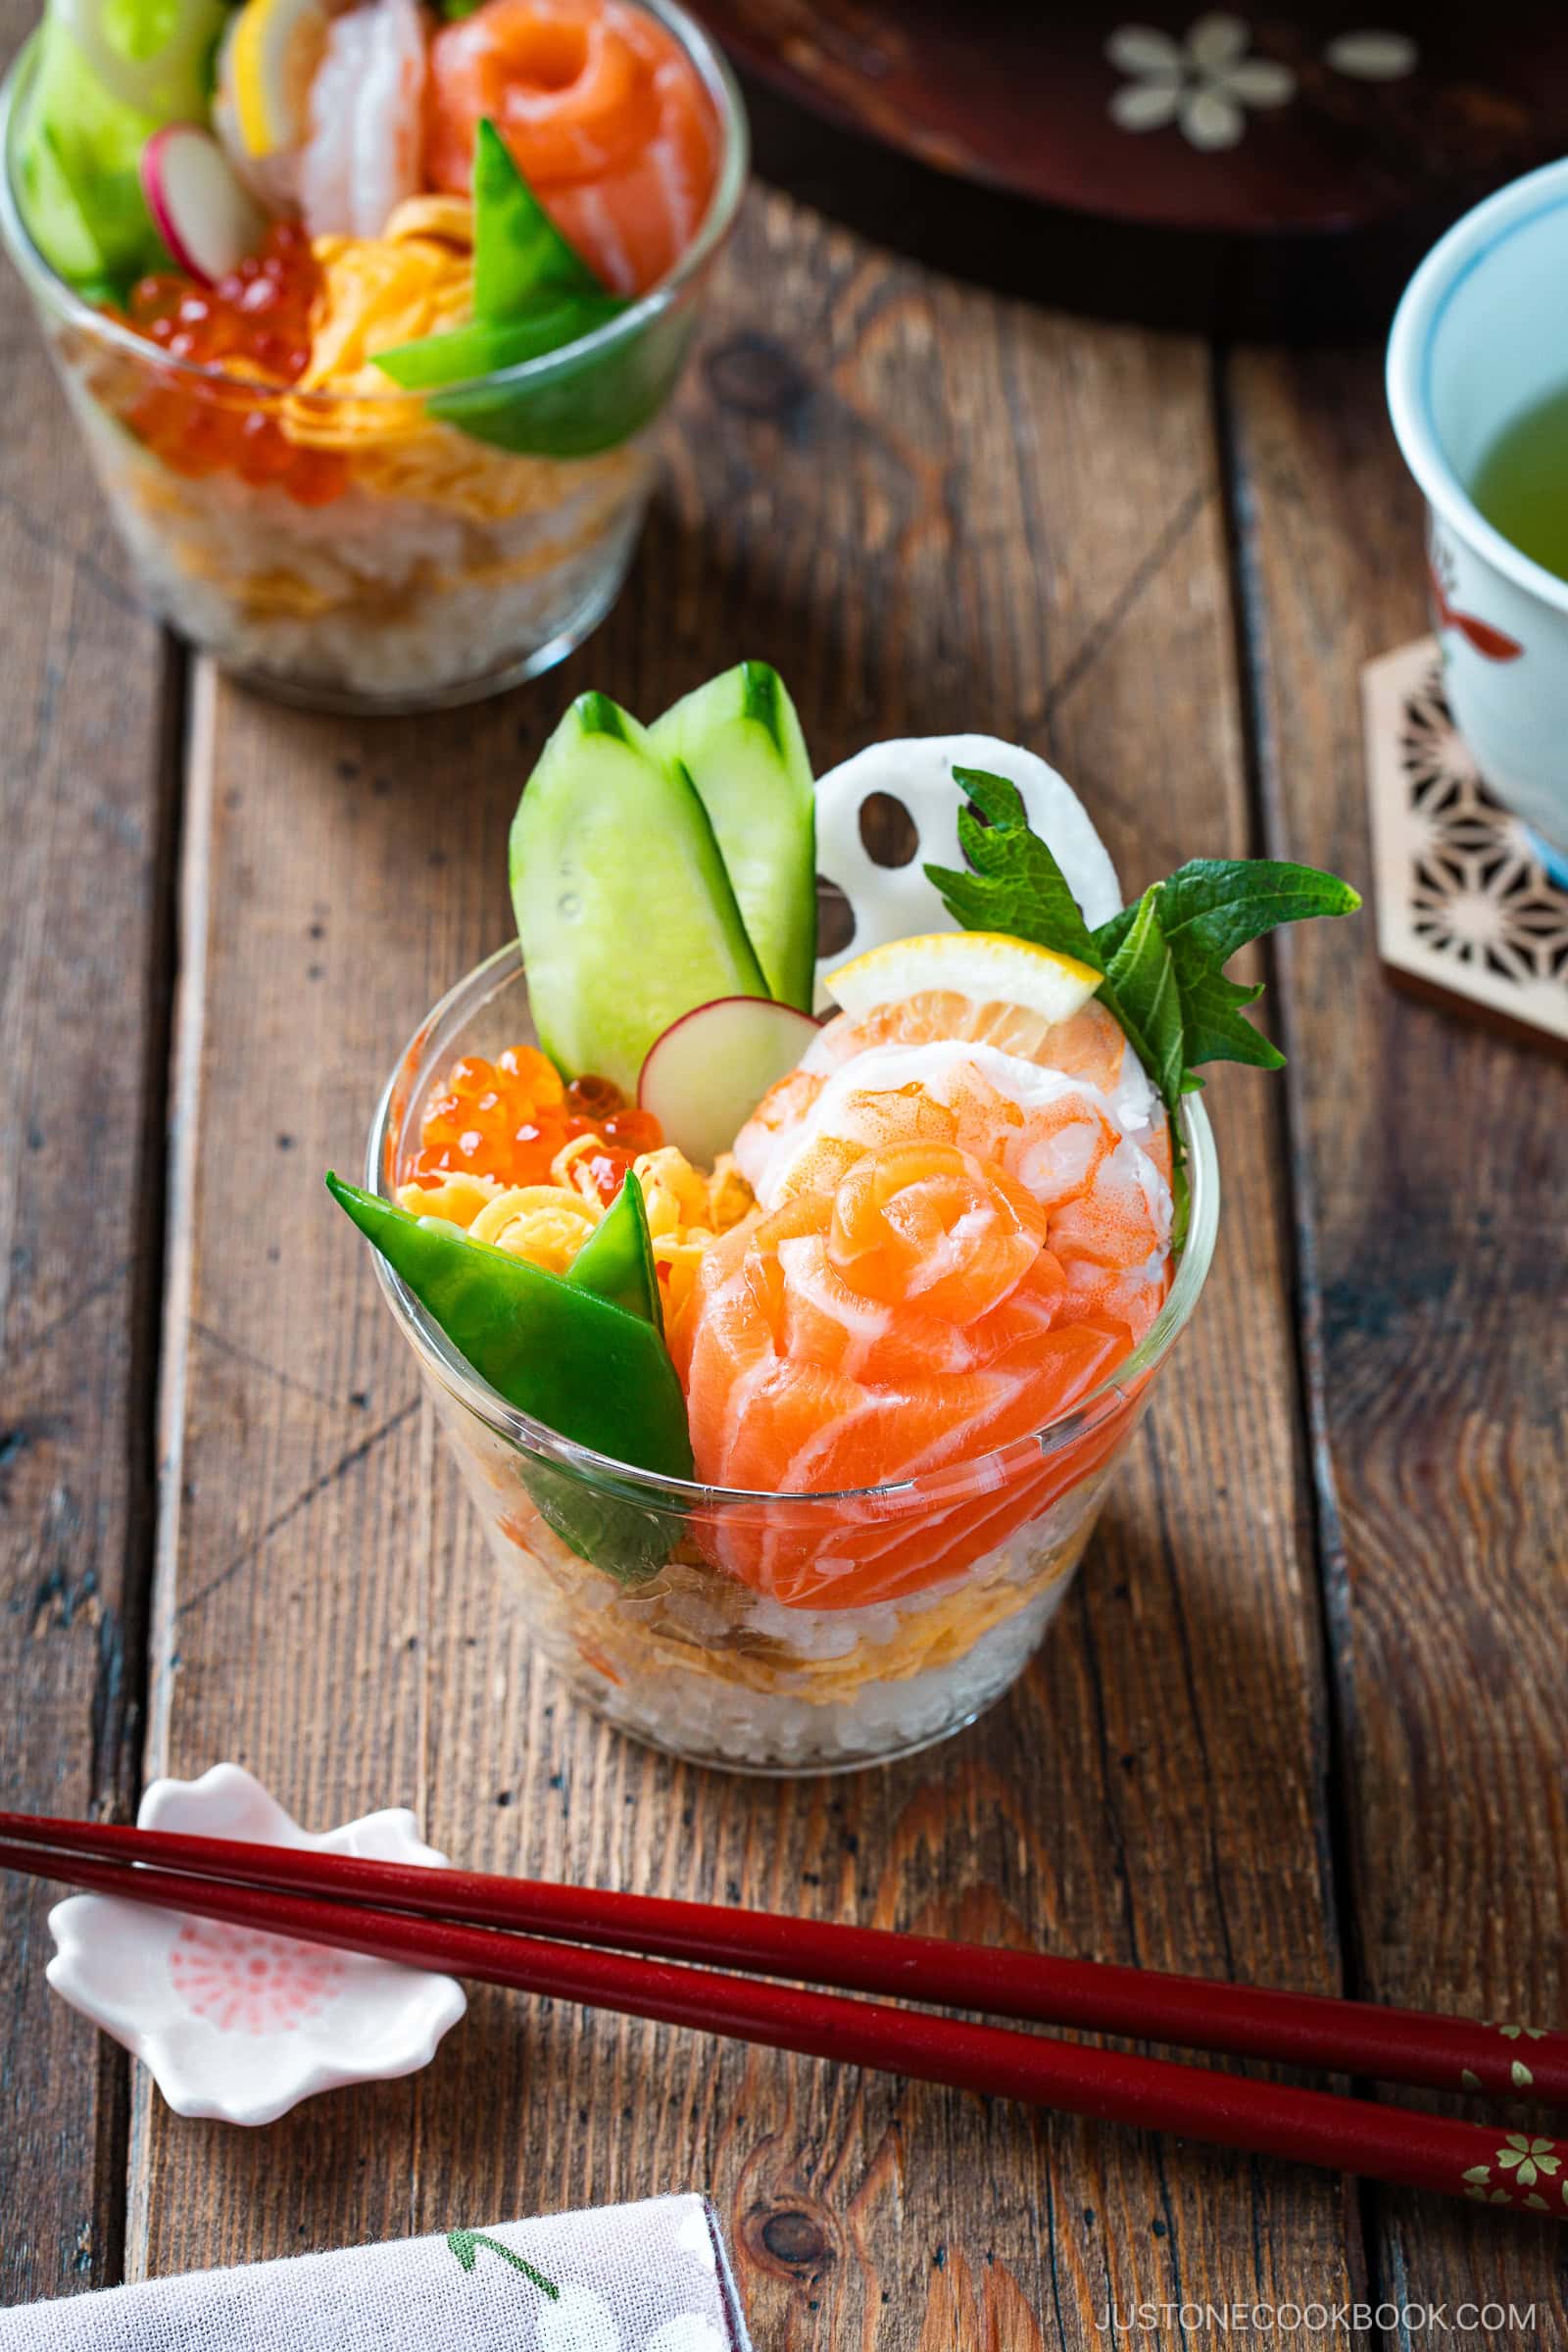
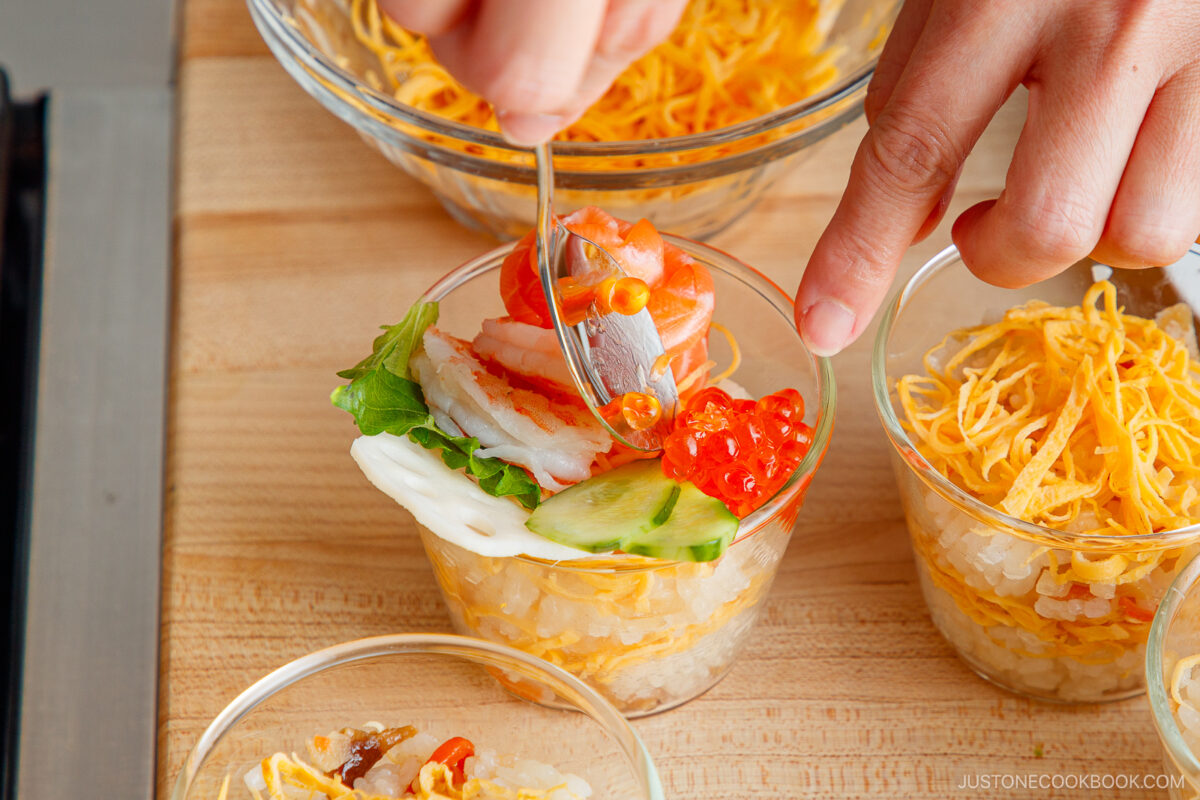
- Make sushi cups. Layer into clear cups. Add shredded egg, shrimp, sashimi, snow peas, nori, and other toppings. Enjoy right away for the best texture.


Nami’s Recipe Tips
These simple tips will help you make Quick & Easy Chirashi Sushi perfectly every time.
- Prepare toppings while rice cooks – Saves time and keeps assembly quick.
- Use hot rice – The seasoning blends best while the rice is freshly cooked.
- Fold gently – Use a slicing motion to avoid mashing the rice.
- Fan the rice – Cooling it while slicing removes excess moisture and creates a glossy finish.
- Cover with a damp towel – Keeps the rice from drying out before serving.
- Serve the same day – Sushi rice tastes best fresh.
Variations and Customizations
Looking to change things up? Try these easy and tasty ideas!
- Made-from-scratch method. Try my traditional Chirashi Sushi recipe with homemade sushi seasoning and chirashi mix.
- Swap toppings. Use sashimi, unagi (eel), imitation crab, or other cooked seafood.
- Add more color. Lemon wedges, radish slices, or shiso (perilla) leaves brighten the dish.
- Have chirashi don. Serve the seasoned rice in a bowl and top with sashimi like tuna, salmon, yellowtail, scallops, and salmon roe.
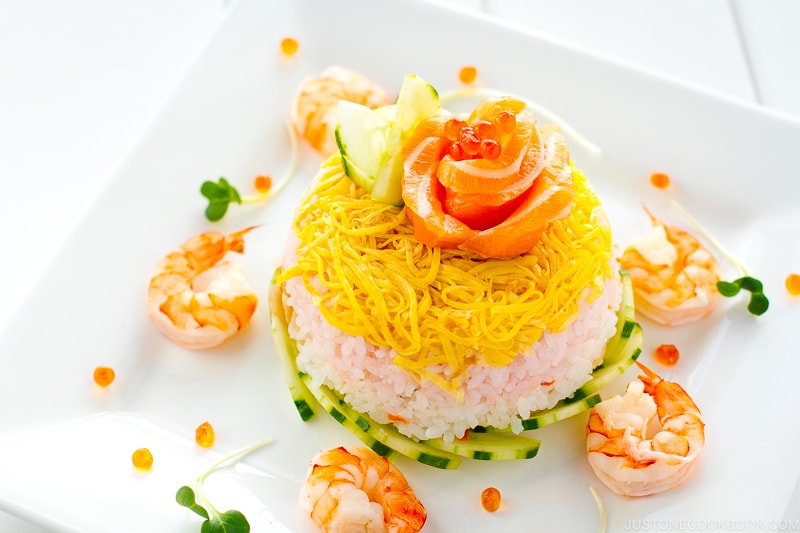
- Make it into a cake. When my daughter was 4 years old, I made a Chirashi Sushi Cake for Girls’ Day and she loved it!
- Make sushi cups. Layer rice, shredded egg, and your favorite toppings in clear cups or chawanmushi bowls. Perfect for parties!

What to Serve with Quick and Easy Chirashi Sushi
Add these colorful and nourishing sides to make a complete meal.
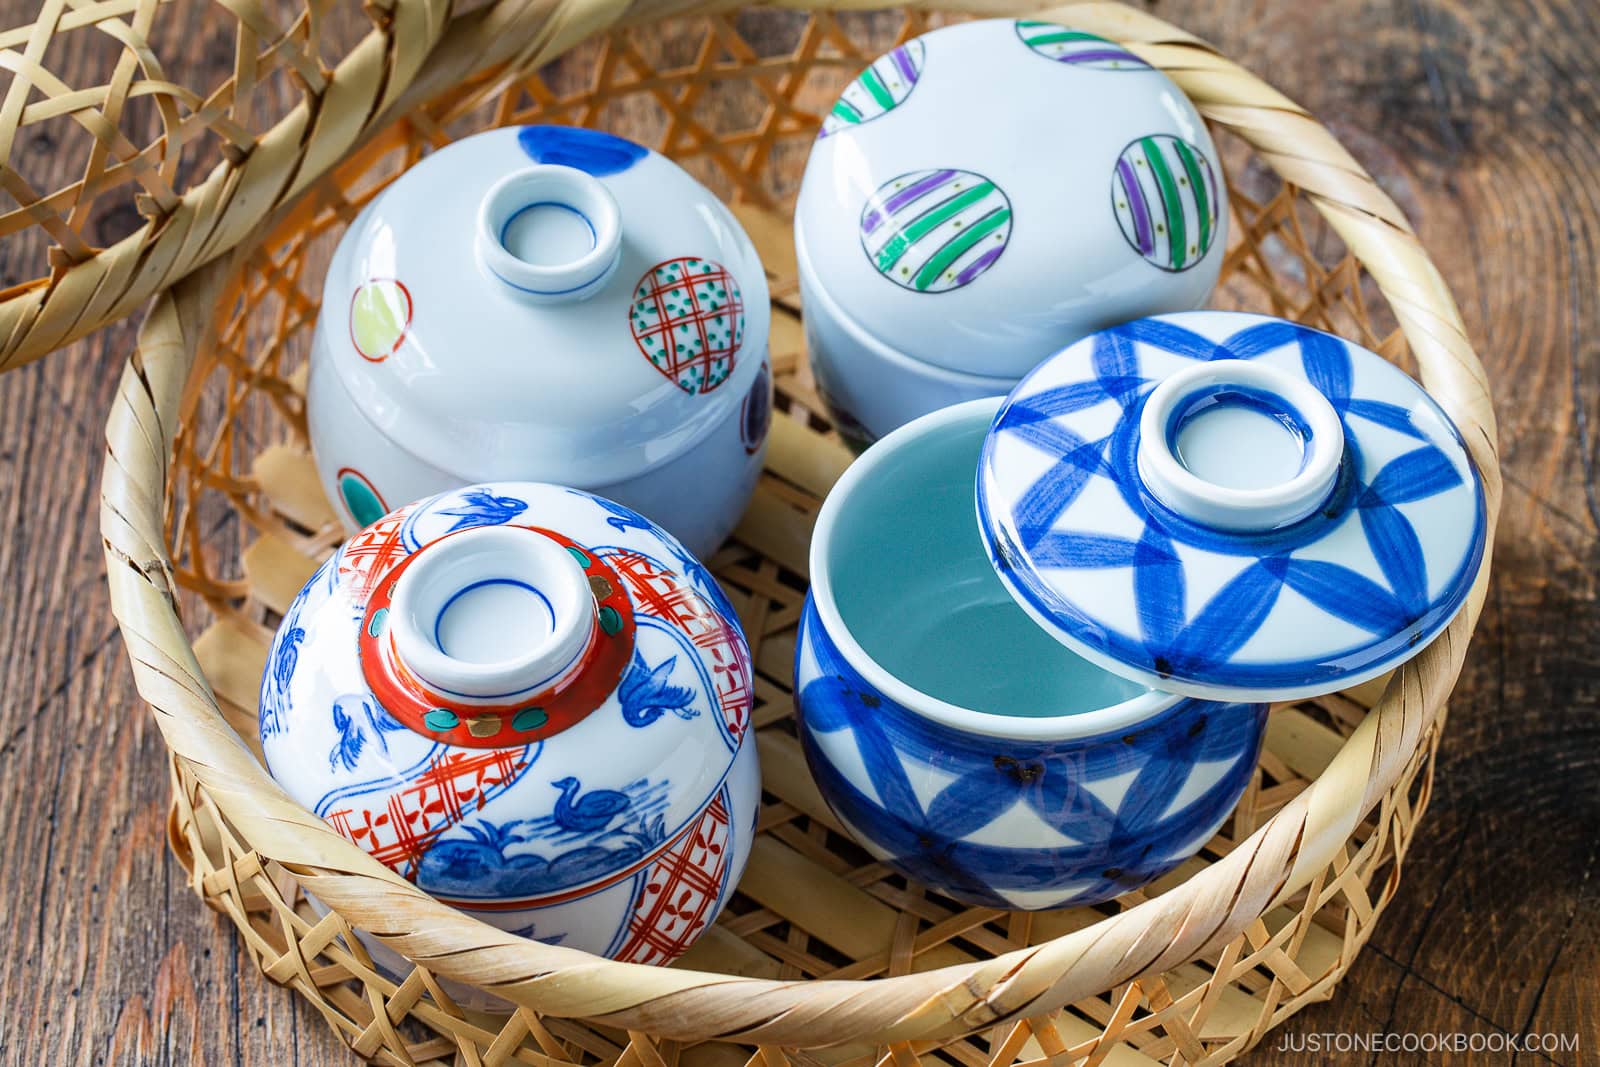
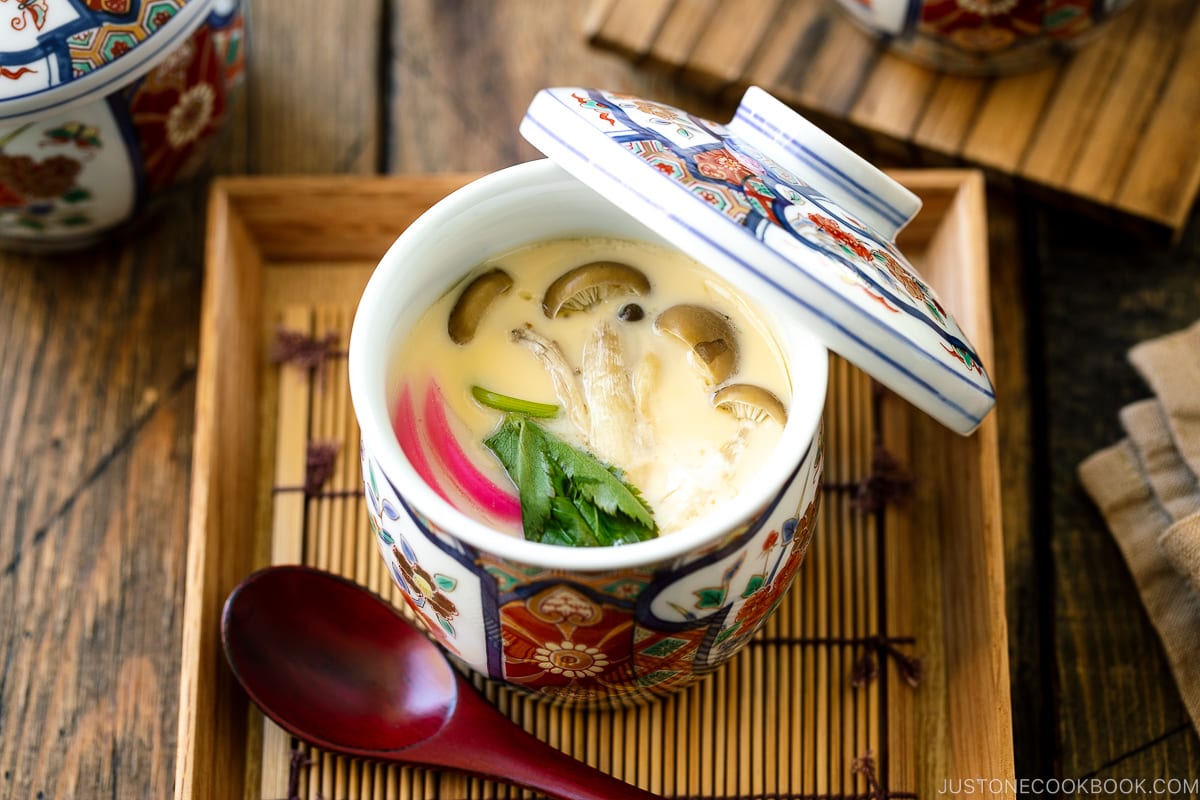
- Chawanmushi – This classic Japanese savory custard makes a special appetizer course.
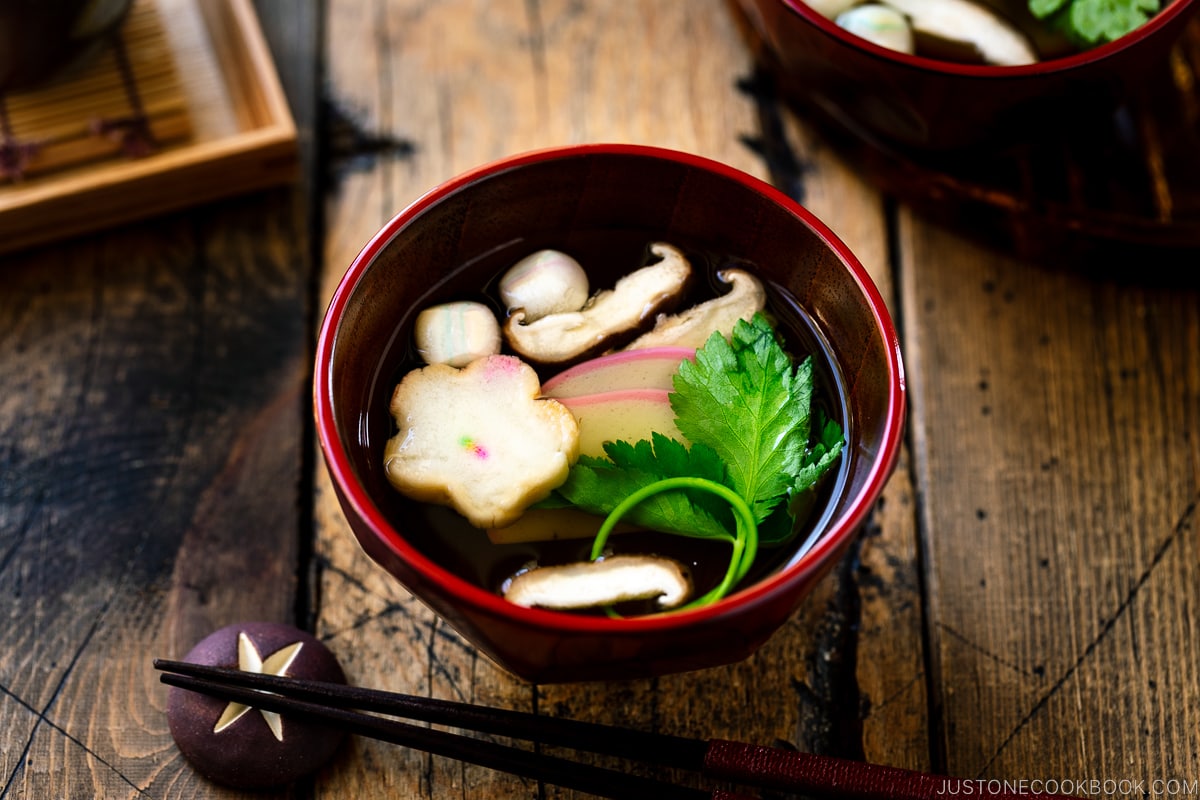
- Japanese Clear Clam Soup – We often serve bowls of this soup for Hinamatsuri.
- Nitsuke Recipe – This classic simmered fish is moist, tender, and full of flavor.
- Hijiki Seaweed Salad – A flavorful side dish with edamame, carrots, and sea vegetables.
Storage Tips
To store: Chirashi sushi is best eaten the same day. If needed, cover tightly with plastic wrap and wrap with a thick kitchen towel before refrigerating. The towel helps keep the rice cool but not too cold. Enjoy within 24 hours for best texture.
FAQs
What is the difference between chirashi sushi and sashimi bowl?
The key difference is the rice. Chirashi sushi uses seasoned sushi rice mixed with vinegar, sugar, and salt. A sashimi bowl uses plain steamed rice. While both may include raw fish, chirashi is built on flavored sushi rice with additional colorful toppings.
Can I make chirashi sushi ahead of time?
You can cook the rice and prepare toppings ahead, but assemble and serve the same day. Sushi rice becomes firm and dry in the refrigerator, so mix the seasoning and decorate just before serving.
What toppings go on chirashi sushi?
Common toppings include shredded egg crepe, shrimp, sashimi-grade salmon, ikura, snow peas, cucumber, and shredded nori. You can also add radish slices or shiso leaves. Toppings are flexible and can be adjusted for the occasion.
How long does chirashi sushi last in the fridge?
Chirashi sushi is best eaten the same day. I don’t recommend storing in the fridge, because the rice gets hard and dry. If storing, wrap tightly with plastic and a thick kitchen towel before refrigerating. Enjoy within 1–2 days.
I’d love to hear how yours turned out! 💛 Please leave a star rating and comment below to share your experience. Your feedback not only supports Just One Cookbook but also helps other home cooks discover recipes they can trust.
Quick and Easy Chirashi Sushi
Ingredients
For the Chirashi Sushi
- 1 packet chirashi sushi mix (Sushi Taro) (each packet contains 2 bags; use the full packet)
- 2¼ cups uncooked Japanese short-grain white rice (3 rice cooker cups; see Notes below)
- 2¼ cups water
For the Main Toppings
- 3 large eggs (50 g w/o shell) (to make my Shredded Egg Crepe with a few additional ingredients)
- 8 snow peas
- 1 Japanese or Persian cucumber
- shredded nori seaweed
For the Optional Toppings
- cooked shrimp (see how to cook raw shrimp in my from-scratch Chirashi Sushi recipe)
- sashimi-grade salmon
- ikura (salmon roe)
- pickled lotus root (see how I make it in my from-scratch Chirashi Sushi recipe card)
- red radishes
- shiso leaves (perilla/ooba)
- lemon wedges
Instructions
- Gather all the ingredients. If you start with freshly cooked rice, assembly takes only 20 minutes. Otherwise, be sure to include the rice cooking time above in your total prep time.Please note that I left some topping amounts open ended on purpose, since the quantity depends on whether you're making one large platter, individual servings, or sushi cups.
To Cook the Rice
- For detailed, step-by-step instructions with photos, please see my post How to Make Sushi Rice. Rinse and wash 2¼ cups uncooked Japanese short-grain white rice (3 rice cooker cups) 3 times and drain well.
- Transfer the rice to the inner pot of a rice cooker and add 2¼ cups water. Soak the rice for 20 minutes, then start cooking. You have about 1 hour to prepare the remaining ingredients while the rice cooks.Nami's Tip: For easy measuring, you can use your rice cooker's White Rice mode and add water to the line for the number of rice cups you're cooking. If you don‘t have a rice cooker, see how to cook short-grain rice using a pot over the stove, Instant Pot, or donabe.
To Prepare the Toppings
- Shredded egg crepe: While the rice is cooking, make shredded egg crepe (kinshi tamago) with 3 large eggs (50 g w/o shell) and some other ingredients. See How to Make Kinshi Tamago.
- Snow peas: Remove the tough strings from 6 snow peas. Bring water to boil in a small saucepan. Add ⅛ tsp salt and blanch the snow peas for 1 minute. Drain and cut diagonally in half or thirds.
- Cucumber slices: Peel the skin alternatively to create stripes. Thinly slice diagonally, leaving about 2 inches of cucumber unsliced.
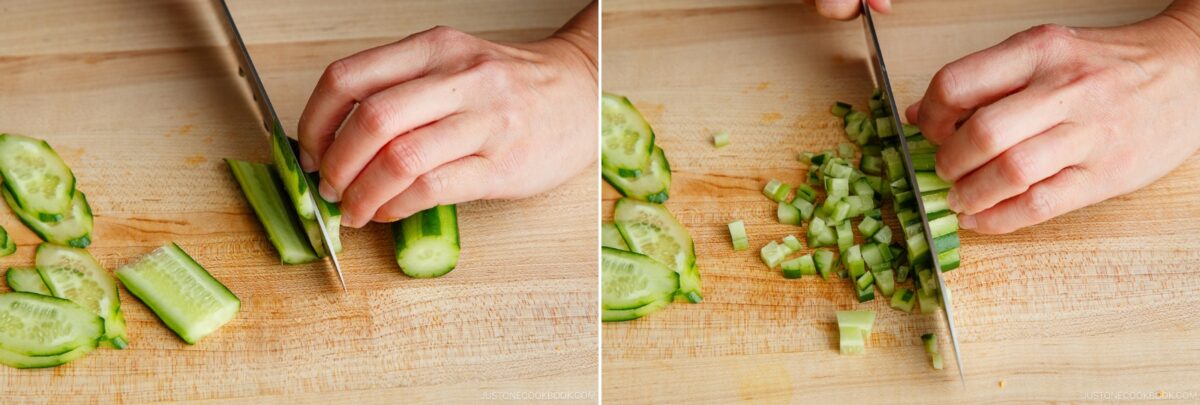
- Minced cucumber: Thinly slice the remaining cucumber into slabs, cut into julienne strips, then finely mince.
- Optional toppings: If using, cut the red radish into thin slices, cut shiso leaves in half, and thin lemon slices in wedges.

To Make the Sushi Rice
- Transfer the hot cooked rice to a sushi oke or baking sheet (lightly moisten it with water to prevent sticking). While the rice is still hot, add 1 packet chirashi sushi mix (Sushi Taro).
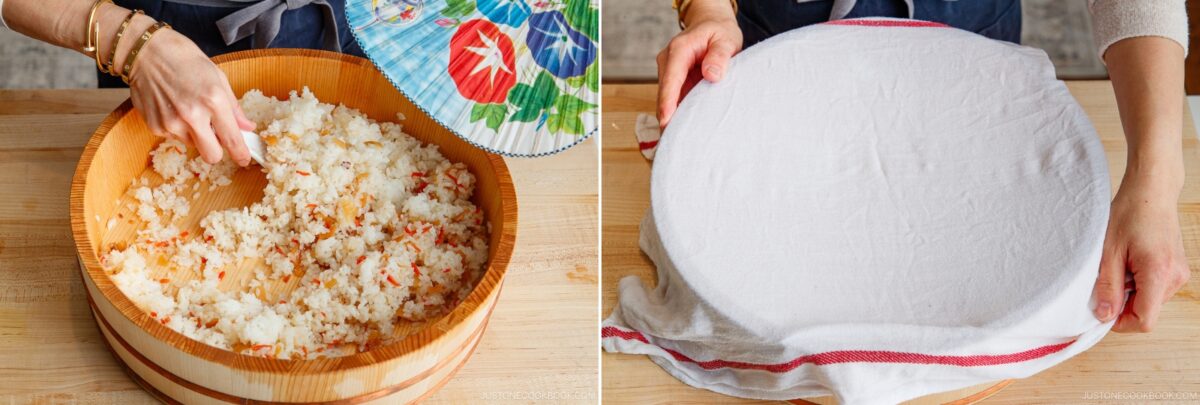
- Gently “slice” the rice with the rice paddle at a 45-degree angle to incorporate the chirashi mix and separate the rice chunks. Do not stir or mix because that may break the grains and make it mushy. As you fold, fan the rice until it's cooled to body temperature. Use a paddle fan or an electric fan. Cover with a damp towel until ready to serve to prevent drying.Nami's Tip: Fanning helps remove excess moisture and gives the rice a beautiful shine.
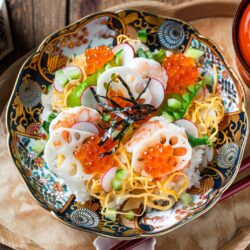
To Serve on Individual Plates
- You're now ready to serve and decorate your chirashi sushi. I'll show you two ways: On individual plates and in sushi cups.
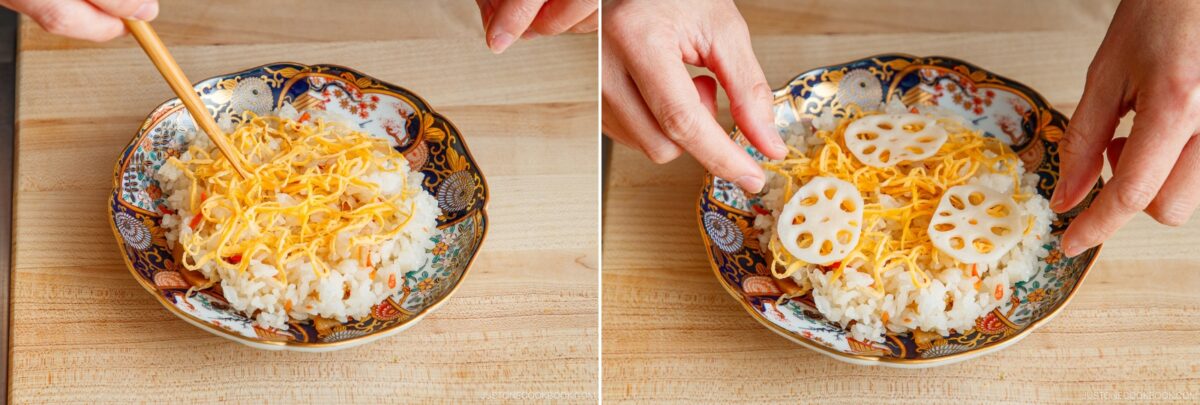
- Serve the sushi rice in an individual plate or bowl and top with shredded egg crepe and optional pickled lotus root (see how I make it in my from-scratch Chirashi Sushi recipe card.)
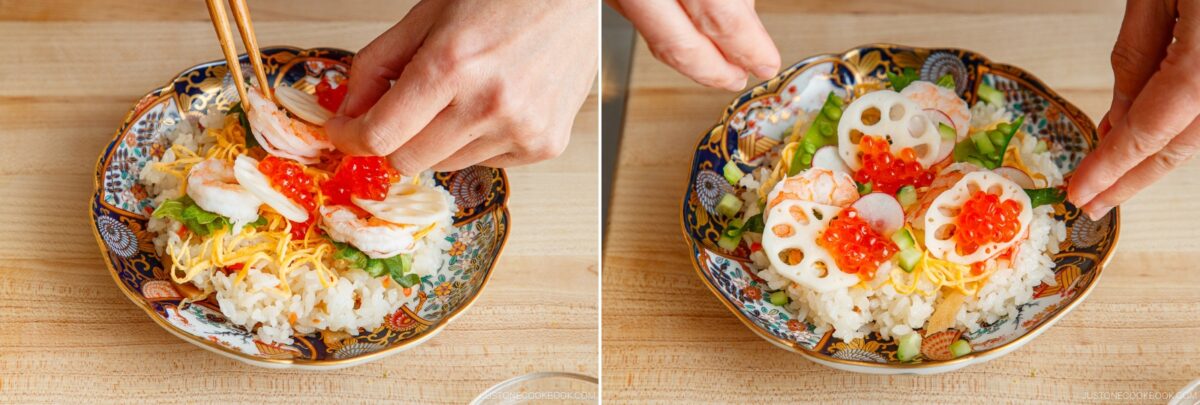
- You can put any topping you like, such as ikura (salmon roe), cooked shrimp, or your favorite sashimi. Finally, add snow peas and sprinkle shredded nori seaweed on top.
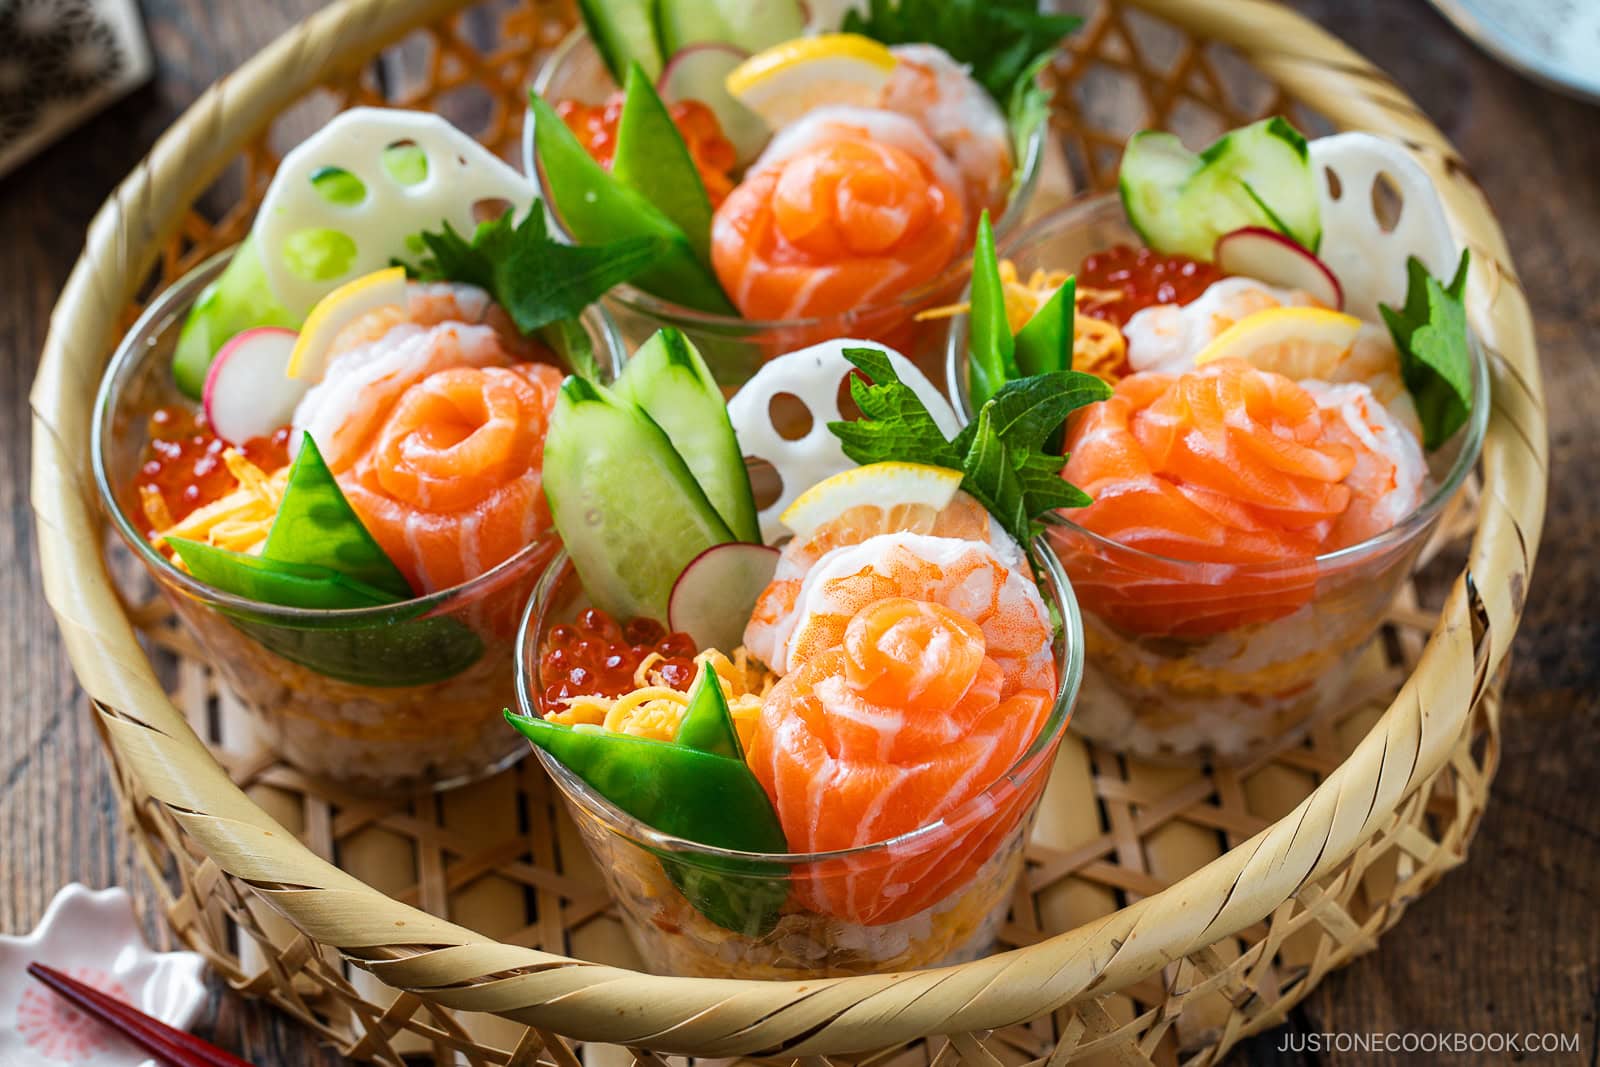
To Make Sushi Cups
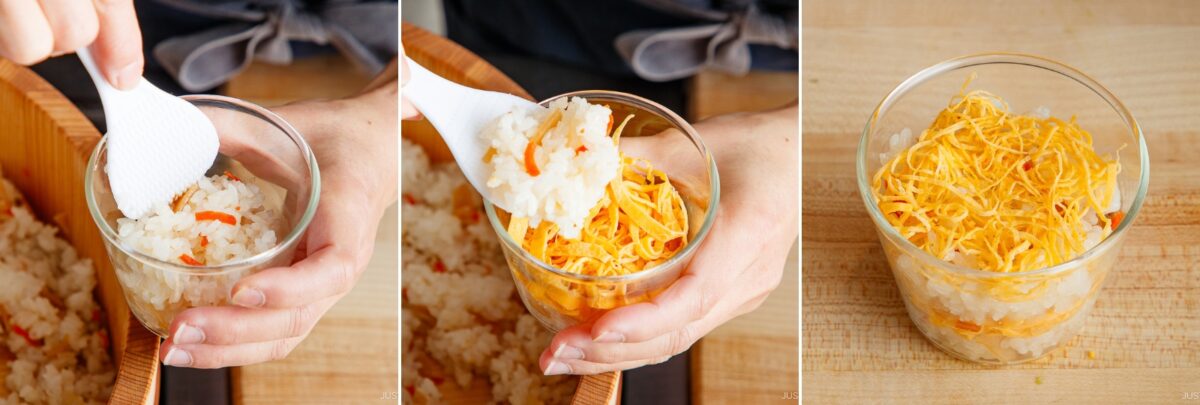
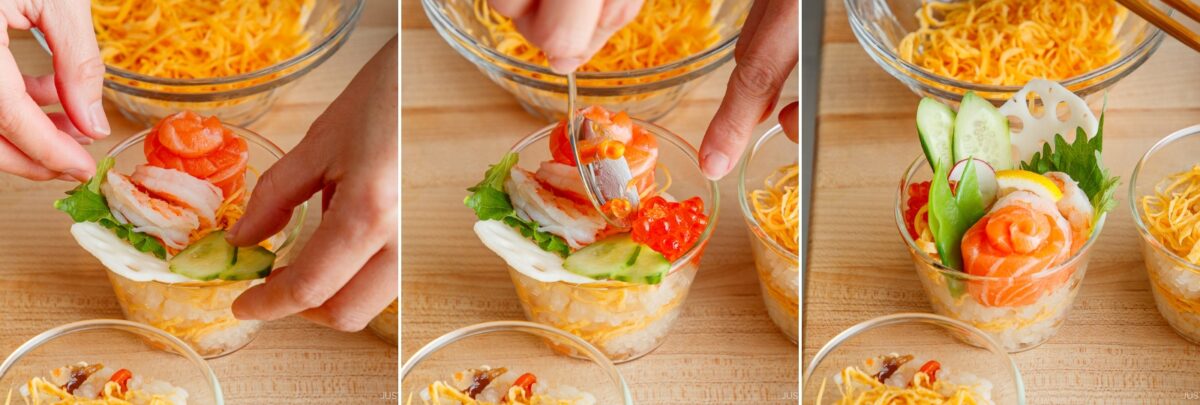
- Fill each clear cup (glass or plastic) halfway with chirashi sushi rice. Add a layer of shredded egg crepe, then top with more rice to create layers. Finish with another layer of shredded egg crepe. Leave about ½ inch (1 cm) of space at the top.Nami's Tip: This recipe yields about 10–12 sushi cups.
- Form a salmon sashimi rose (or use your preferred main topping) and place it on top. Position a shrimp behind it to hold it upright.

- Add cucumber slices, lotus root, snow peas, shiso, ikura, or other colorful toppings of your choice. Adjust and decorate to make each cup look festive and balanced.
To Store
- Rice gets hard when refrigerated; therefore, it‘s best to cover it with plastic and a thick kitchen towel to store in the refrigerator for up to 24 hours.
Notes
- Uncooked Japanese short-grain white rice: 2¼ cups (450 g, 3 rice cooker cups) of uncooked Japanese short-grain rice yield 6⅔ cups (990 g) of cooked white rice.
Nutrition
Did you make this recipe?
Tag @justonecookbook on Instagram so we can see your delicious creation!
Editor’s Note: This post was originally published on March 1, 2012. It was republished with additional recipe tips, new images, and more helpful content on February 25, 2026.
