
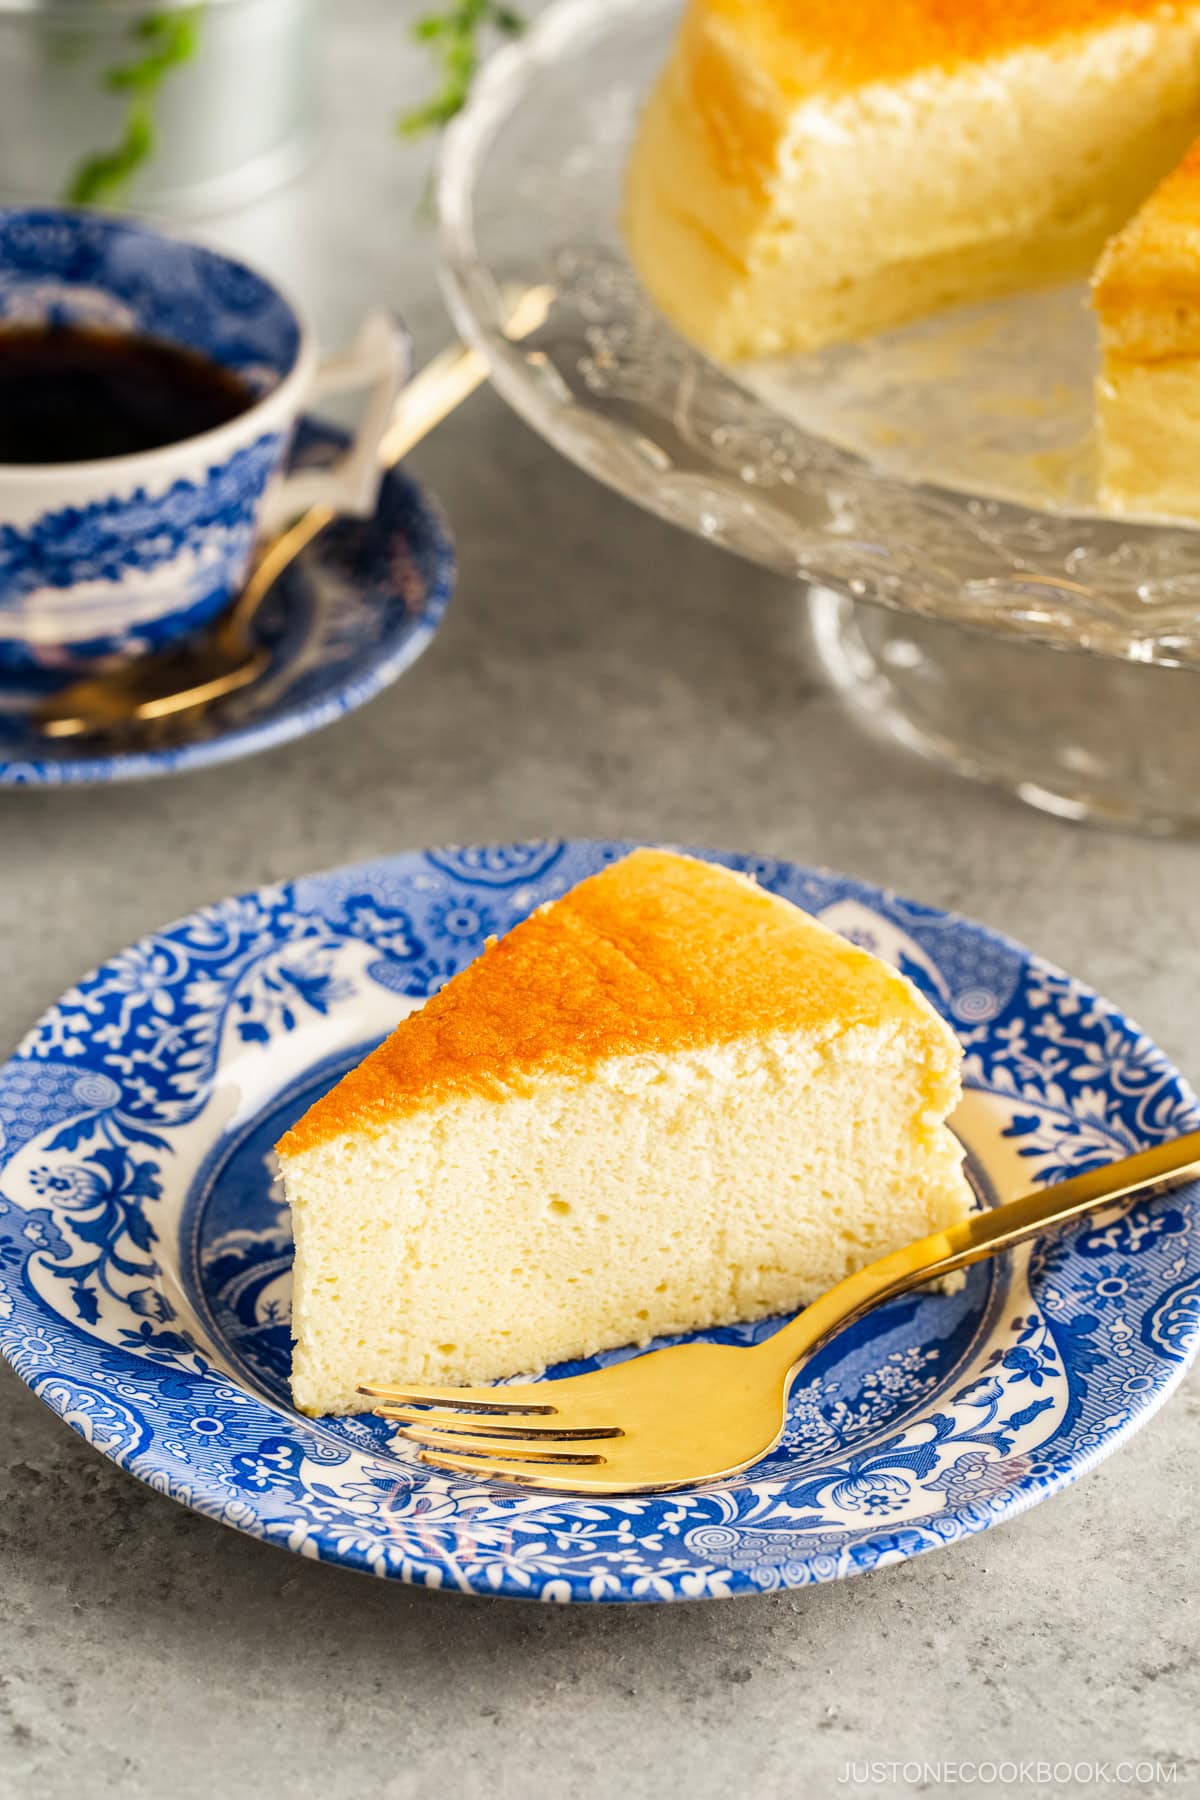
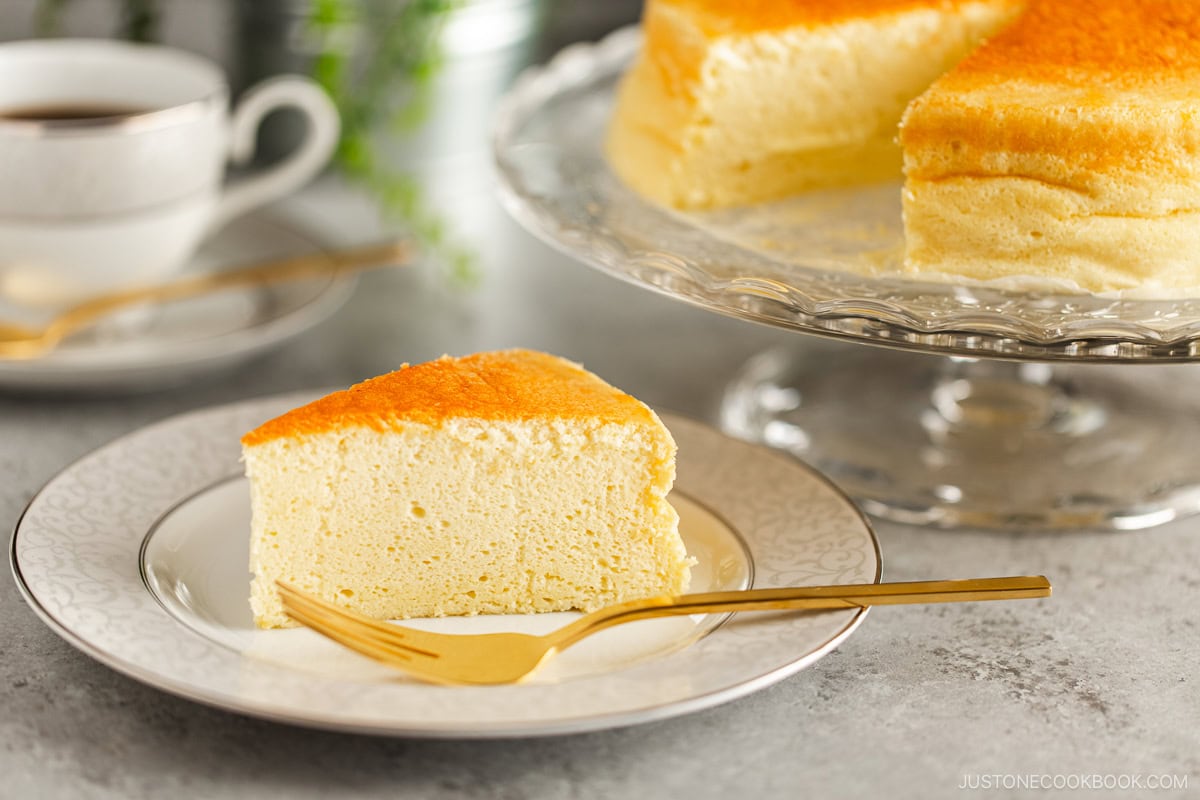
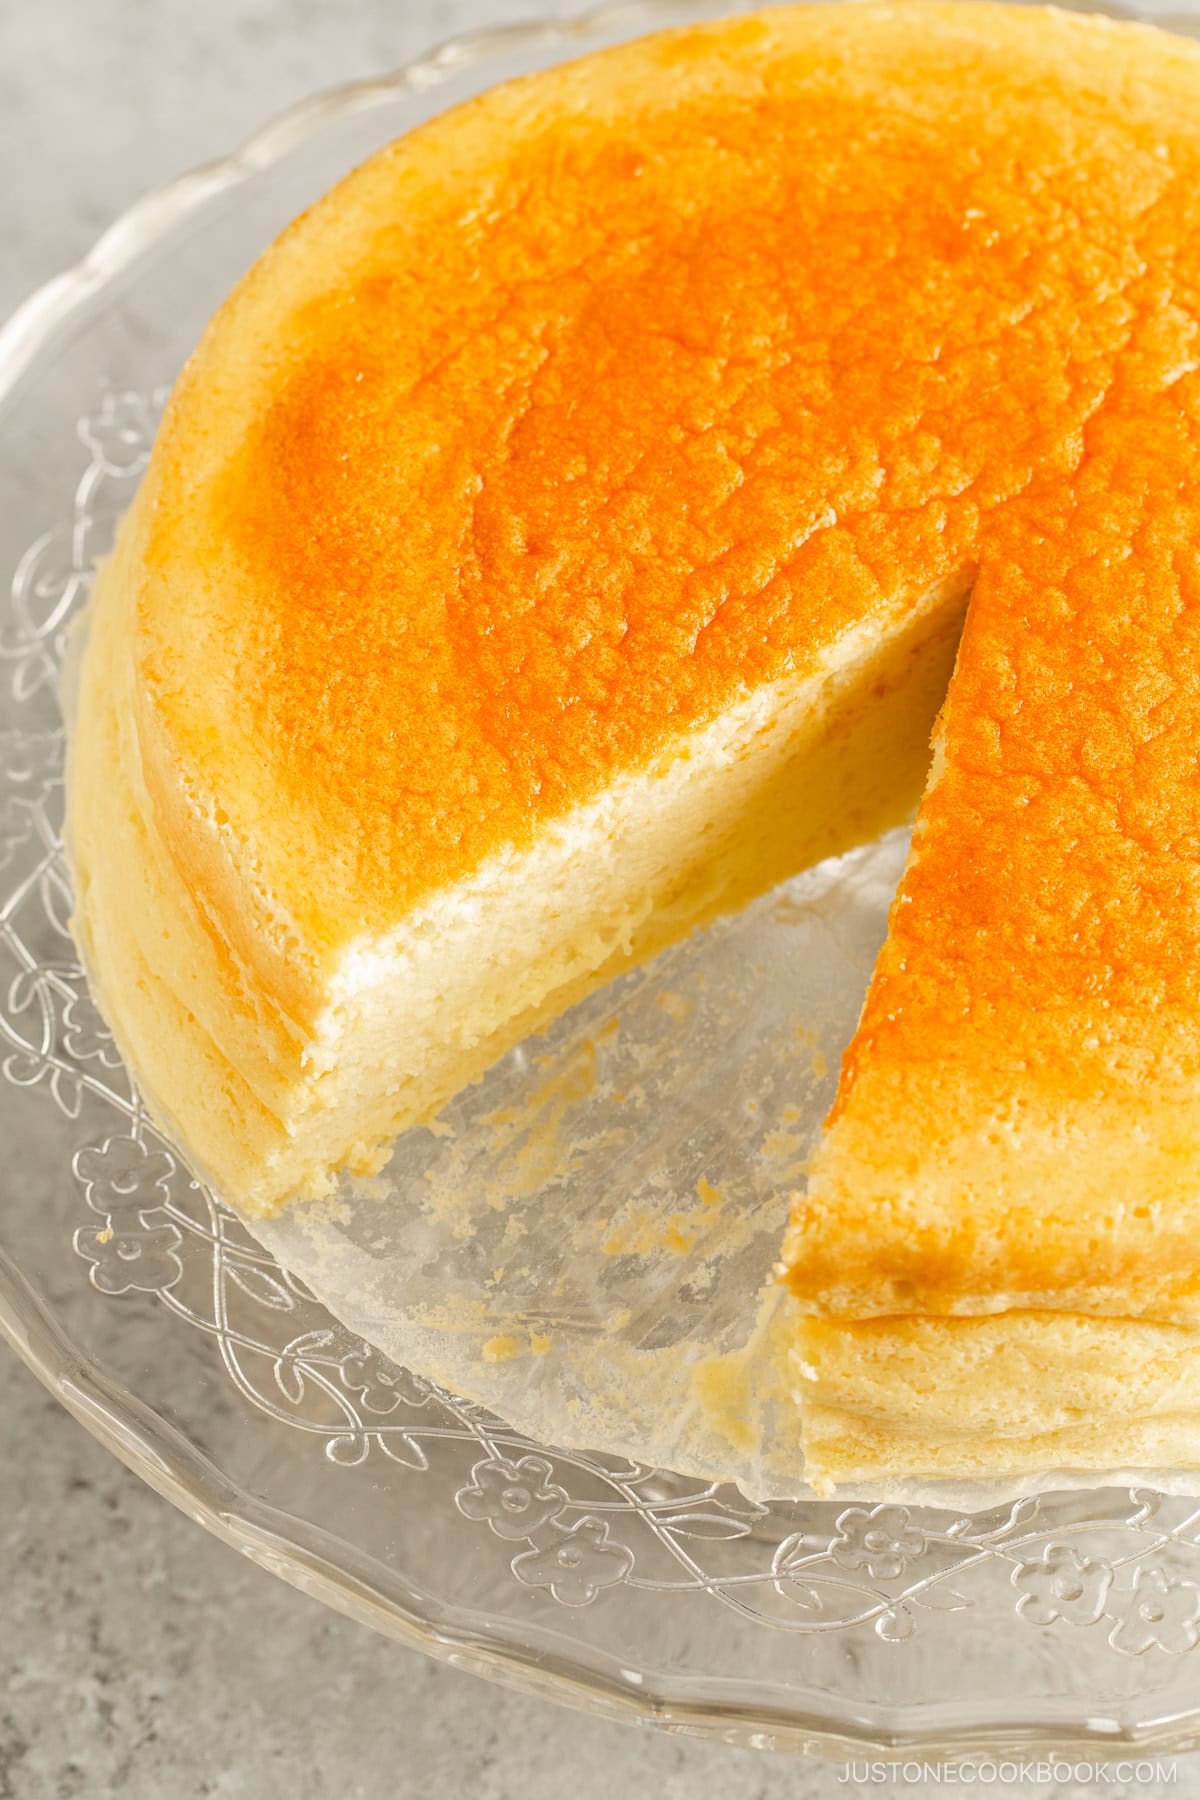
Japanese Cheesecake, known as soufflé cheesecake in Japan, is a heavenly dessert that’s taken the food world by storm. I’ve made it countless times for parties or potlucks, and it never fails to impress! I’ll guide you through my Japanese cheesecake recipe step-by-step so you can make this ultra-creamy and airy cake at home, too.
For more amazing cheese-based desserts, try my Basque Burnt Cheesecake, Baked Cheese Tarts, and Matcha Basque Cheesecake recipes next!
What is Japanese Cheesecake?
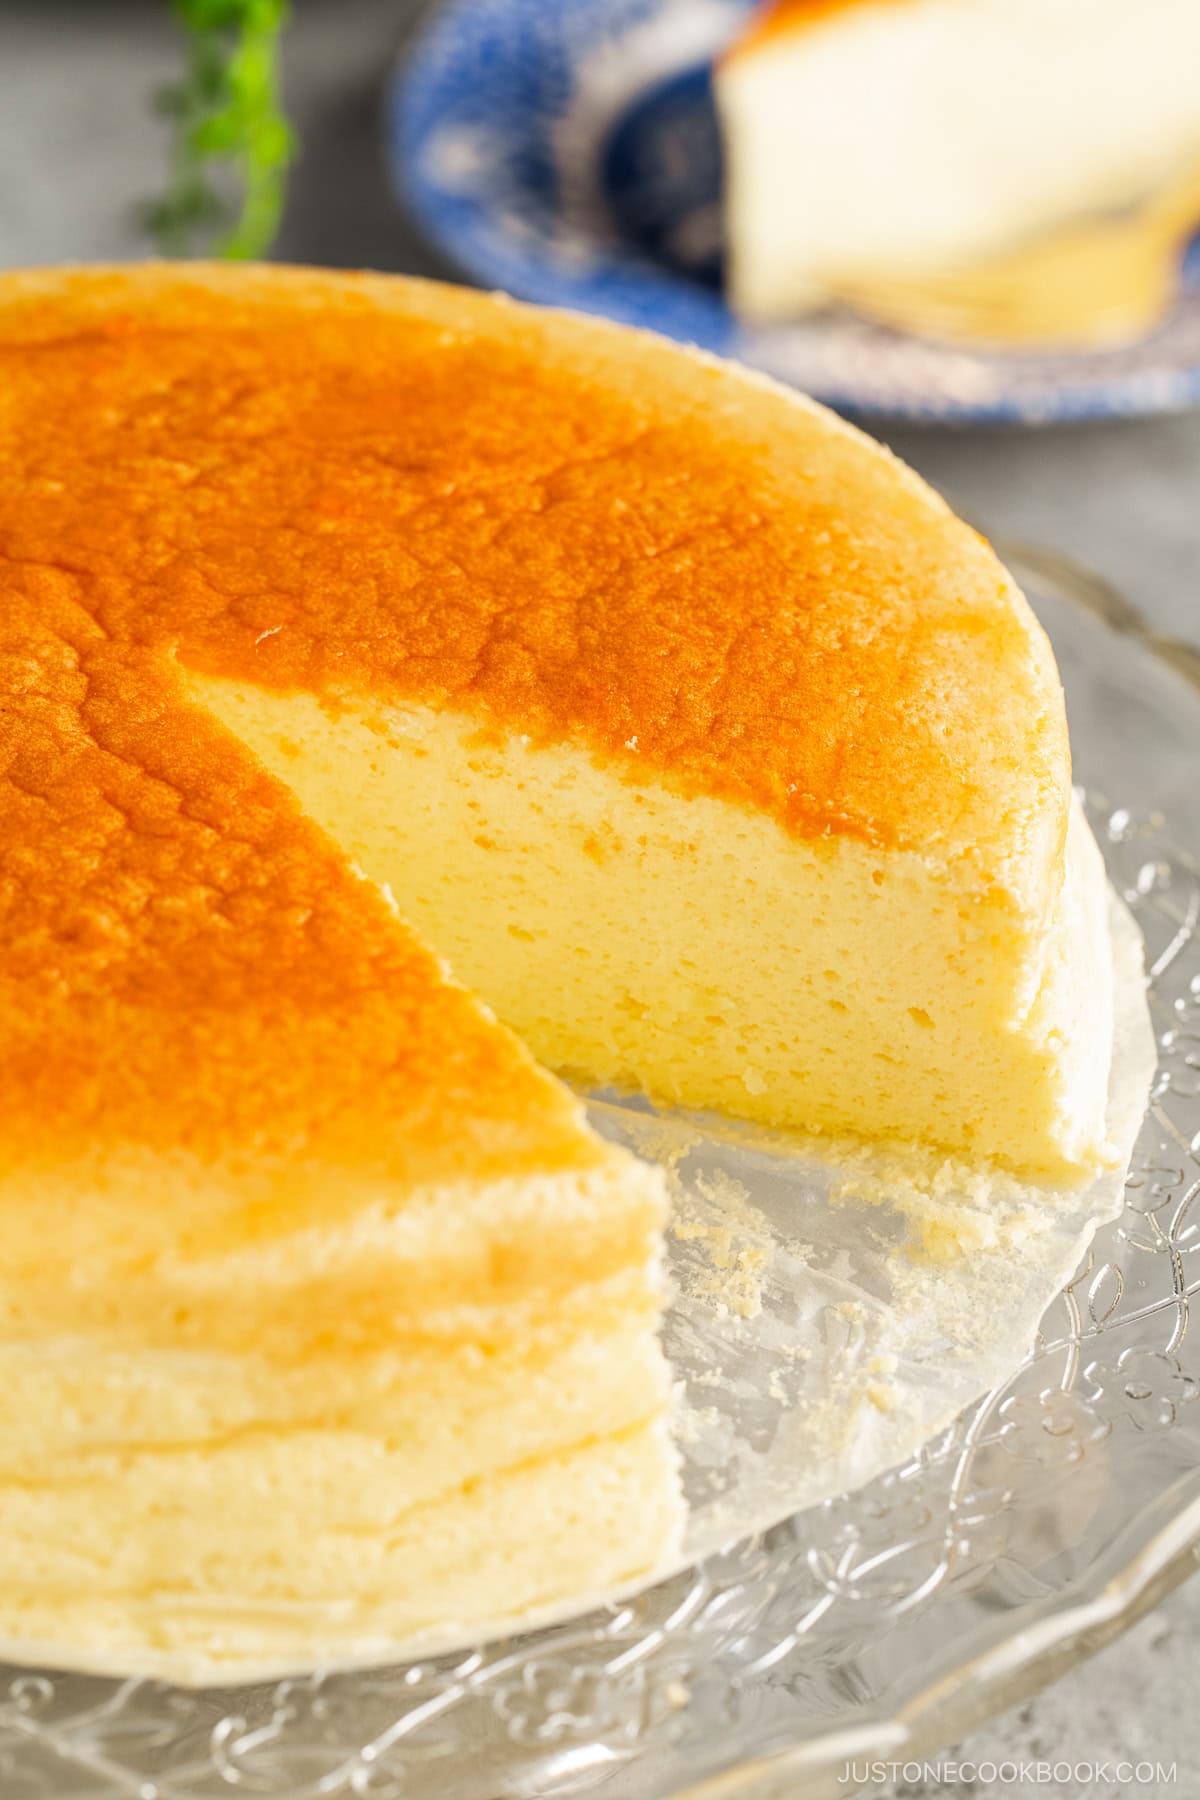
Japanese cheesecake, also known worldwide as Japanese cotton cheesecake or jiggly cake, was first created by pastry chef Yasui Juichi (安井寿一) at the Plaza Hotel in Osaka. To achieve the signature light and fluffy texture, his recipe incorporates whipped egg whites into the batter that’s baked in a water bath. In Japan, we call it soufflé cheesecake (スフレチーズケーキ).
Why You’ll Love This Recipe
- Incredible texture and taste. Combining elements of a rich, velvety custard and a pillowy, cottony sponge cake with a slightly tart flavor, this dessert hits all the right notes.
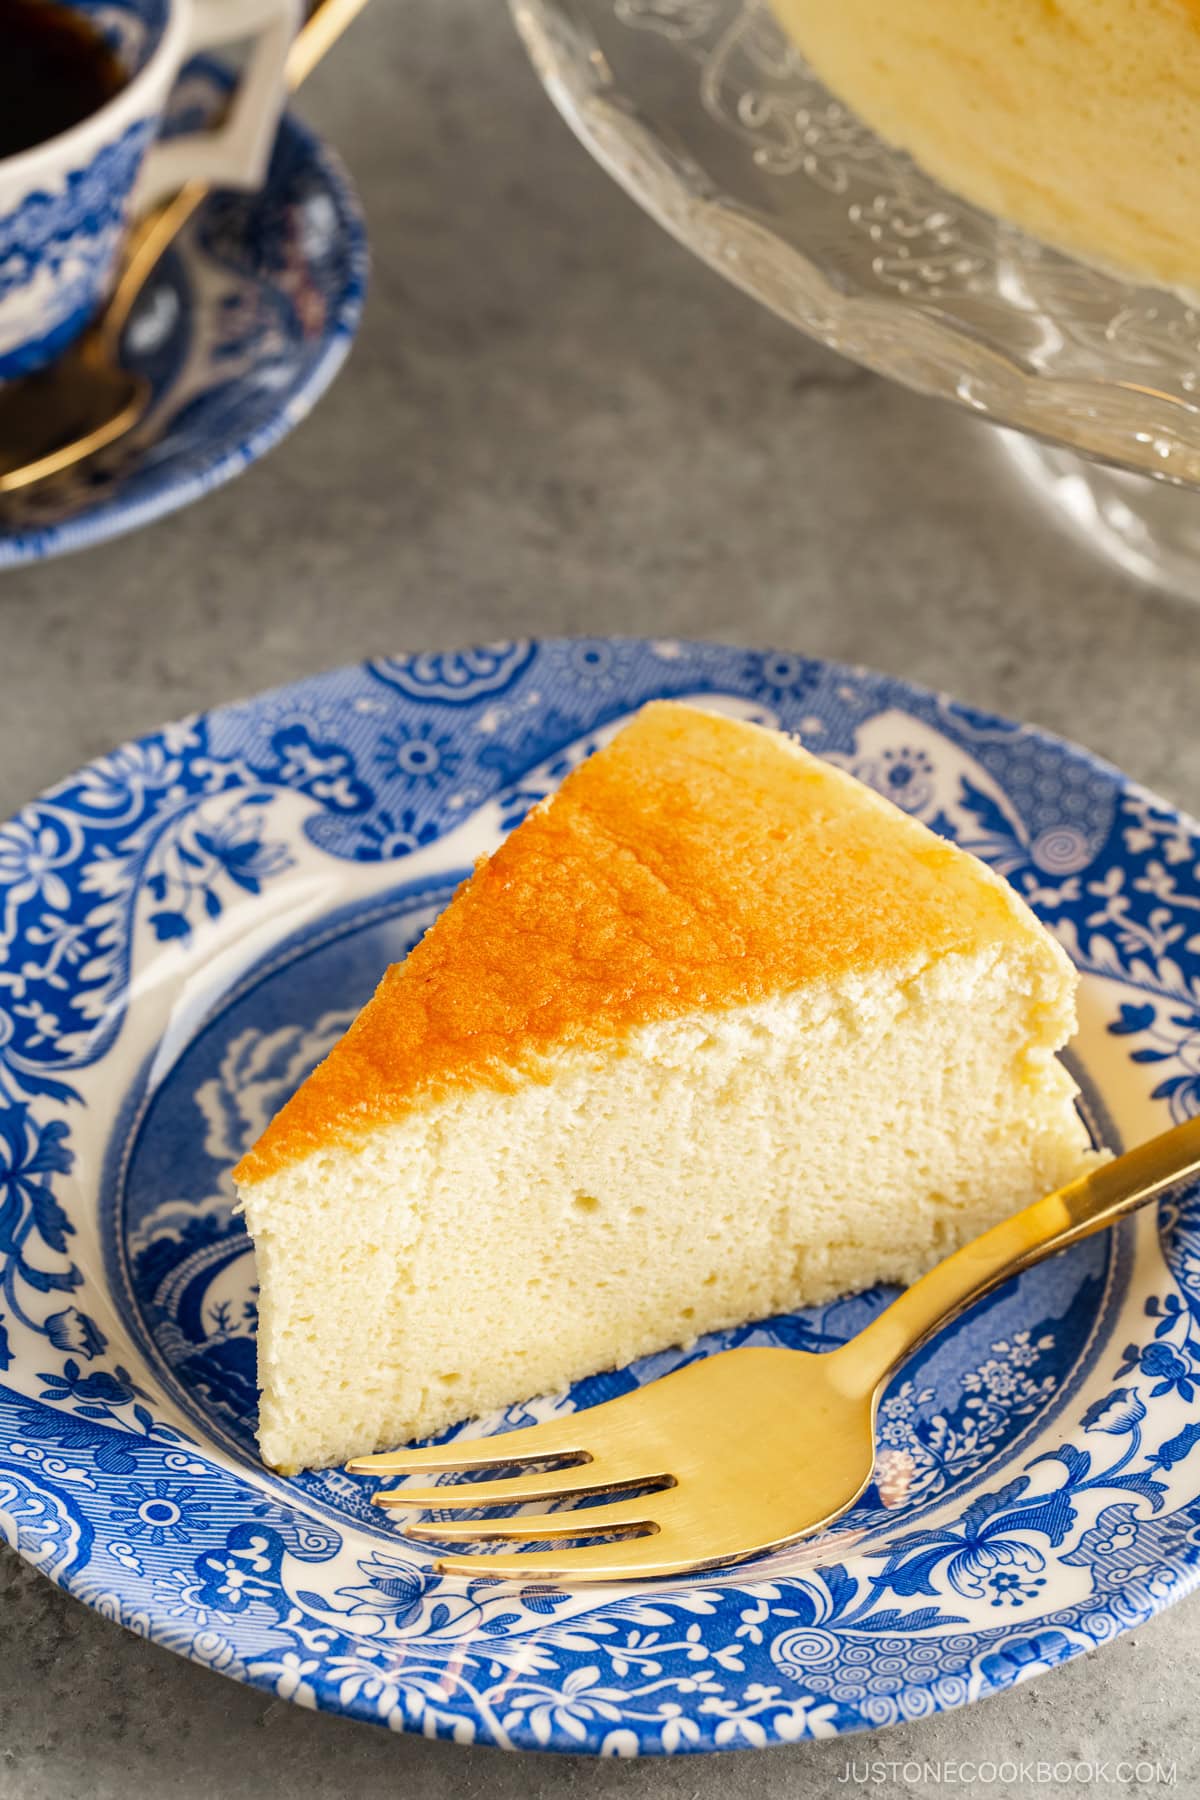
- It’s a fluffy and lightly sweet cheesecake that’s popular even among those who typically don’t enjoy regular cheesecake like sweet and heavy New York-style cheesecake. You might find yourself indulging in an extra slice!
- Detailed instructions to guarantee success. Many of my readers have successfully made this recipe. Be sure to read through all my tips below—you’re going to love the result!
Ingredients for Japanese Cheesecake
- Cream cheese
- Large eggs – separated; for the batter and the meringue
- Unsalted butter – divided; for the batter and greasing the pans
- Heavy (whipping) cream
- Granulated sugar – divided; for the batter and the meringue
- Cake flour
- Lemon zest + lemon juice
- Apricot jam
Find the printable recipe with measurements below.
Jump to RecipeSubstitutions
- Cake flour – Cake flour has lower protein content and less gluten than all-purpose flour. It gives delicate pastries a fine crumb and tender structure. Please do not substitute all-purpose flour, which will make the texture dense and tough. If you don’t have cake flour, you can make your own with all-purpose flour and cornstarch. See how in the recipe card below.
- Heavy (whipping) cream – Heavy cream or heavy whipping cream is the richest type of liquid cream with a fat content of at least 36%. You can also go light and use whole milk in this recipe.
- Cream cheese – For the best result, please use the full-fat type. I buy two 8-oz boxes of Philadelphia Original Cream Cheese and use one full box plus 2.5 oz from the second box. Please do not use the round container type or the reduced fat (lite) type. If you wish to lighten the recipe, you can substitute whole milk for the heavy cream.
Key Kitchen Tools
- 9 x 4-inch (23 x 10-cm) cake pan
- Parchment paper (and a 9-inch round parchment cake liner)
- Saucepan and large bowl (or a double boiler)
- Silicone spatula
- Fine-mesh strainer
- Large mixing bowl (for the batter)
- Stand mixer with whisk attachment (or an electric mixer)
- Stand mixer bowl or large mixing bowl (for the egg whites)
- Hand whisk
- Large baking sheet (for the bain-marie)
How to Make Japanese Cheesecake
Preparation
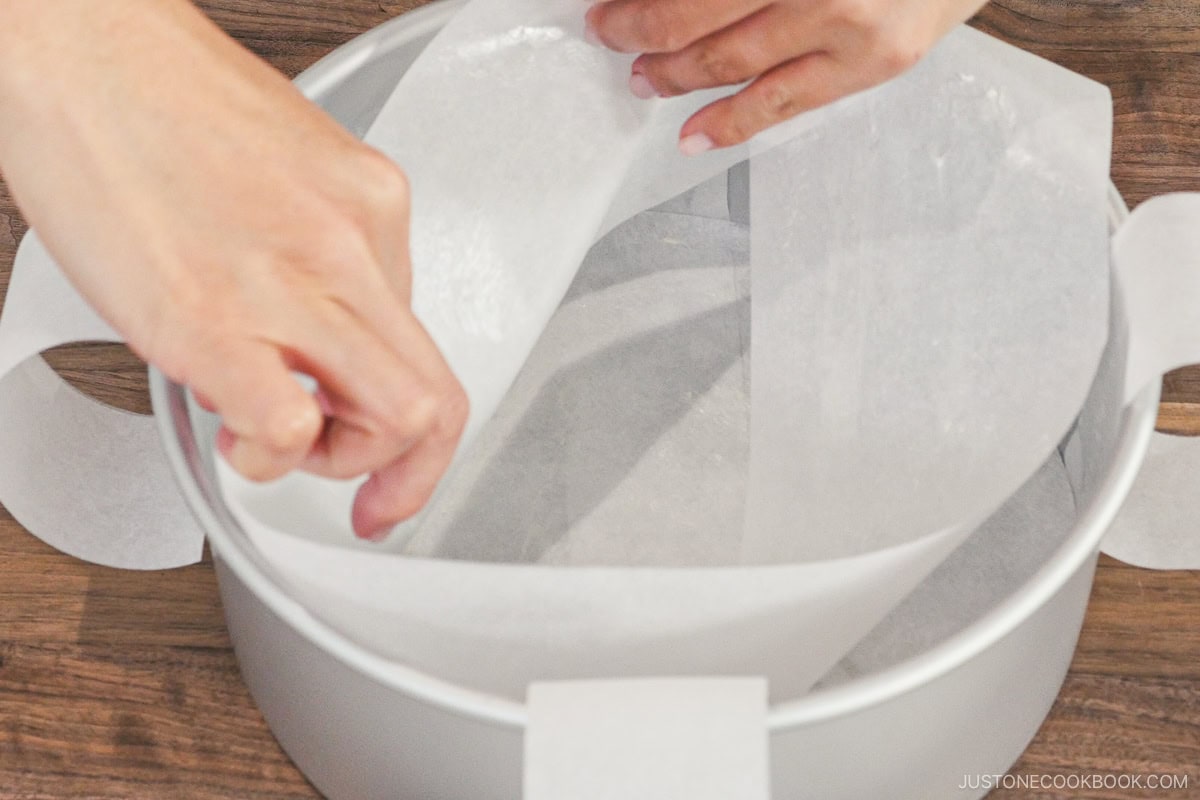
Step 1 – Line the pan, preheat the oven, and prepare the double boiler. Grease the cake pan and line it with parchment paper, including two crisscrossed straps you’ll use the lift out the cake. Turn on the oven to 350ºF (180ºC) to preheat. Meanwhile, bring a medium saucepan with 2 inches (5 cm) of water to a simmer.
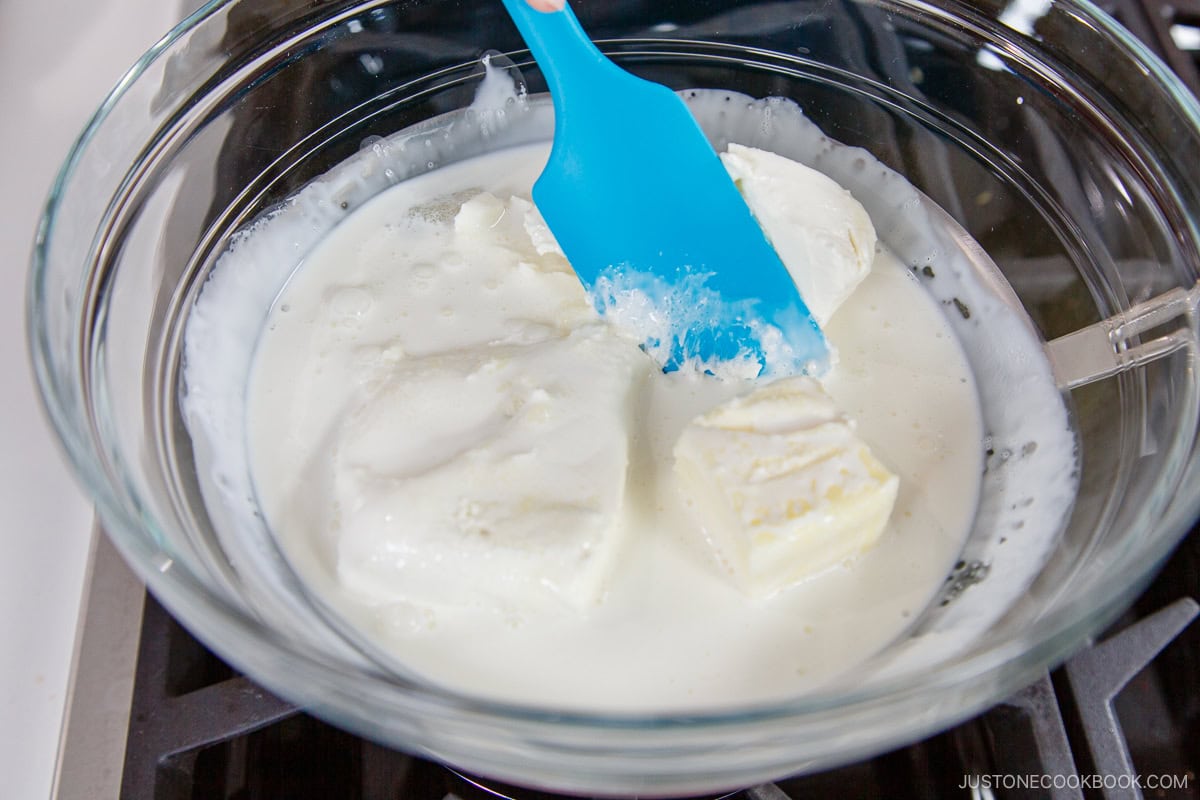
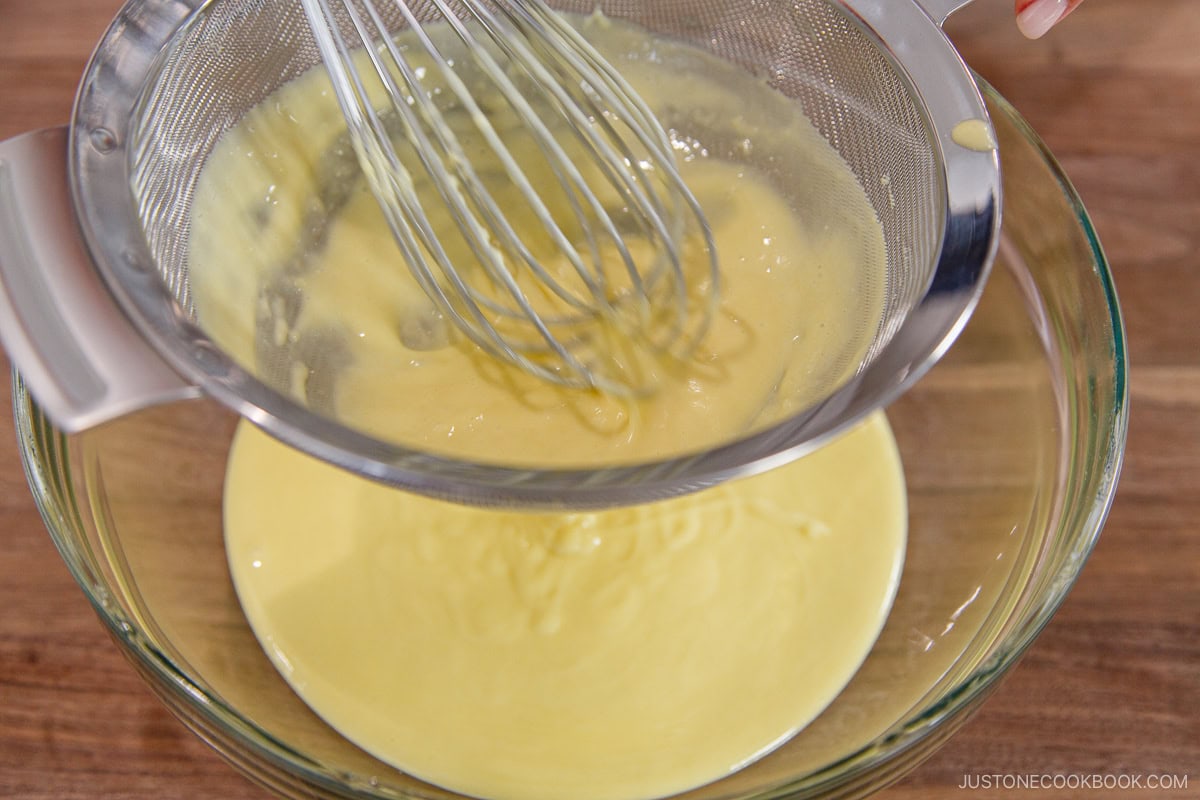
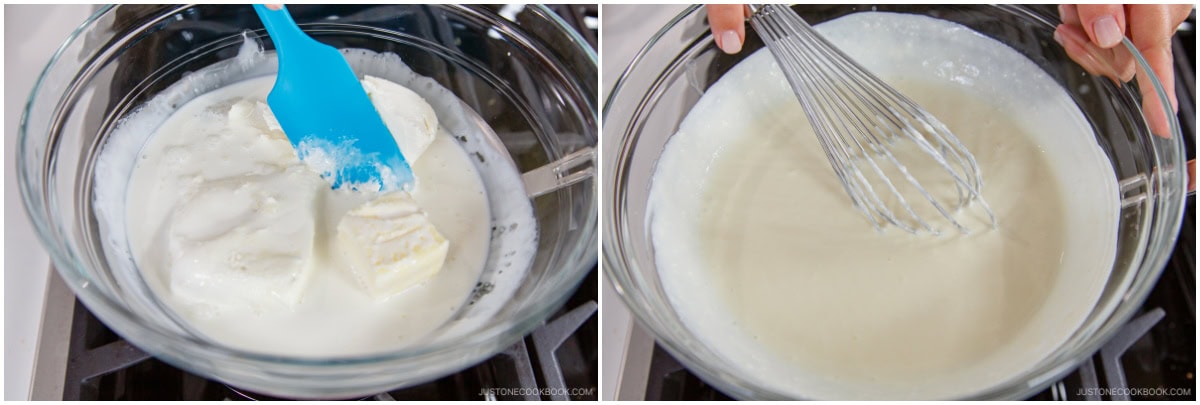
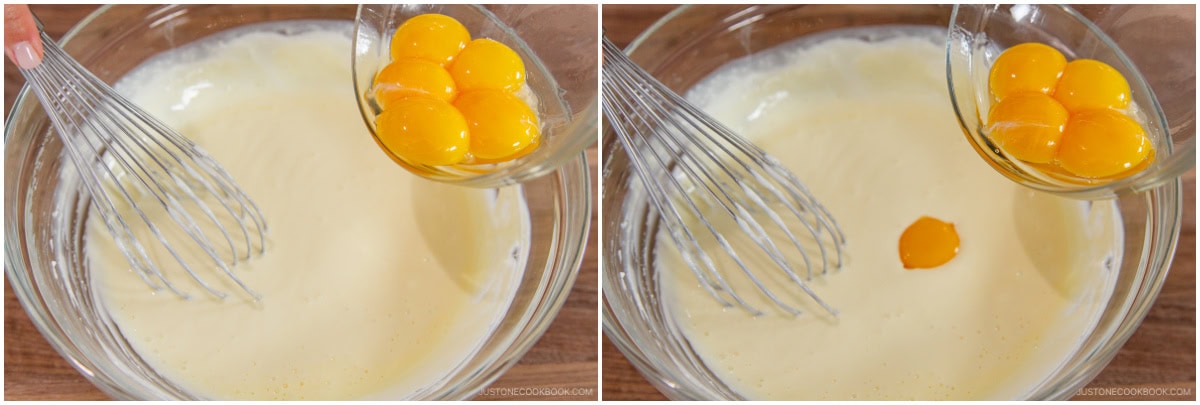
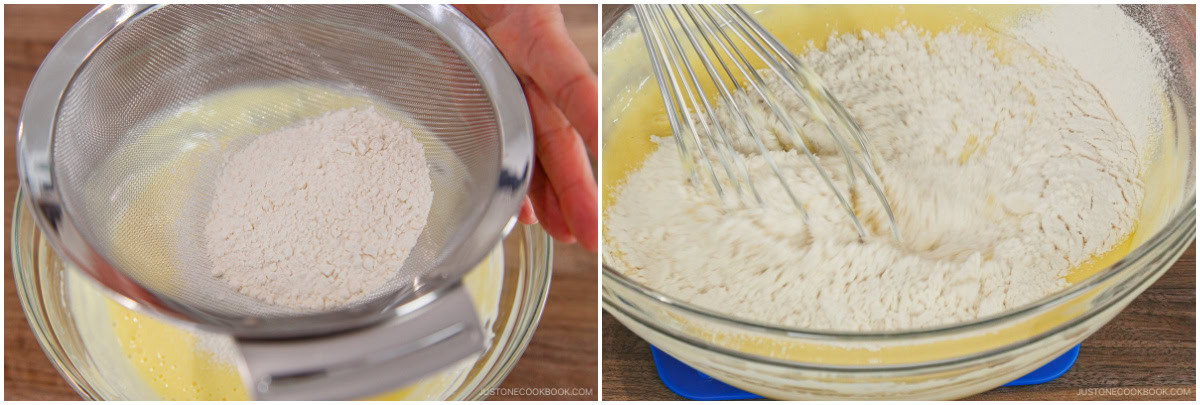
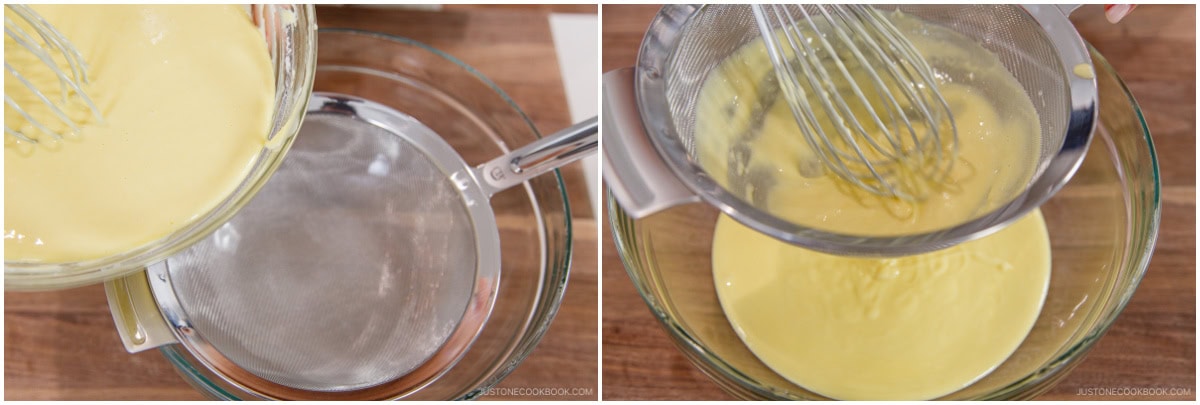
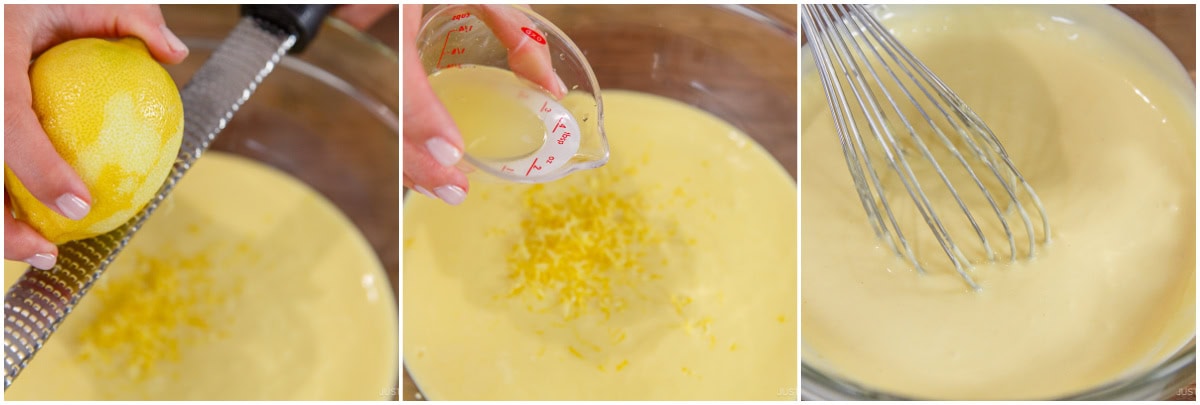
Step 2 – Make the cake batter. Combine the cream cheese, butter, heavy cream, and sugar in a large bowl resting over the simmering water. Mash until melted and blended, then remove from the heat. Whisk in the egg yolks and the sifted cake flour. Pass the batter through a fine-mesh strainer, then blend in the lemon zest and juice.
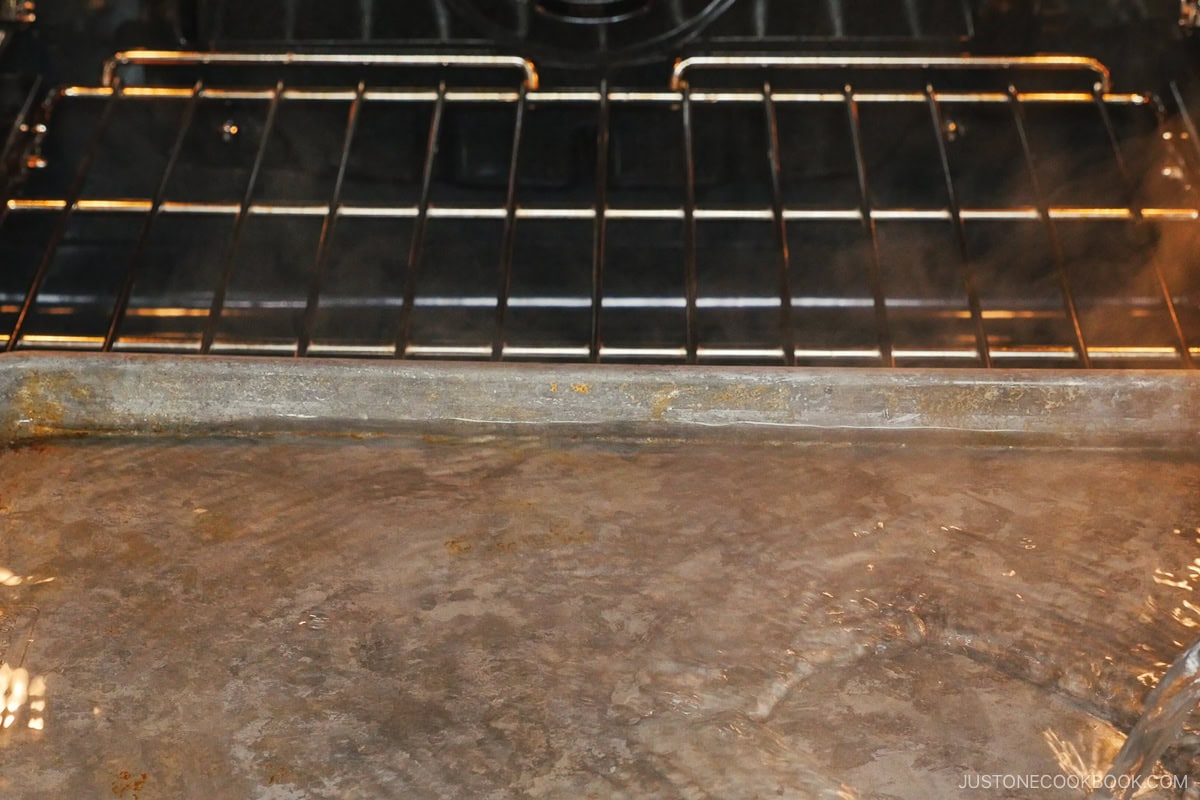
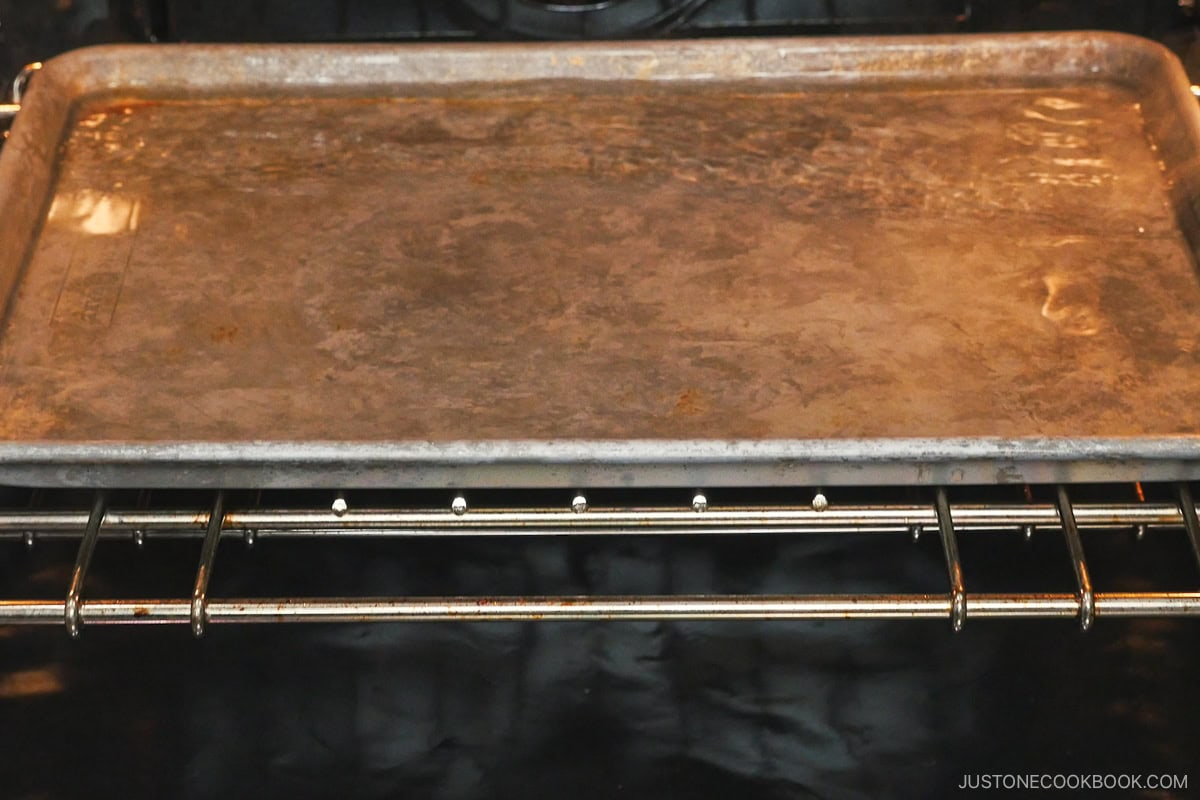
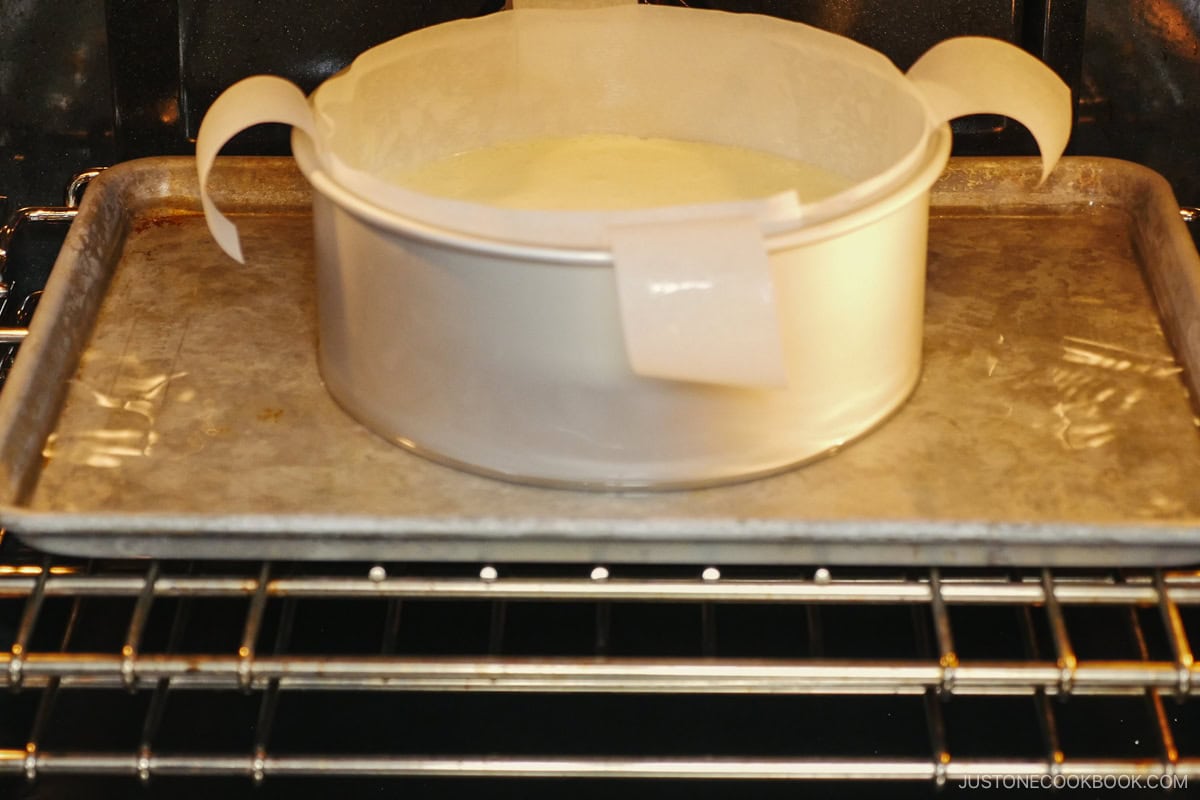
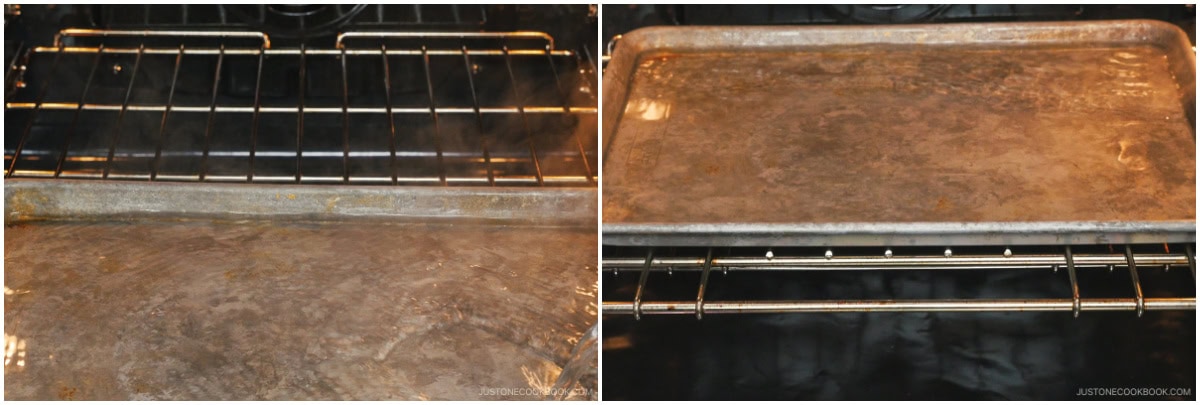
Step 3 – Set up the bain-marie. Put the baking sheet inside the preheating oven and pour in hot water until it is halfway up the sides or ½ inch deep. Close the oven door.
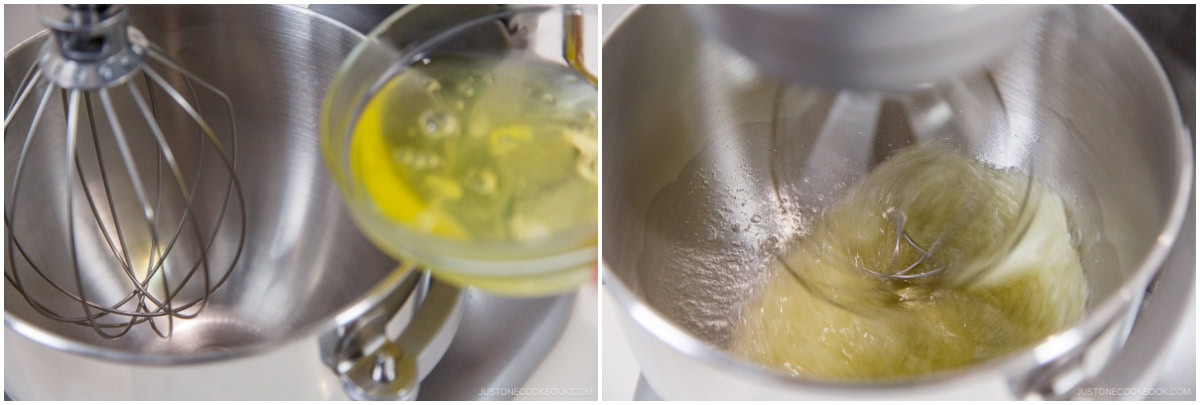
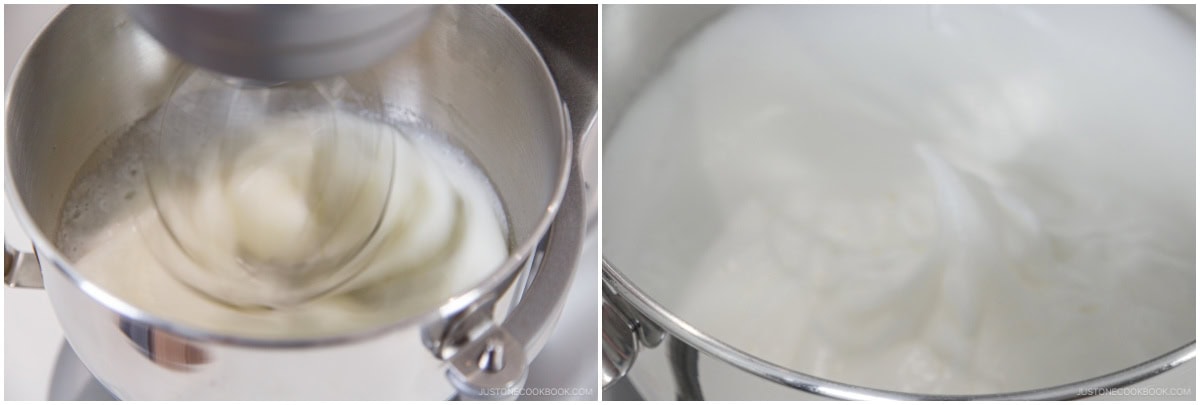
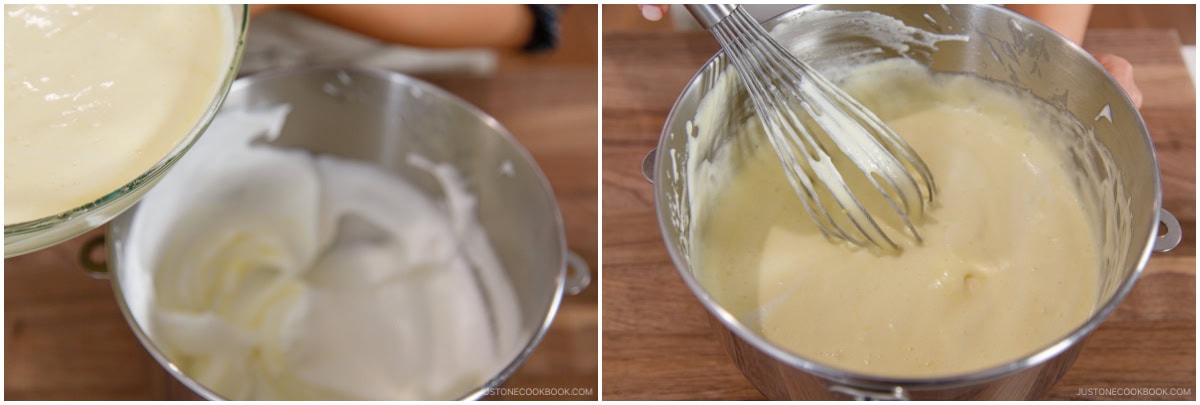
Step 4 – Beat and incorporate the egg whites. Whisk the chilled whites on medium speed until they become opaque and foamy. Slowly add the sugar, one-third at a time, then beat at high speed until you have firm peaks. Use a hand whisk to gently fold the meringue into the cream cheese mixture, one-third at a time, until incorporated.

Baking
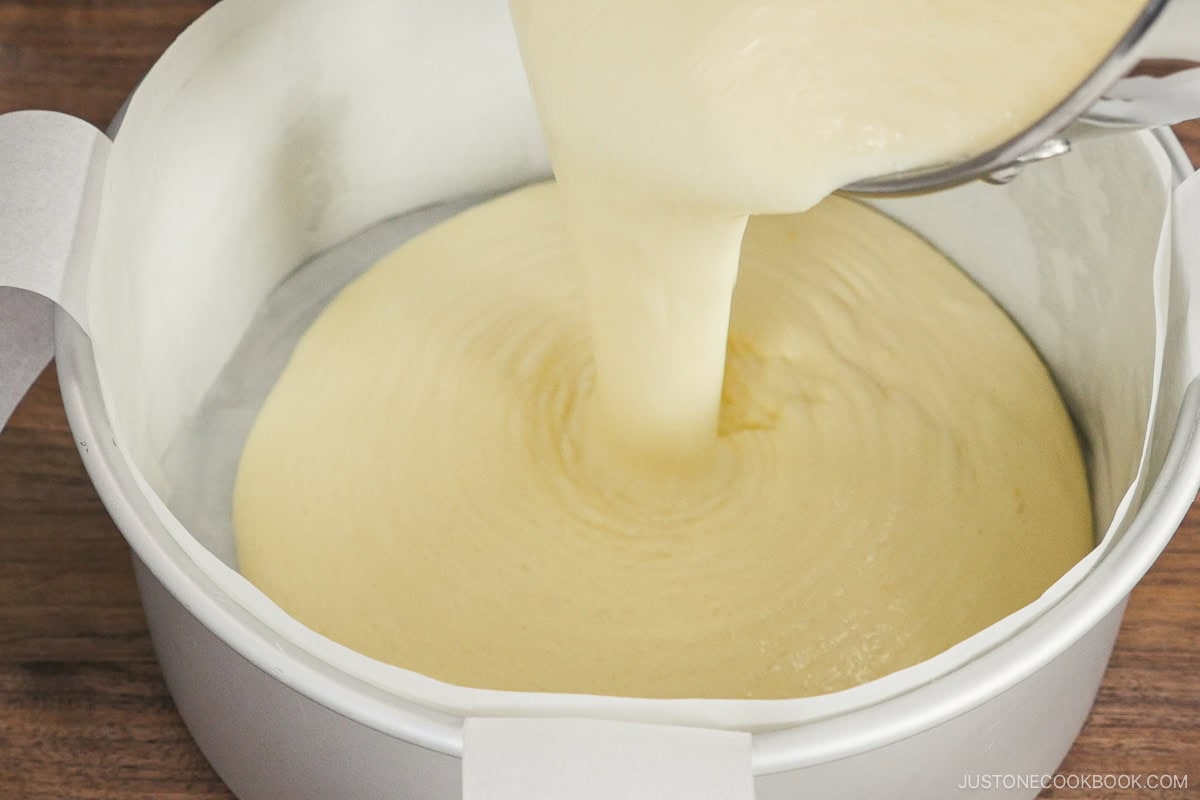
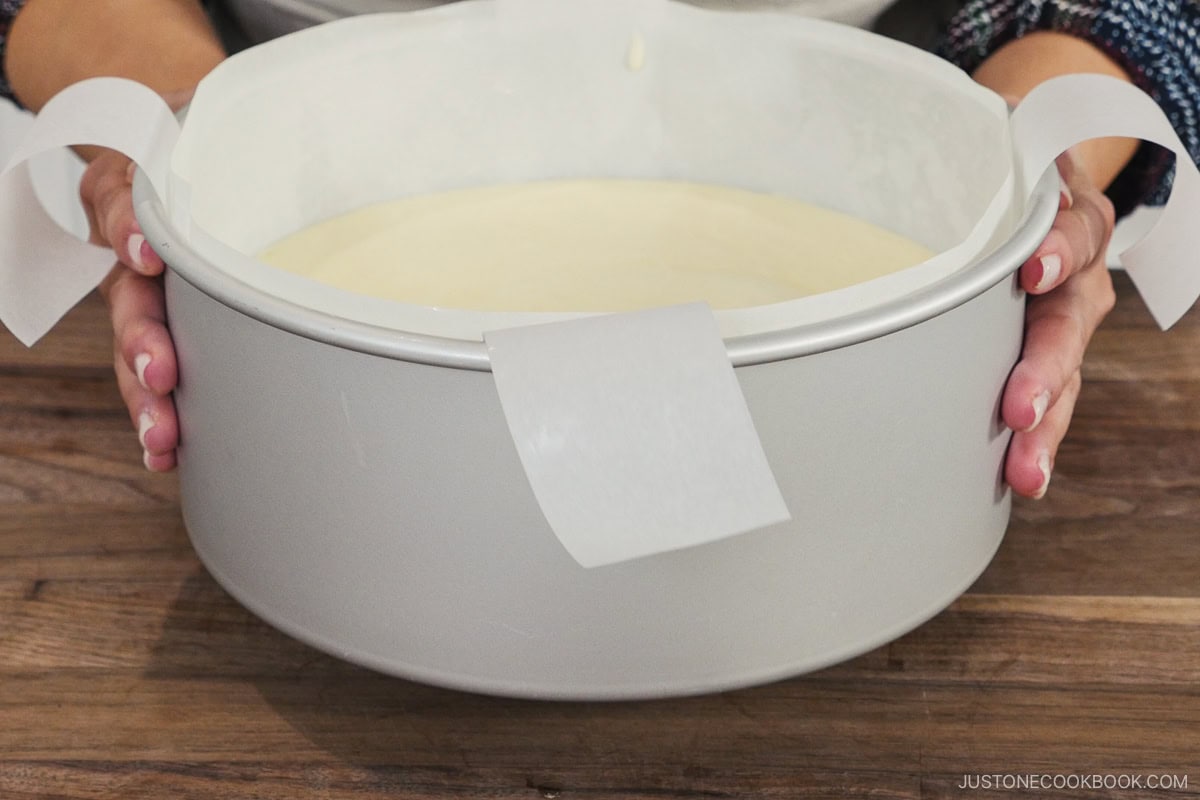
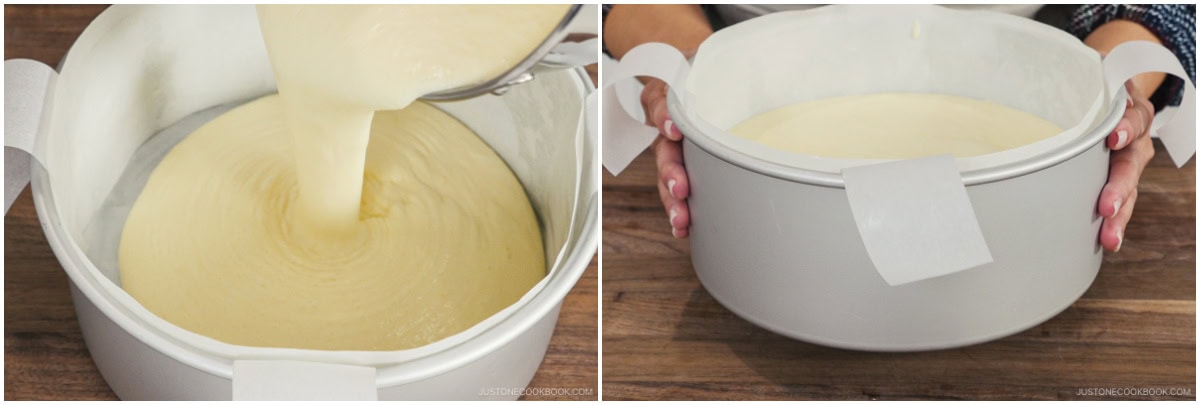
Step 5 – Pour the batter into the cake pan. Pour the batter into the cake pan in one go. Tap the pan a few times on the kitchen counter to release any air pockets in the batter.
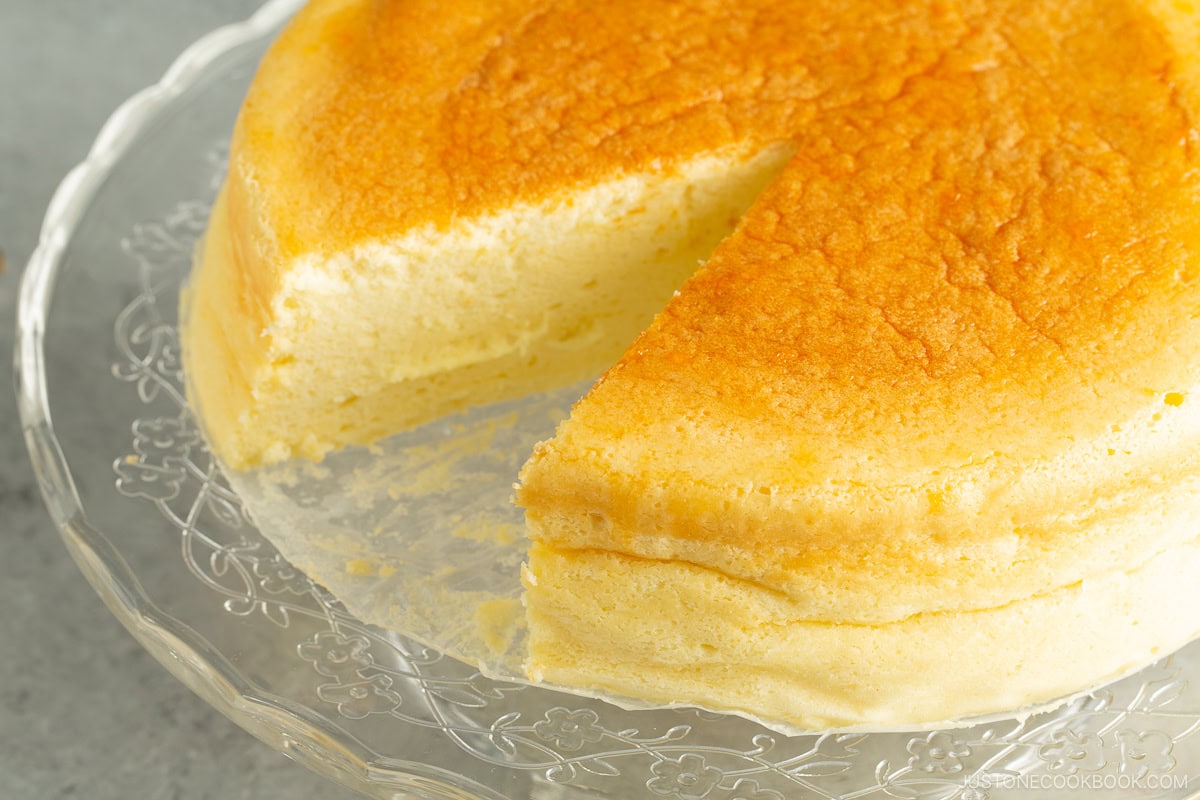
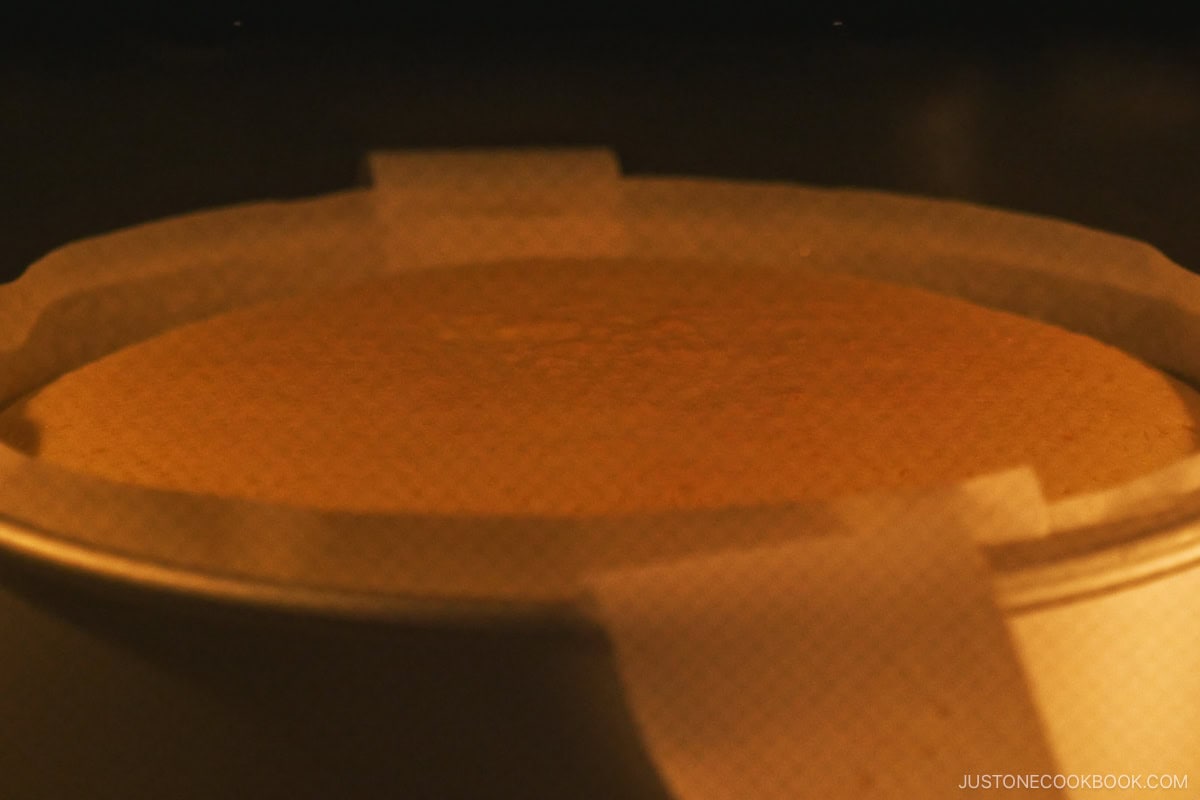
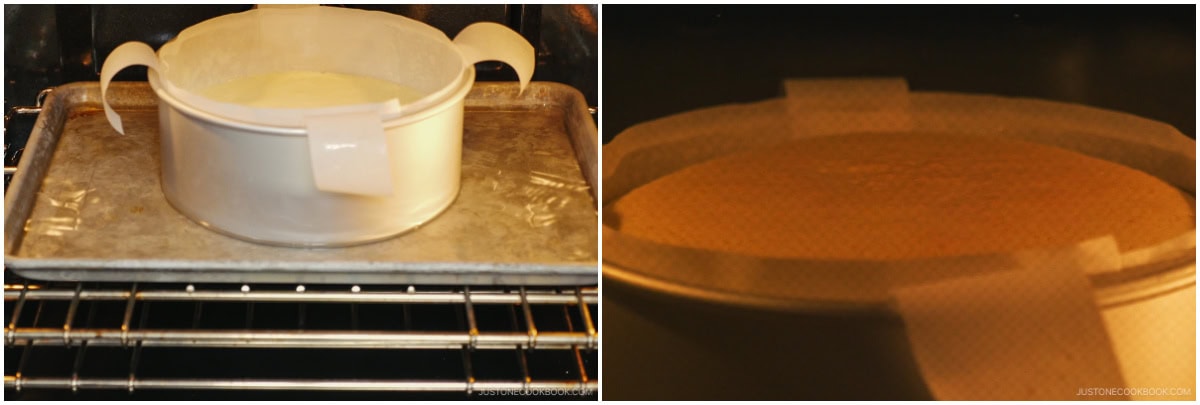
Step 6 – Bake the cheesecake in the water bath. Place the cake pan in the bain-marie. Reduce the oven temperature to 320ºF (160ºC) and bake for 70–75 minutes. Then, reduce the temperature to 300ºF (150ºC) and bake until the top is golden brown. The cake is done when an inserted skewer comes out without a wet batter.
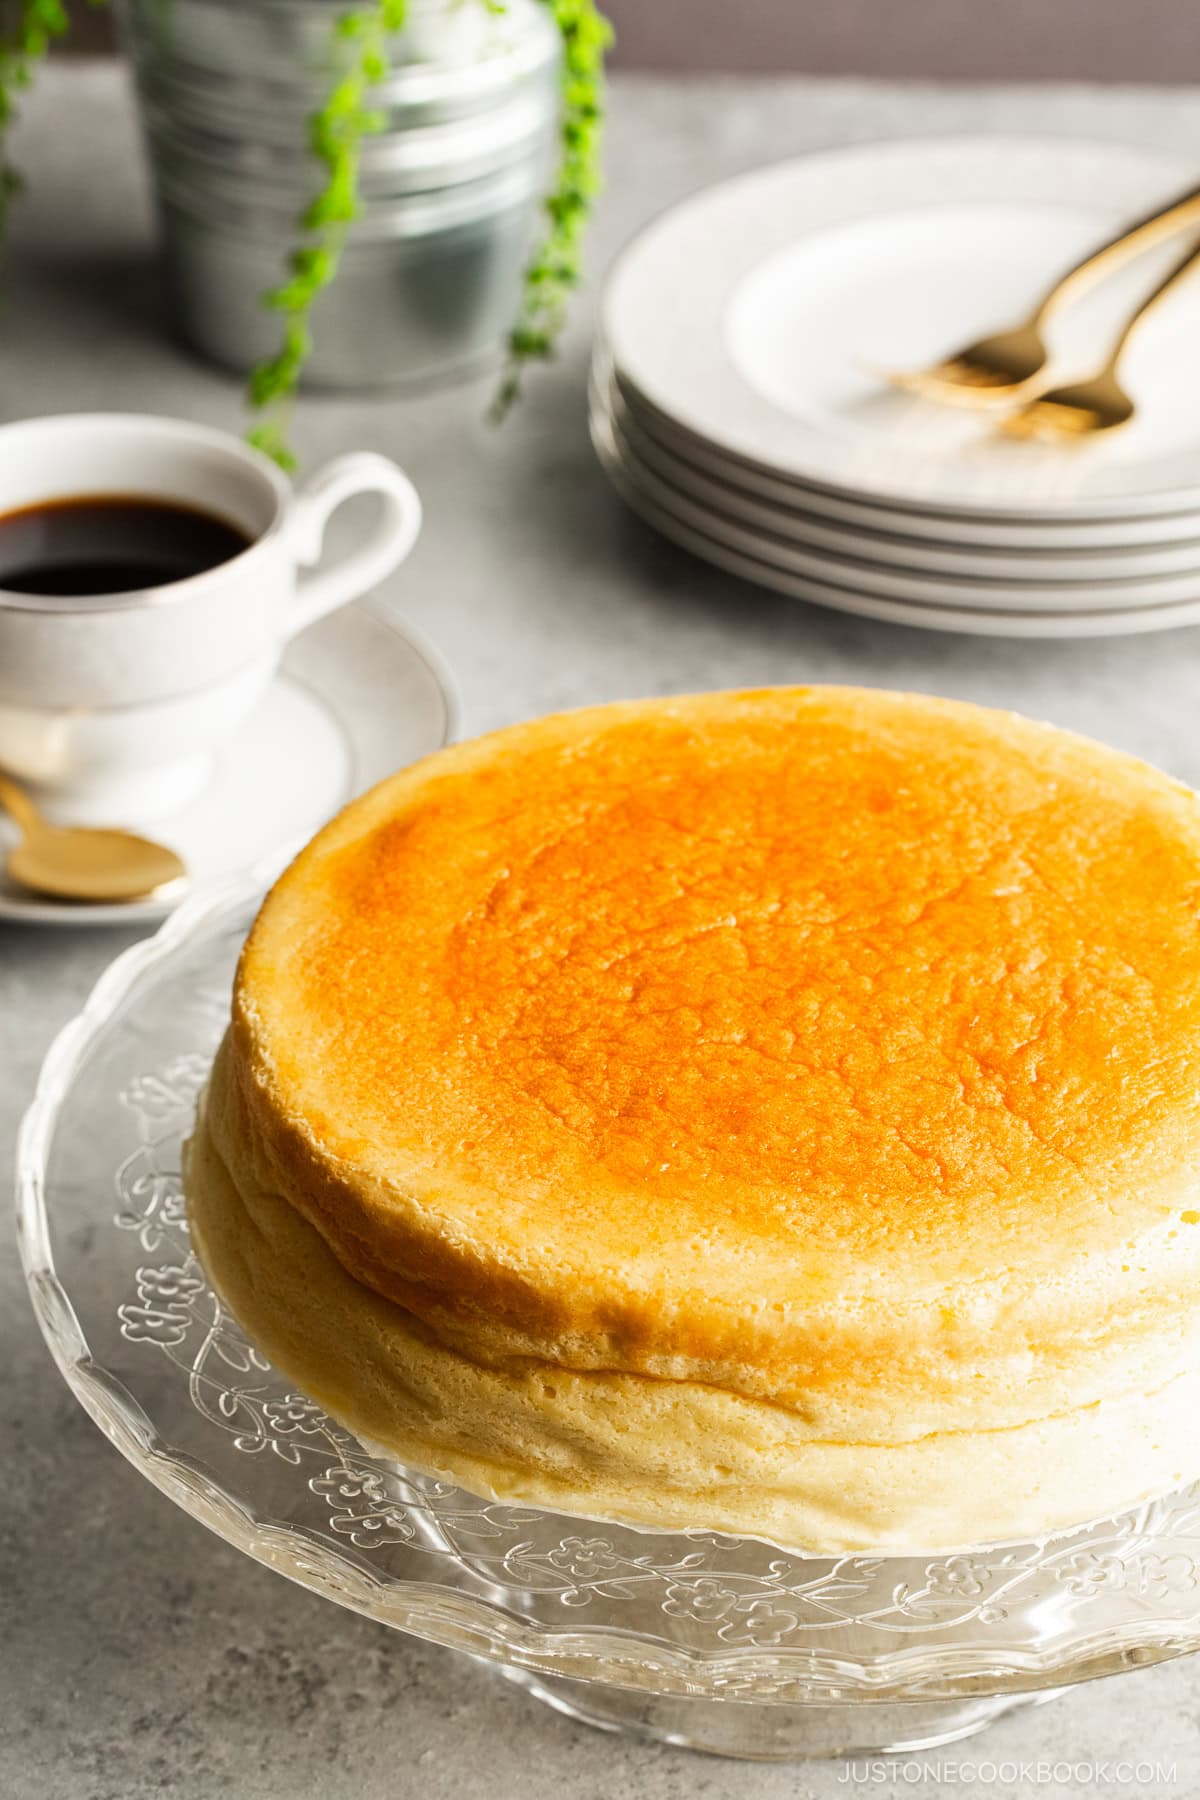
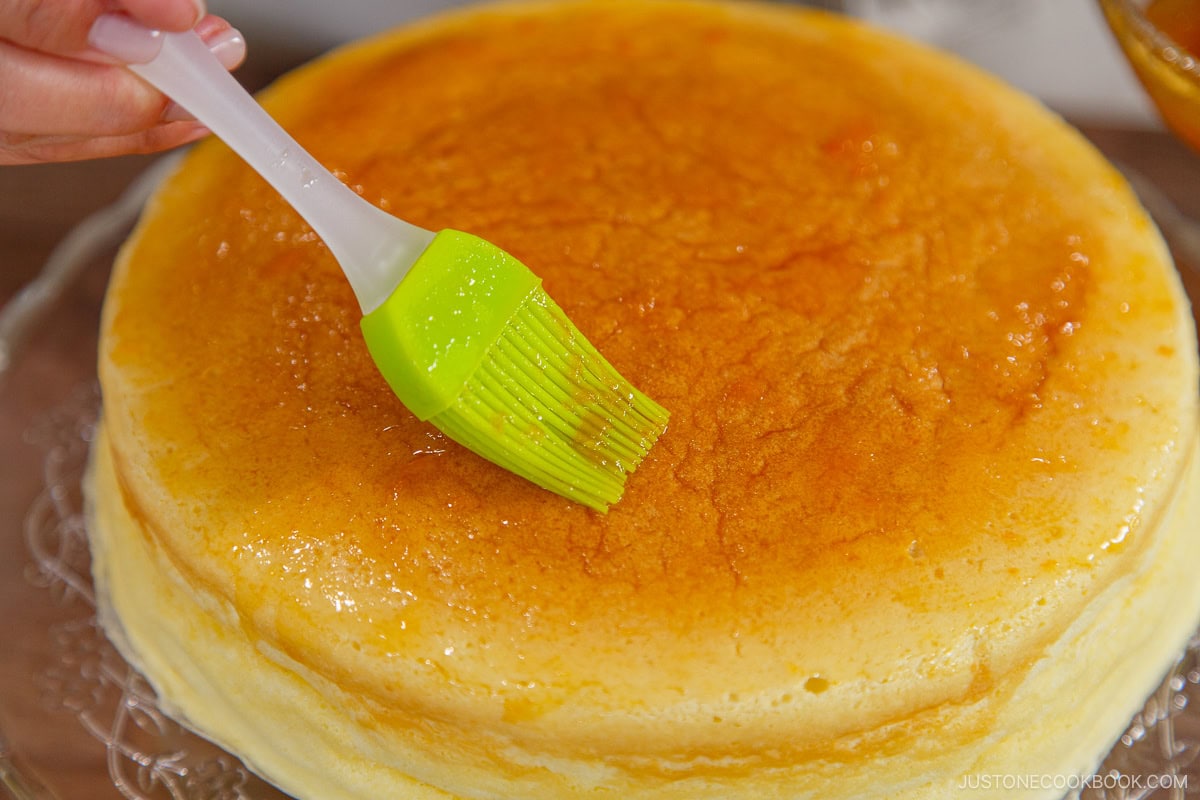
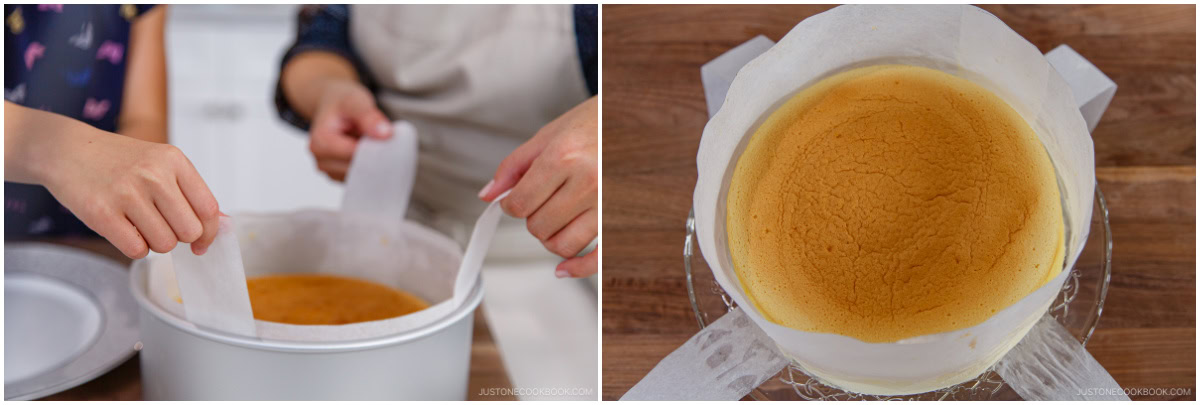
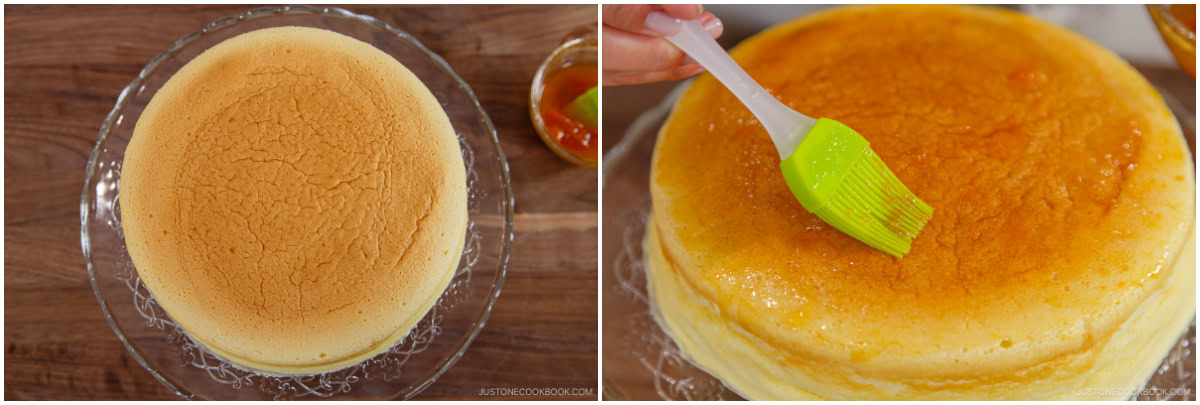
Step 7 – Cool in the oven, then at room temperature. Turn off the heat and leave the cake inside the oven with the door slightly ajar for 15–20 minutes. Remove the pan from the oven and lift out the cake with the two parchment paper straps. Brush the top with apricot jam glaze. Cool to room temperature for 1–2 hours.
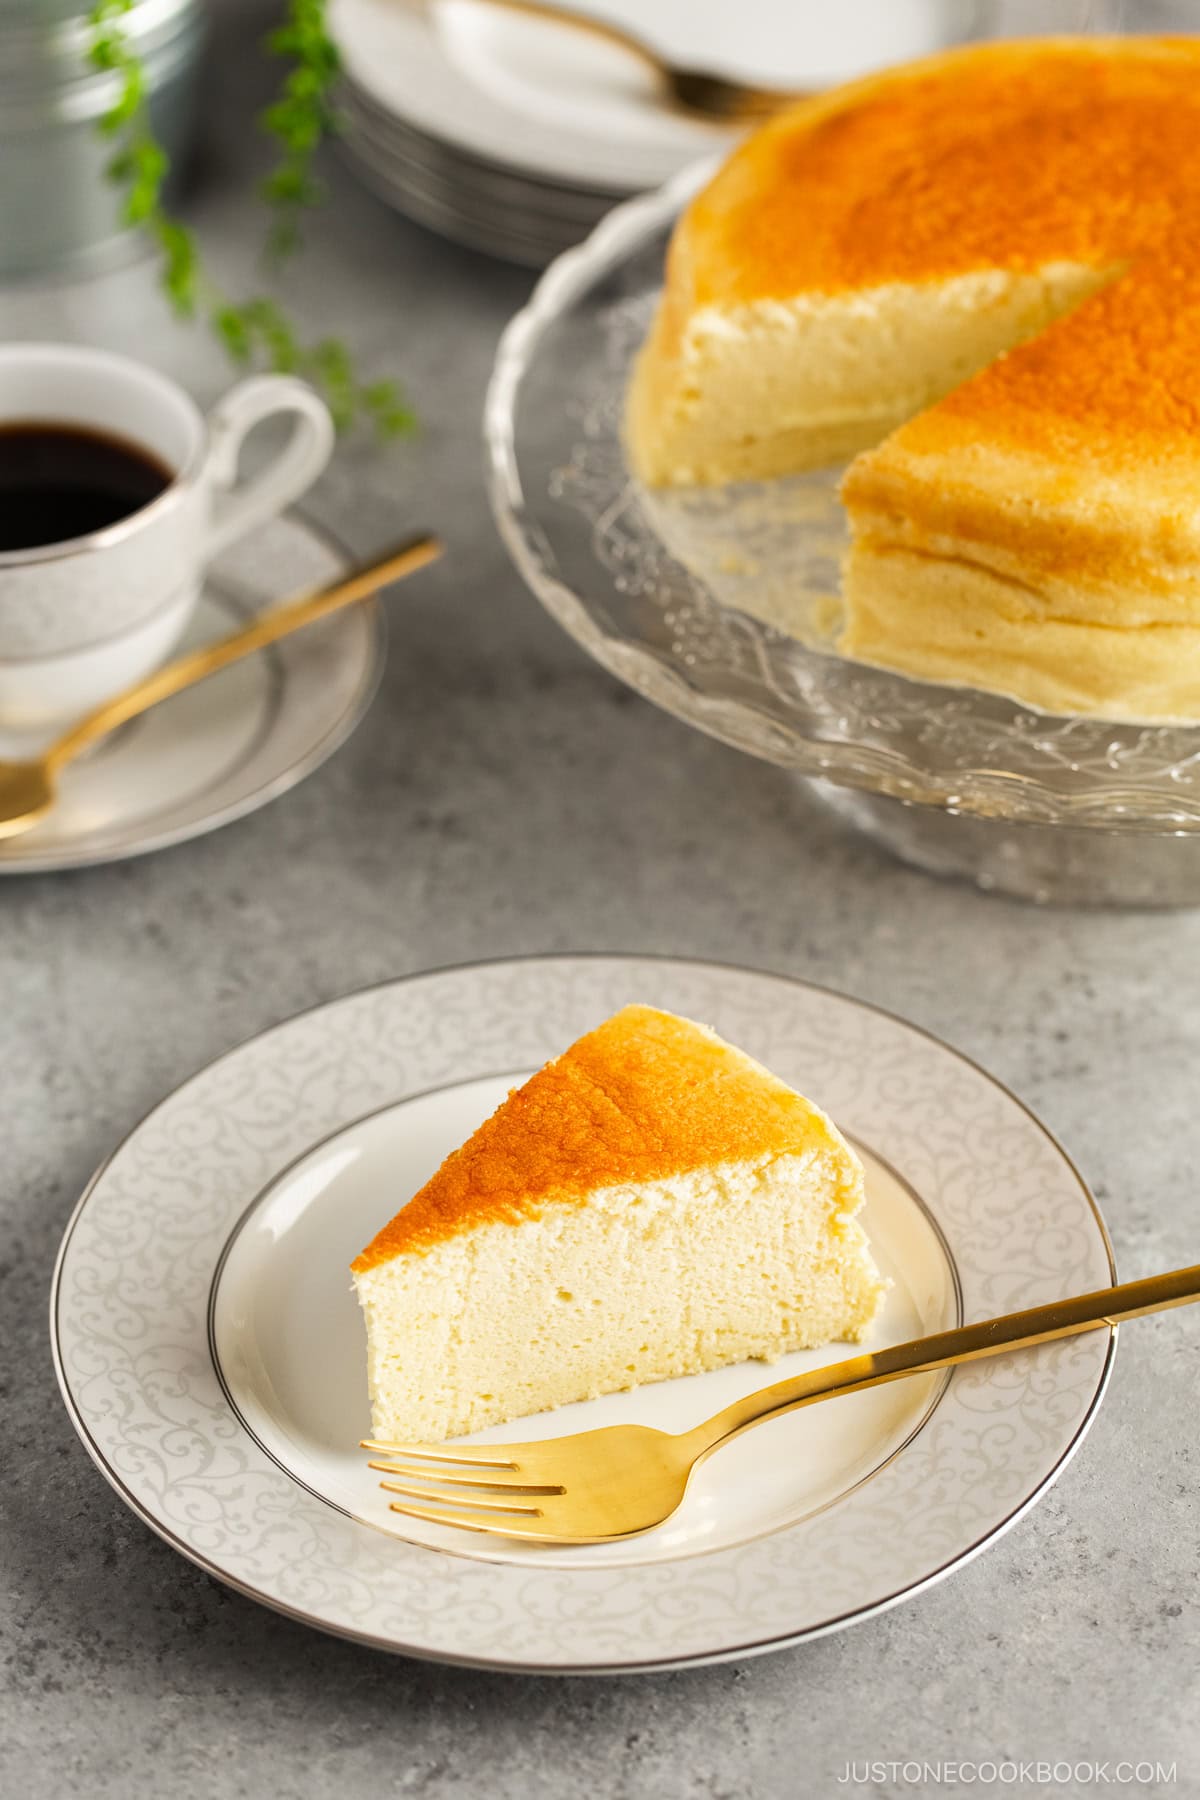
Step 8 – Chill in the refrigerator and serve. Finally, wrap it loosely with plastic wrap or cover it with a lid to protect it from drying out or absorbing fridge odors. Chill in the fridge for 4–6 hours (or overnight). Take out the cheesecake 10–15 minutes before serving. Slice with a sharp knife and enjoy!
Nami’s Recipe Tips
Prep Tips
- Measure all the ingredients before you begin – Timing is very important for this recipe, so you must prepare everything ahead of time. That way, the ingredients are ready to go when you need them. Any missteps can alter the batter and meringue quality.
- Weigh your flour – I highly encourage you to weigh your ingredients with a kitchen scale, using the recipe’s Metric button to convert the measurements to weights. If you don’t have a scale, you will need to fluff your flour with a spoon and sprinkle it into your measuring cup so you don’t scoop more than you need.
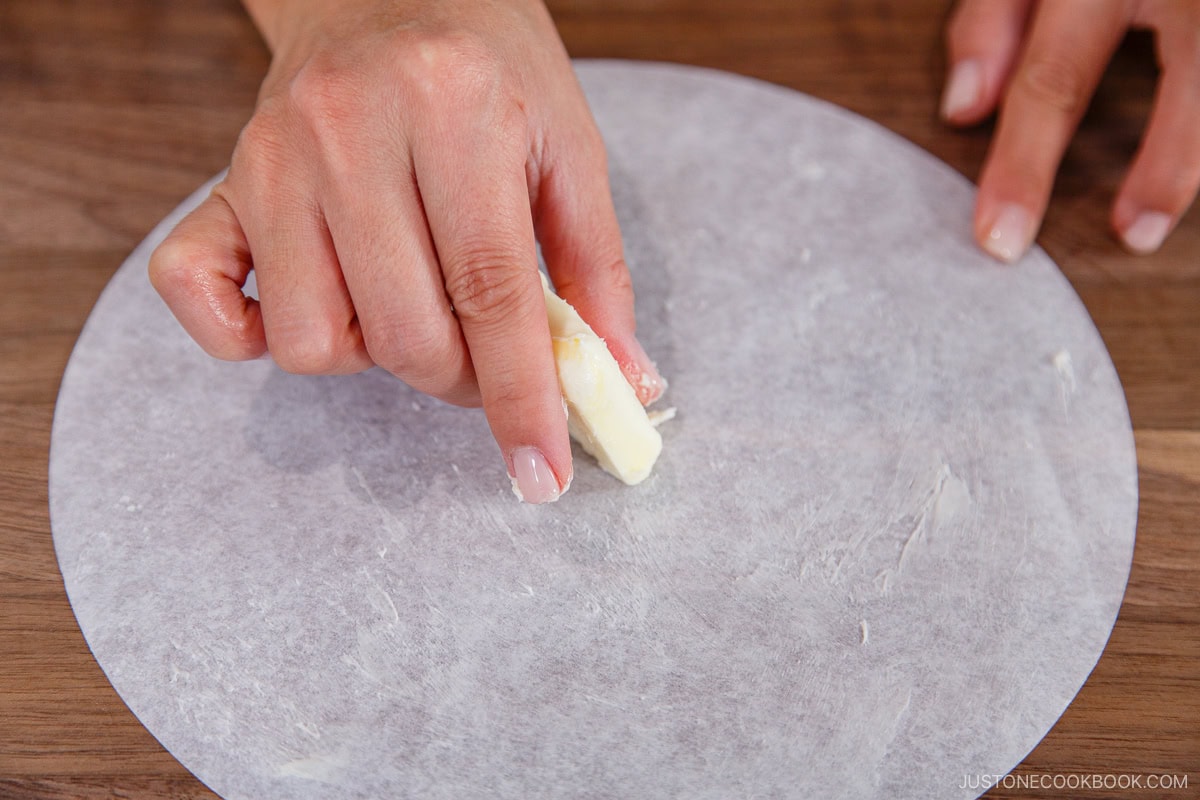
- Grease the pan and parchment paper – This helps the parchment paper stick to pan. You will also need to grease any part of the paper that will touch the batter. If the cake sticks to the paper while rising, it will pull on the cake and end up cracking it.
- Set up a double boiler – The steam from the simmering water will warm up the cream cheese, heavy cream, and egg yolks in the bowl so you don’t have to bring them to room temperature before mixing! I love this speedy method as I often forget to remove the ingredients from the refrigerator ahead of time.
Mixing Tips
- Use cold egg whites – In Japan, we use chilled egg whites for a refined texture. I notice that American recipes call for room temperature whites to achieve volume. Maybe we look at things differently? Some recipes call for cream of tartar, but I do not use it here because it is not a common product in Japan.
- Use a clean, dry, and cold mixing bowl – Make sure there is no oil or water in the bowl when you beat the egg whites. I avoid plastic bowls because even clean ones may hold oily residue that will keep the whites from whisking properly. Also, use a bowl that’s wide enough so the beaters don’t get buried in the meringue. Finally, I highly recommend chilling the bowl in the fridge until you need it.
- Beat the egg whites to firm peaks – This is the trickiest and most important part of making Japanese cheesecake. There are three stages of meringue—soft peaks, firm peaks, and stiff peaks. I aim for firm peaks where the meringue clings to the whisk when you turn it over and holds its shape fairly well, but the tip of the peak folds back on itself. Meringue adds small air pockets to the cake’s structure so it stays airy and fluffy.
- Fold in the meringue with a hand whisk – I learned that a whisk does a better job than a silicone spatula to gently fold the meringue into the cream cheese mixture. By not breaking the small air bubbles, the cake can rise higher without collapsing.
Baking Tips
- Bake in bain-marie – A bain-marie (ban mah-REE) is the French term for a water bath. The hot water creates a gentle and uniform heat around the cake and provides moisture inside the oven. We use this essential technique to cook delicate foods like soufflé and custards.
- Bake at two different oven temperatures – This is probably the second most important factor for a successful result. If the temperature is too high or the heat source is too close, the cake will rise too fast, the structure will break, and the cake will crack. I preheat the oven to 350ºF (180ºC), reduce to 320ºF (160ºC) when I start baking, then lower it further to 300ºF (150ºC) toward the end of baking.
Cooling/Chilling Tips
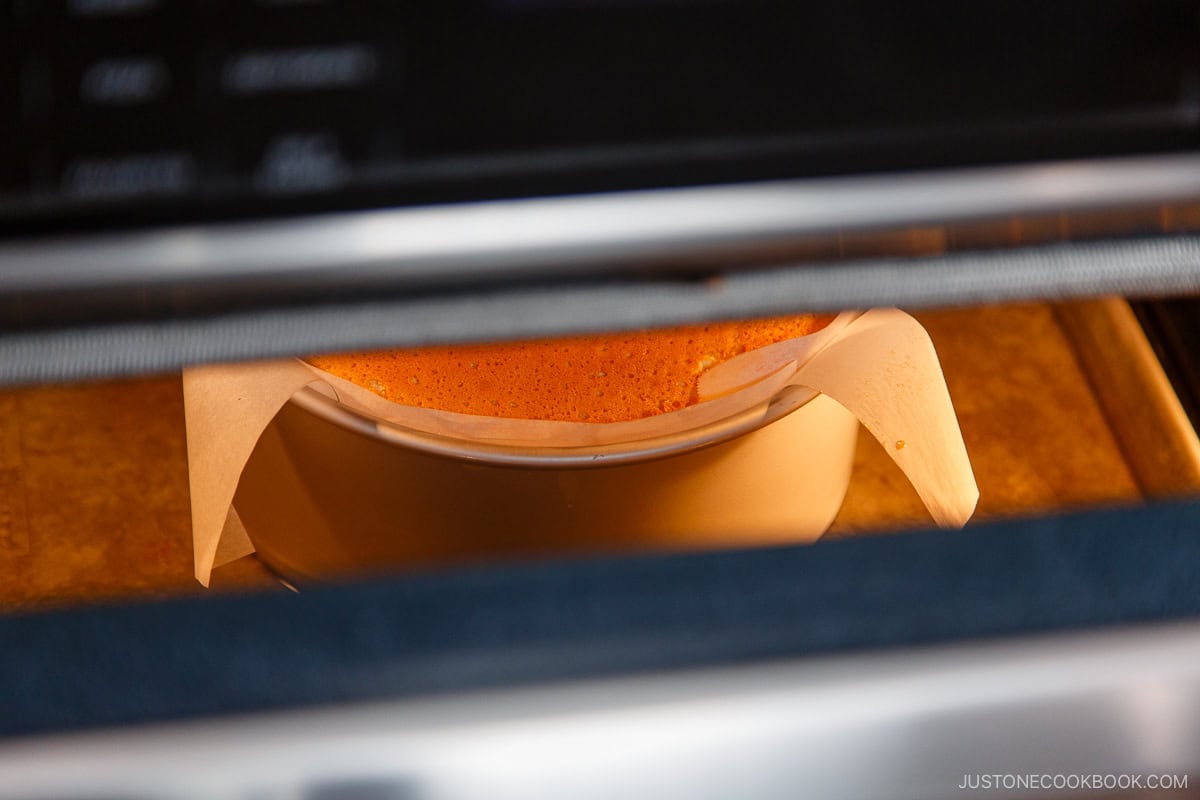
- Cool it slowly in the oven – Once it’s done, turn off the heat and leave the cake in the oven with the door ajar for a while. Gradual cooling prevents a sudden change in temperature that could shrink or collapse the cake. Eventually, you want the cake to come down to half the height, from 4 inches (tallest point) to 2 inches.
- Use parchment straps to unmold the cake – The crisscrossed straps makes it easy to lift the cheesecake from the pan. It’s easiest if you have a second pair of hands to help; my daughter often assists me. With this easy method, I never worry that the jiggly soufflé cake will collapse.
- Cool to room temperature, then chill overnight – Cooling the cake first helps prevent condensation from forming in the refrigerator. To develop the perfect balance of flavors and the famously airy and creamy texture, I highly recommend chilling the cake in the fridge for 4–6 hours or overnight loosely wrapped in plastic or covered with a lid to protect it from drying out or absorbing odors.
Serving Tips
- Remove from the fridge 10–15 minutes before serving – Cold cheesecake is dense, and if you prefer a softer texture, this allows the flavors to mellow and the texture to become even fluffier.
- Warm up a sharp knife before each slice – Dip a clean, sharp knife in warm water and wipe it clean between slices to ensure neat and tidy cuts, as soufflé cheesecake can be quite delicate.
Variations and Customizations
You can make Japanese cheesecake in different flavors! Here, I suggest a few classic and elegant variations that would add a distinctly Japanese taste to your sweet creation.
- Matcha Soufflé Cheesecake: Add matcha powder to the batter, dust the top with additional green tea powder, and serve with sweet red bean paste and whipped cream.
- Yuzu Soufflé Cheesecake: Add yuzu juice and zest to the batter for a citrus aroma and tang, and serve with yuzu marmalade and candied yuzu peel.
- Hojicha Soufflé Cheesecake: Add hojicha powder to the batter for a nutty, roasted flavor, dust the top with more hojicha powder, and serve with whipped cream.
- Black Sesame Soufflé Cheesecake: Mix black sesame paste (kuro nerigoma) into the batter for a nutty and slightly savory flavor and garnish with whipped cream and toasted black sesame seeds.
What to Serve with Japanese Cheesecake
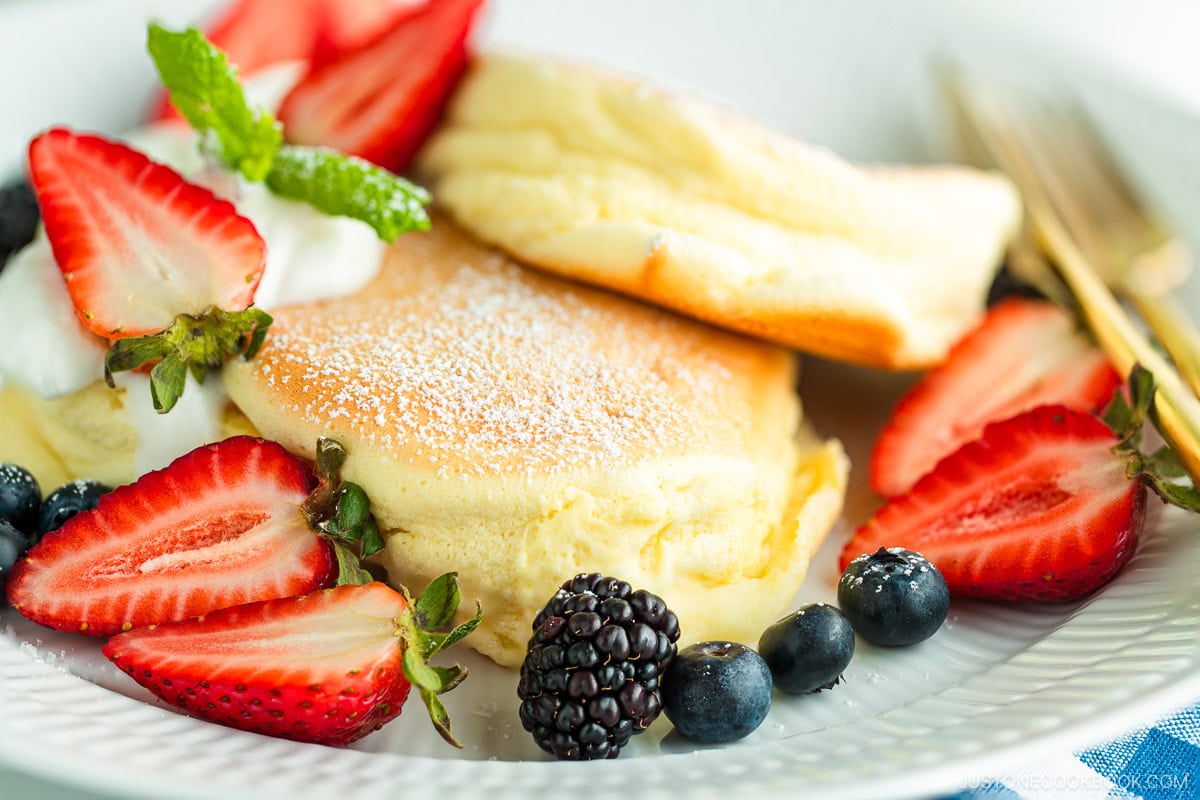
This soufflé cheesecake is delicious served with berries on the side and other toppings. Here are my suggestions for foods to pair with this heavenly dessert.
- With a sauce – Strawberry Sauce (Strawberry Compote) goes so well with this cheesecake.
- With fruit preserves or curd – Try it with a dollop of lemon curd or Yuzu Marmalade.
- With fresh fruit and whipped cream – The classic combination! See how I make fresh whipped cream in my Japanese Strawberry Shortcake recipe.
- With a hot or iced beverage – I love serving Japanese iced coffee or Royal Milk Tea with this dessert.
Storage Tips
To store: You can store the cheesecake in the refrigerator for up to 3–4 days or in the freezer for 3–4 weeks. Thaw the cake overnight in the refrigerator.
FAQs
What is Japanese cheesecake and why is it so jiggly?
Japanese cheesecake, also called soufflé cheesecake, is a light and airy cake made by folding whipped egg whites into a cream cheese batter and baking it in a water bath. This technique creates a soft, cottony texture and the famous jiggle that made the dessert popular worldwide.
What is Japanese cheesecake made of?
Japanese cheesecake is made with cream cheese, eggs, butter, heavy cream, sugar, cake flour, lemon zest and juice, and apricot jam for the glaze. The egg whites are whipped into a meringue and folded into the batter, giving the cake its fluffy, cloud-like texture.
Why is my Japanese cheesecake flat or collapsed?
A flat cheesecake usually means the egg whites were underbeaten or overbeaten, or the cake cooled too quickly. The meringue must reach firm peaks and be folded gently into the batter. After baking, the cake should cool slowly in the oven to prevent shrinking or collapse.
How do you bake Japanese cheesecake so it stays fluffy?
Japanese cheesecake is baked in a bain-marie, or water bath, at two temperatures for gentle, even heat. This prevents cracking and helps the cake rise slowly. After baking, it cools gradually in the oven before chilling, which keeps the texture light, airy, and creamy.
More Japanese Dessert Recipes You’ll Love
If you love this cheesecake recipe, you’re in for a treat with these other irresistible Japanese desserts:
I’d love to hear how yours turned out! 💛 Please leave a star rating and comment below to share your experience. Your feedback not only supports Just One Cookbook but also helps other home cooks discover recipes they can trust.
Japanese Cheesecake
Ingredients
- 10.6 oz cream cheese (full fat; see end Notes)
- 200 ml heavy (whipping) cream (¾ cup + 4 tsp; or use whole milk)
- 6 large eggs (50 g w/o shell) (10.6 oz, 300 g w/o shells)
- 4 Tbsp unsalted butter (plus 1 Tbsp to grease the pan and parchment paper)
- 4½ Tbsp sugar (for the cream cheese mixture)
- ½ cup sugar (for the egg whites)
- ⅔ cup cake flour (weigh for accuracy; click the Metric button above for weights; or learn how to measure flour with a measuring cup; you can make homemade cake flour)
- ½ large lemon (for the zest + 2 Tbsp juice)
For the glaze
- 2 Tbsp apricot jam
- 2 tsp hot water
Instructions
Before You Start
- Please note that this recipe requires a cooling time of 1–2 hours and a chilling time of at least 4–6 hours (or overnight) to achieve the perfect texture and balanced flavor. I encourage you to read the blog post for more detailed information about this recipe.Weigh your ingredients with a kitchen scale for best results. Click the Metric button above for weights. If you don't have a scale, here's how to measure flour with a measuring cup so you don't scoop too much: Fluff the flour with a spoon, sprinkle it into the measuring cup, and level it off.
To Prepare the Cake Pan
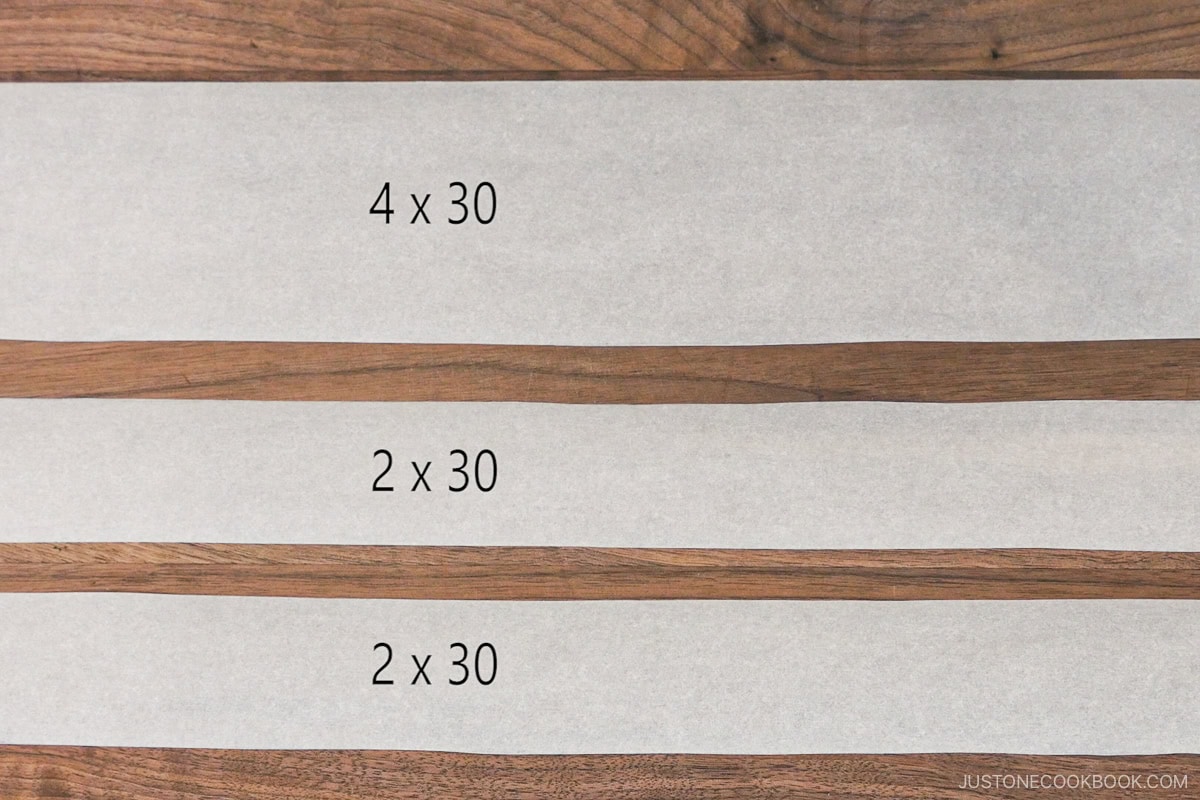
- Use a 9-inch (23-cm) x 4 inch (10 cm) cake pan. Cut one circle of parchment paper 9 inches (23 cm) in diameter (or use a 9-inch round parchment cake liner) and one rectangular strip 4 x 30 inches (10 x 76 cm). Cut two straps 2 x 30 inches (5 x 76 cm) each to use to lift the baked cake from the pan.
- Use 1 Tbsp unsalted butter to grease the cake pan and one side of the parchment paper circle and strip. You don‘t need to use all the butter.
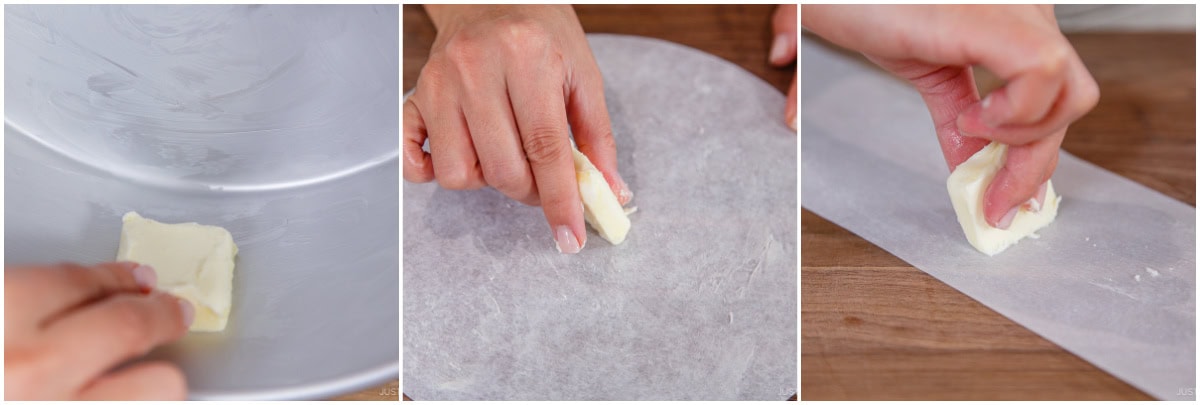
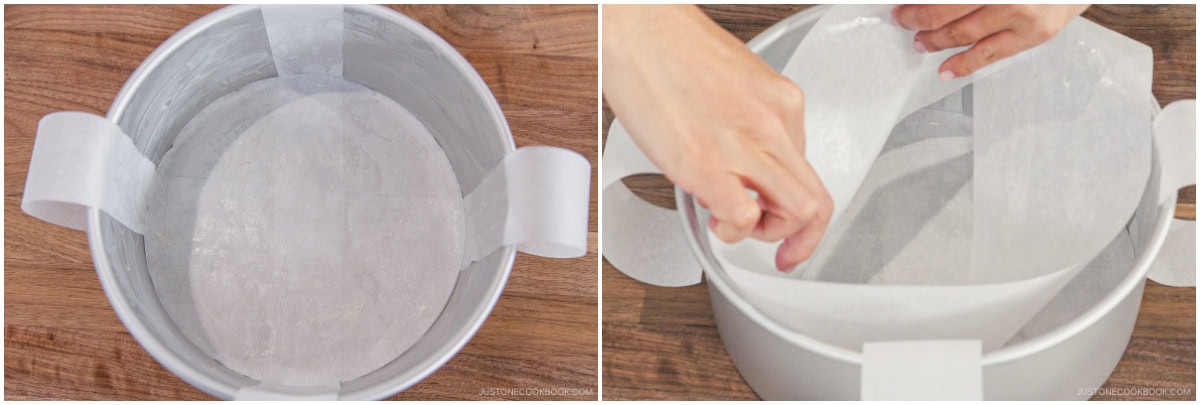
- Crisscross the two straps on the bottom of the pan to form an “X" and let the excess hang over the edges. Line the paper circle on the bottom and the strip on the sides, keeping the greased side touching the pan.
To Preheat the Oven and Prepare a Double Boiler
- Preheat the oven to 350ºF (180ºC). For a convection oven, reduce the temperature by 25ºF (15ºC). Note: You will be baking at 320ºF (160ºC), but we’ll preheat a bit higher because your oven will lose heat when you open it to place the cheesecake inside.
- Set a medium saucepan with 2 inches (5 cm) of water over high heat for the double boiler. Bring it to a simmer, then cover and reduce the heat to maintain a steady simmer.
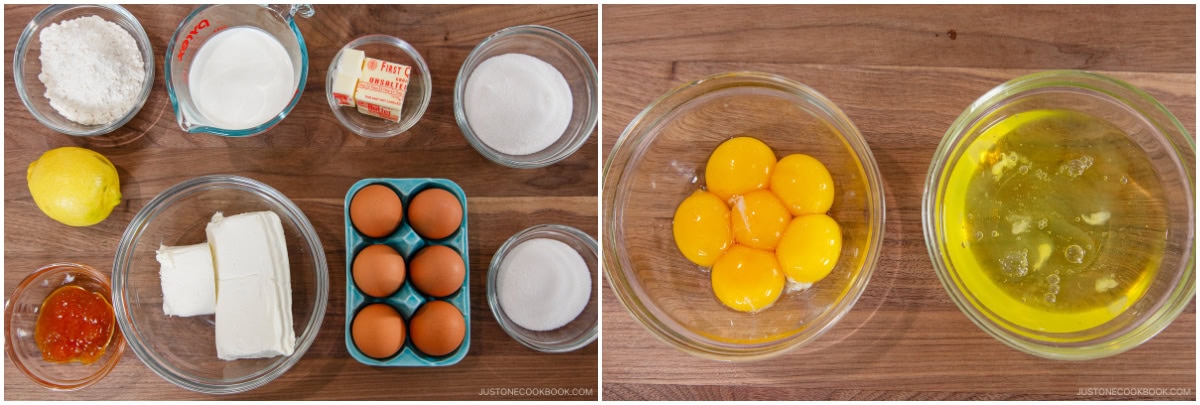
To Gather the Ingredients
- Gather all the ingredients.Separate 6 large eggs (50 g w/o shell) into egg yolks and whites. Place the egg whites in the refrigerator until ready to use. Nami's Tip: I highly recommend chilling a clean, dry stand mixer bowl in the fridge until you're ready to whip the egg whites.
To Make the Cake Batter
- Add 10.6 oz cream cheese, 4 Tbsp unsalted butter, 200 ml heavy (whipping) cream, and 4½ Tbsp sugar to a large bowl and rest it on the saucepan above the simmering water. Nami's Tip: The double boiler will warm and soften the cream cheese and butter, so you don't need to bring them to room temperature ahead of time.
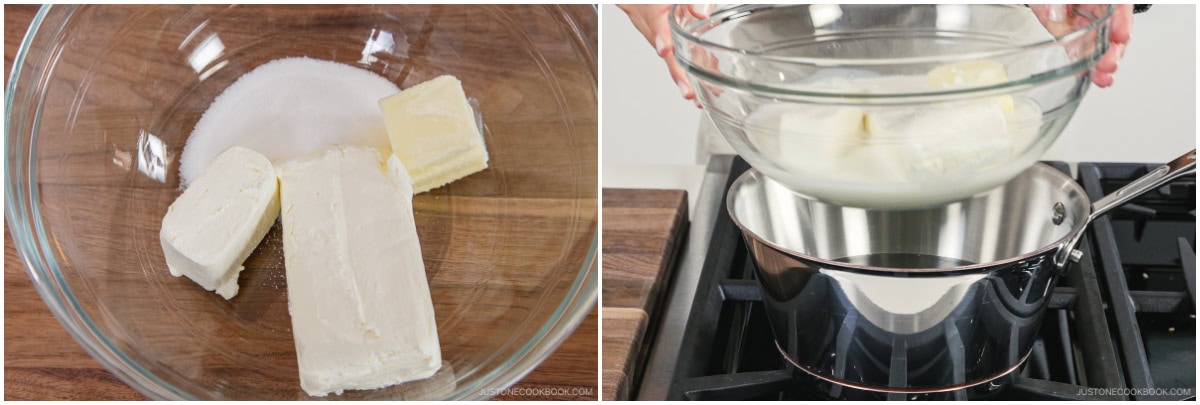
- Mash the cream cheese and butter with a silicone spatula until soft, then whisk the mixture until smooth and combined. Remove from the heat.
- Add the egg yolks one at a time, whisking each yolk into the cream cheese mixture until fully incorporated before adding the next.
- Sift ⅔ cup cake flour into the batter with a fine-mesh strainer. Whisk until no dry streaks remain.
- Pass the batter through the strainer into a clean large bowl.
- Add the zest of ½ large lemon (outer yellow layer only, avoiding the white pith) and 2 Tbsp lemon juice and whisk to combine.
To Set Up the Bain-Marie (Water Bath)
- Place a large baking sheet inside the preheating oven and add hot water until it is ½ inch deep (halfway up the sides). Close the oven door.
To Beat and Incorporate the Egg Whites
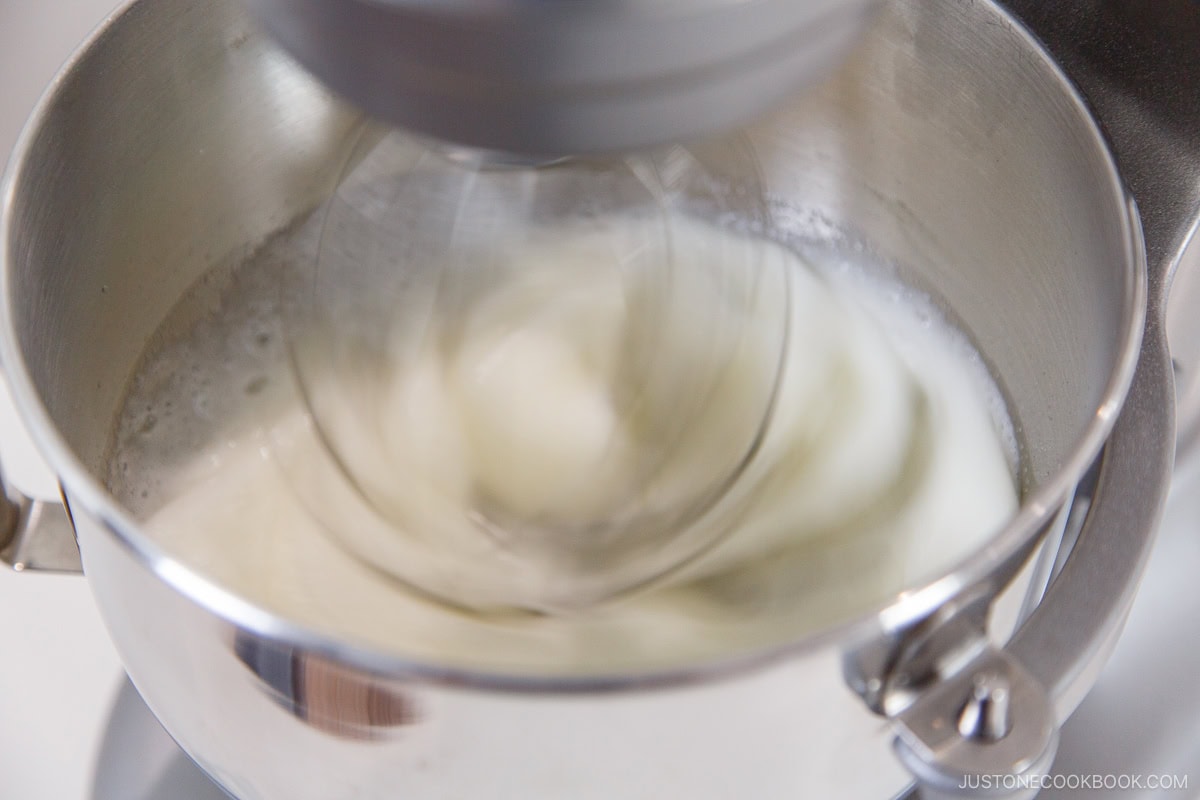
- Add the cold egg whites to the cold, dry, and clean stand mixer bowl. Whisk the egg whites on medium speed (Speed 4) until they become opaque, foamy, and bubbly, about 2 minutes. Slowly add ½ cup sugar, one-third at a time, while mixing.Nami's Tip: Use a clean and dry mixing bowl and beaters. A speck of oil, water, or egg yolk can minimize the volume of the beaten whites. Avoid plastic bowls, as they may hold oily residue. Use a bowl that's wide enough to keep the beaters from being buried in the egg whites.
- Increase the speed to high (Speed 8–9) and beat the egg whites to firm peaks. Stop the mixer to check: When you lift the whisk upright, the egg whites should cling and hold their shape with the tip folding back on itself.
- Add one-third of the egg whites to the cream cheese mixture and whisk until incorporated. Fold in another one-third of the egg whites.

- Pour the cream cheese mixture into the mixer bowl with the last of the egg whites. Fold until just combined.
- To minimize air pockets, pour the batter into one spot in the cake pan in a steady stream. Tap the pan on the counter a few times to release any trapped air.
To Bake the Cheesecake
- Quickly open the oven and place the cake pan onto the baking sheet with the bain-marie. Reduce the oven temperature to 320ºF (160ºC)—25ºF (15ºC) lower for a convection oven—and bake for 70–75 minutes. Reduce the oven temperature to 300ºF (150ºC) and bake for another 10 minutes, or until the top is golden brown. Open the oven door slightly to test for doneness. If an inserted skewer comes out without wet batter, it‘s done. Leave the cake inside the oven.
To Cool
- Turn off the heat and leave the oven door slightly ajar for 15–20 minutes with the cake inside so it cools gradually, then remove the cake pan from the oven. Nami's Tip: If you immediately remove the cake pan, the sudden change in temperature could cause the soufflé to collapse. While cooling in the oven, the cake will slowly shrink down to half its height, from roughly 4 inches to 2 inches high.

- Lift the cheesecake from the cake pan using the two parchment paper straps—an extra set of hands helps here. Place the cake on a plate.
- Remove the parchment paper from the sides (leave the bottom paper). Mix 2 Tbsp apricot jam and 2 tsp hot water in a small bowl and brush it on top of the cake. Cool to room temperature.
To Serve
- Cool completely in the refrigerator for at least 4–6 hours or overnight. Chilled cheesecake has a creamy yet light texture, with a perfectly balanced flavor.For a softer texture, remove the cheesecake from the refrigerator 10–15 minutes before slicing.
To Slice
- Use a sharp knife dipped in warm water, wiping the blade clean between slices. The cake is delicate and cuts cleanly this way.
To Store
- Store it in the refrigerator for up to 3–4 days or in the freezer for up to 3–4 weeks. Thaw overnight in the refrigerator. Cold cheesecake is dense, so remove it from the fridge 10–15 minutes before serving to soften the texture.
Notes
- Cream cheese: I use full-fat Philadelphia Original Cream Cheese blocks for the best result. Please do not use the round container type or the reduced fat (lite) type.
- Heavy (whipping) cream: Heavy cream has a fat content of at least 36%. To lighten the recipe, substitute whole milk.
- Cake flour: Cake flour is more delicate than all-purpose flour; please do not substitute AP flour, which will make the texture dense and tough. To make cake flour at home, measure 1 level cup of all-purpose flour, remove 2 Tbsp, and add 2 Tbsp cornstarch. Sift 3–4 times.
- My previous recipe from 2012. You can still read my original Japanese Cheesecake post (zoom to read).
- Matcha or hojicha soufflé cheesecake. Sift 1–2 Tbsp matcha powder or hojicha powder into the batter. Matcha gives a grassy, earthy flavor; hojicha a nutty, roasted one. Serve with sweet red bean paste or whipped cream.
- Black sesame soufflé cheesecake. Swirl in 2–3 Tbsp black sesame paste for a savory, nutty flavor. See How to Make Black Sesame Paste at home.
Nutrition
Did you make this recipe?
Tag @justonecookbook on Instagram so we can see your delicious creation!
Editor’s Note: This post was originally published on December 11, 2016. It was republished with more helpful tips and information on December 11, 2024.
